| MGF Cars: Left Hand Drive (LHD) Conversion #2 |
As a result of informal customer focus groups and notwithstanding the discriminatory & highly prejudicial attitudes of various government agencies and insurance cartels across Canada towards right hand drive (RHD) vehicles, we have decided to make our left hand drive (LHD) conversion programme for the MGF a high priority.
Fortunately, and somewhat surprisingly since export to North America was apparently ruled out relatively early in the project, MG Rover designed the MGF so that variances in drive side would require minimal component changes compared to most other cars.
This second project will also feature adding anti lock brakes (ABS) and possibly air conditioning (A/C).
Clearly, the dashboard and steering rack will require replacement, but there are also implications for the pedal box, windscreen wipers and last but not least the wiring harness.
The location of some components such as the handbrake lever remain the same regardless of drive side, but the brake master cylinder & booster are on the opposite side of the steering wheel. We have recently learned this was done for crash protection purposes.
For a perfect conversion down to the last detail one must not forget items such as the keyhole in the former passenger side outer door handle and the wear pad on the drivers side carpet! |
|
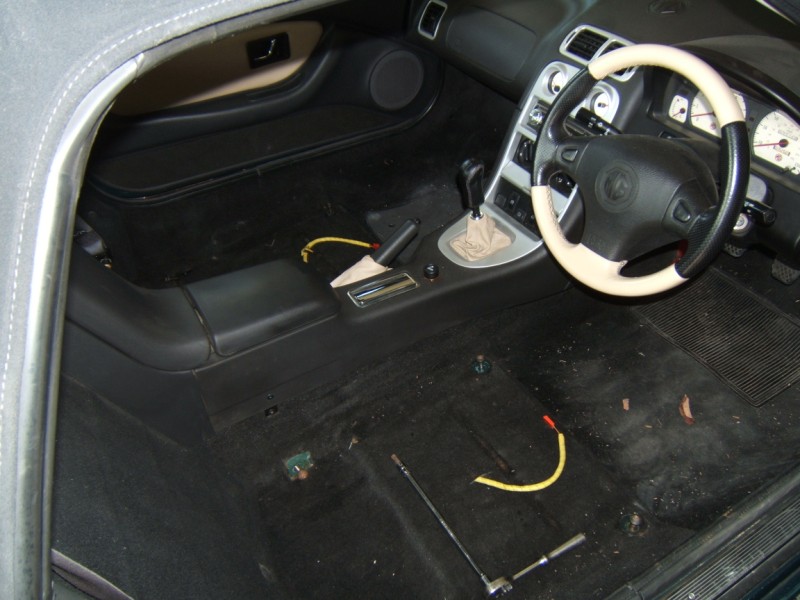 |
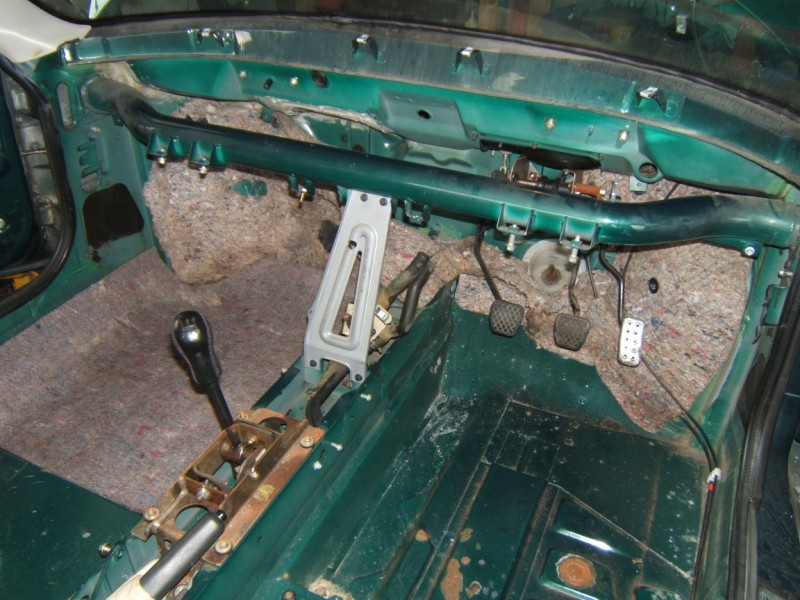
This time we started by removing the seats. |
 |
Followed by the centre console trim. These are quite delicate and someone had already broken this one. Start removal by carefully prising up from the gear shift end. |
 |
The rear centre console is next. |
 |
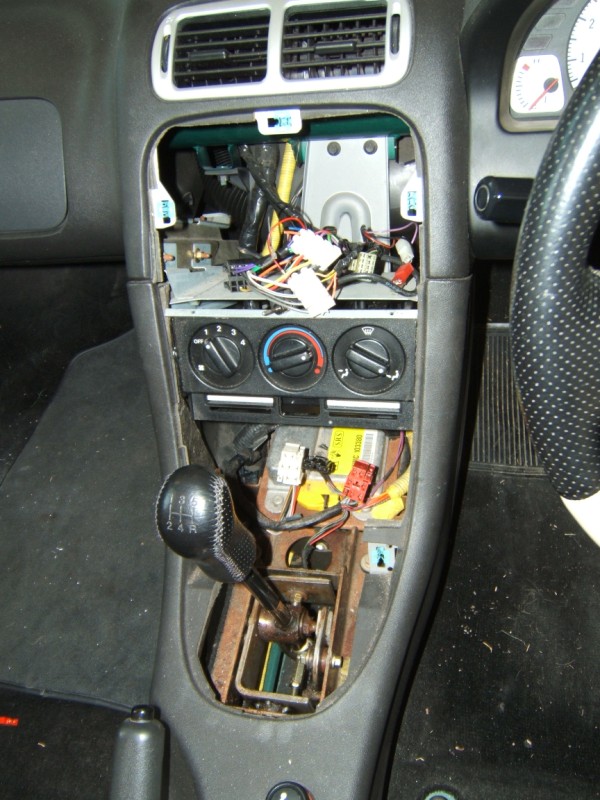
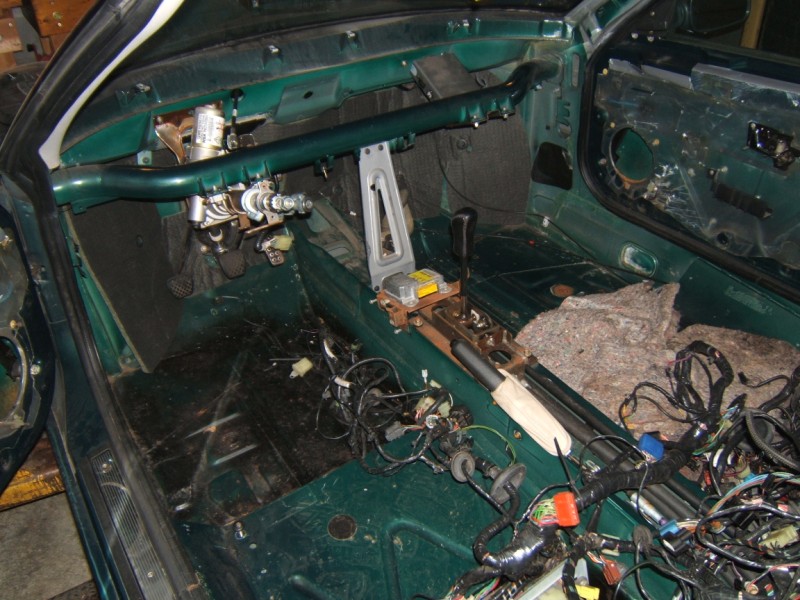
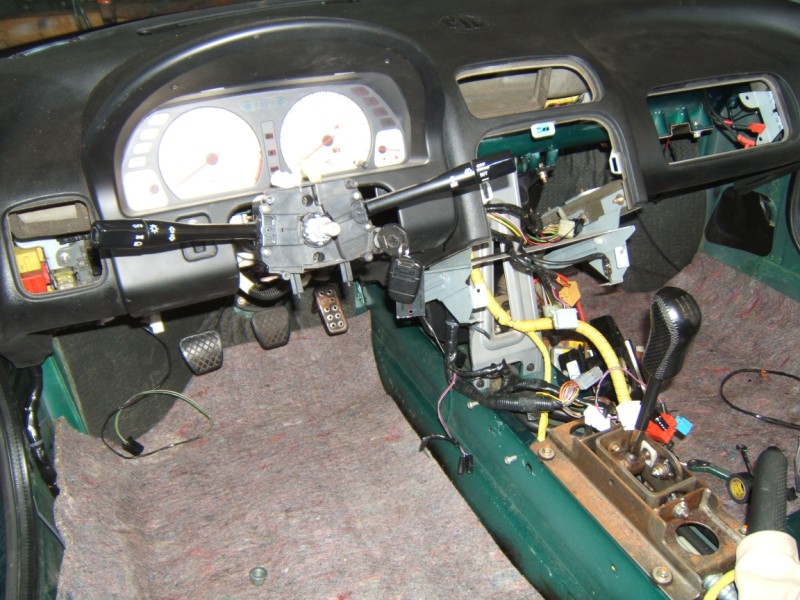
Next remove the steering wheel, clock spring & column switchpack. Note airbag precautions in service manual! |
 |
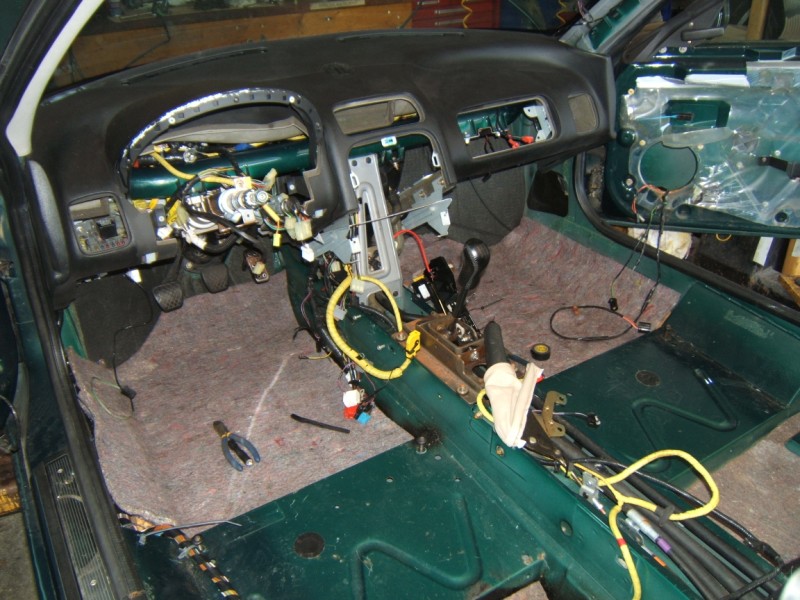
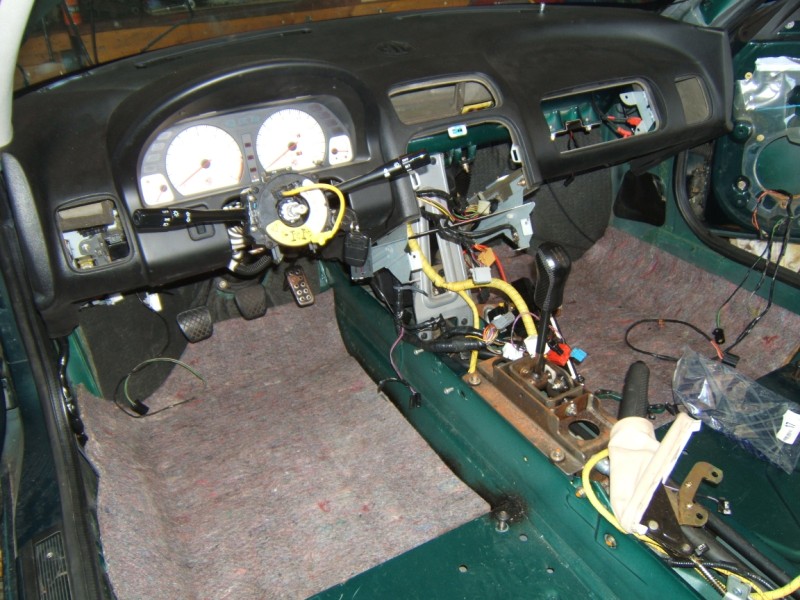
With the dashboard out, the project is moving right along. |
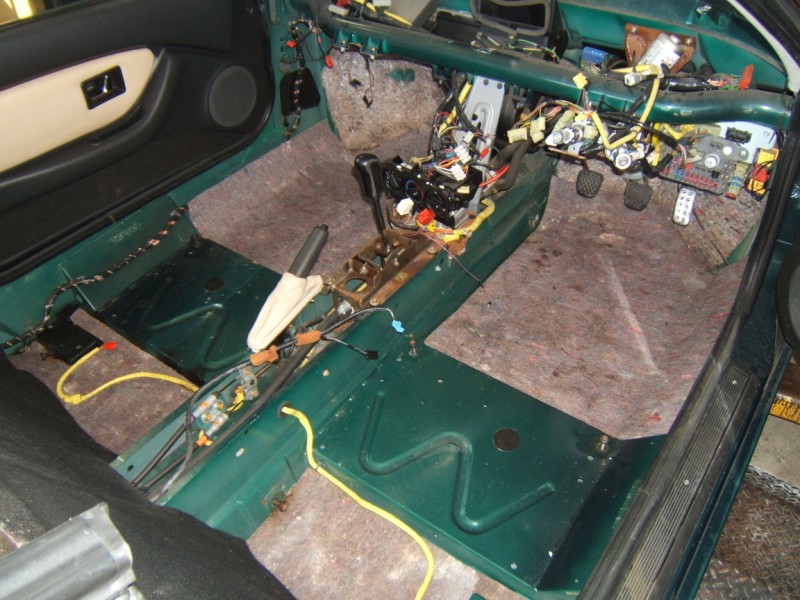 |
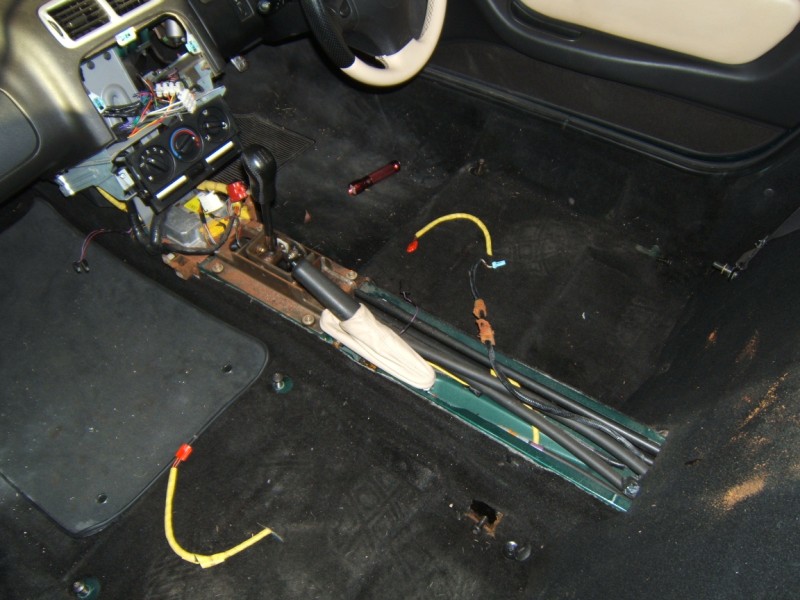
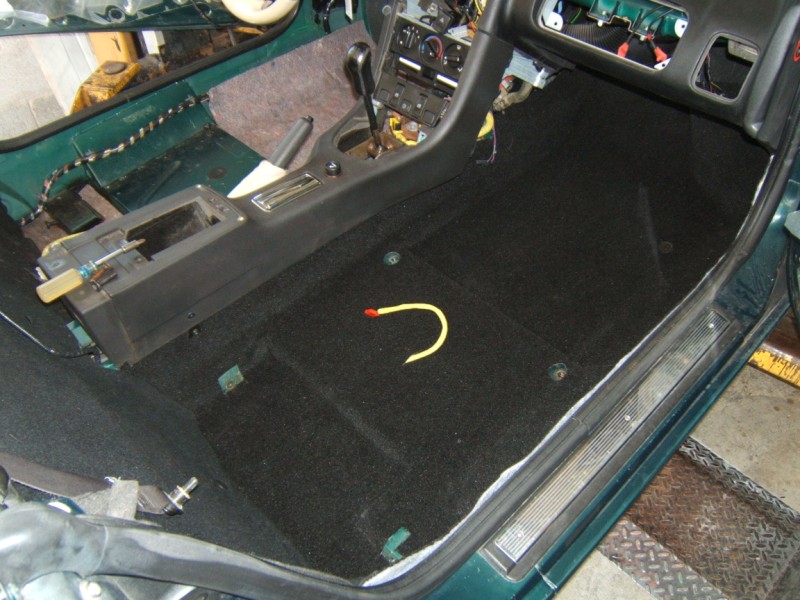
We decided to remove the carpets next. |
 |
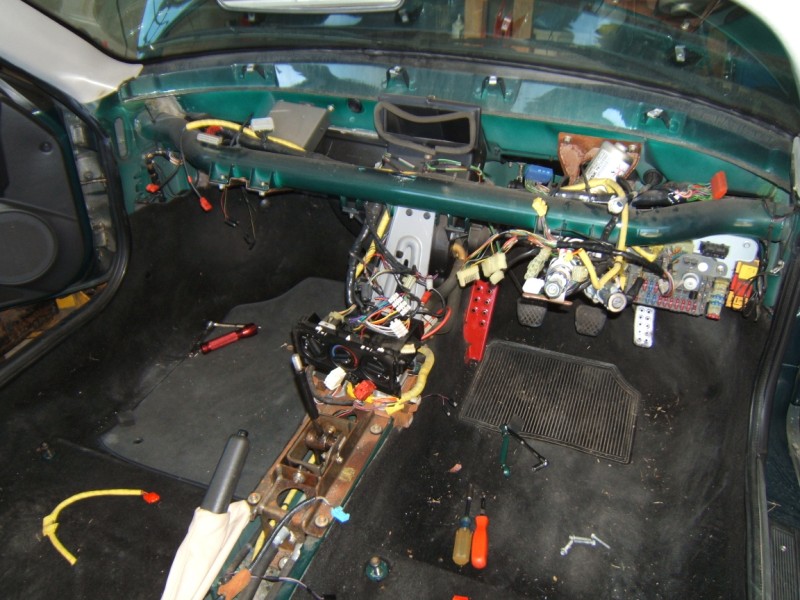
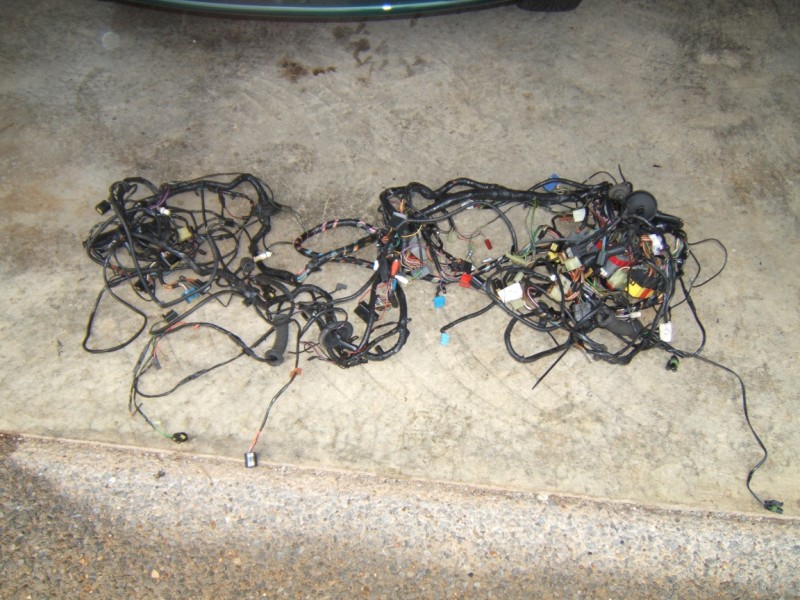
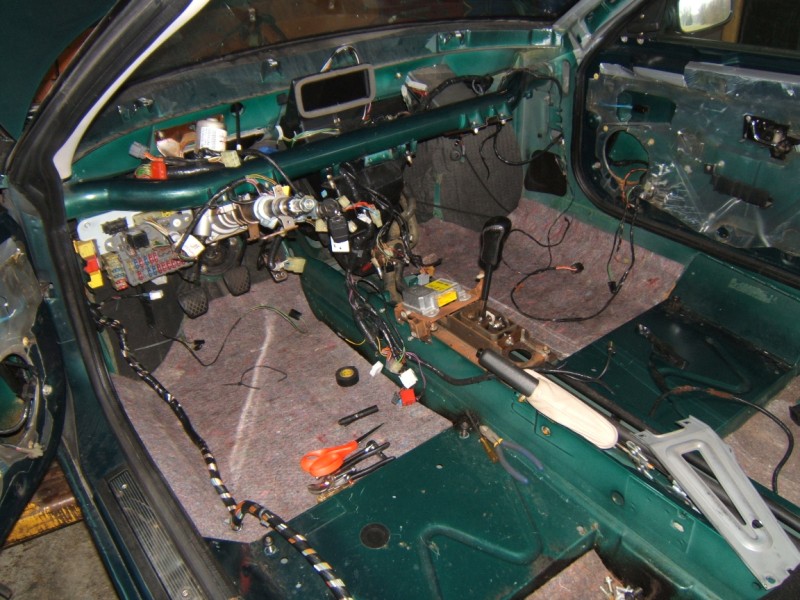
Removing the main harness is next. Closeup photos such as this are extremely useful for recording subtle layout details for reassembly. |
 |
Although not essential, we decided to go ahead and remove the column at this stage to facilitate harness removal. |
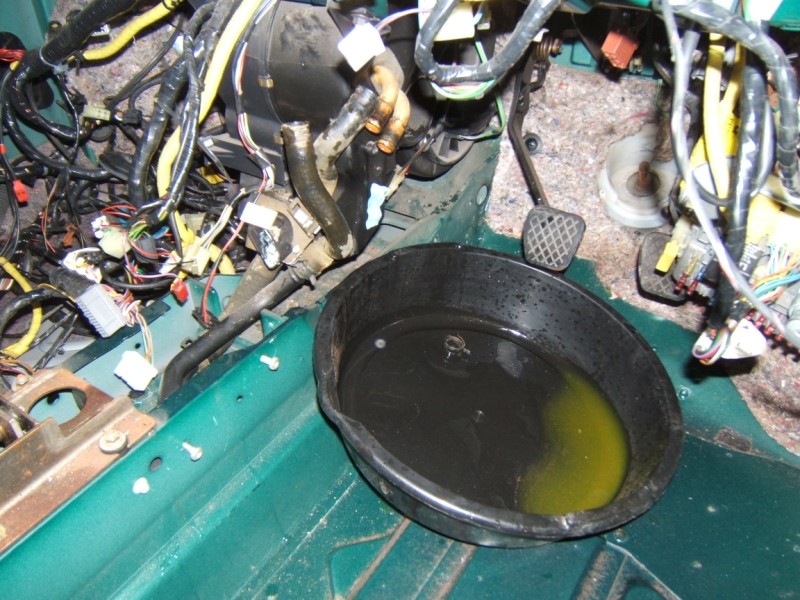 |
Likewise with the heater box. Even after draining the cooling system, expect some further spillage from the unit! |
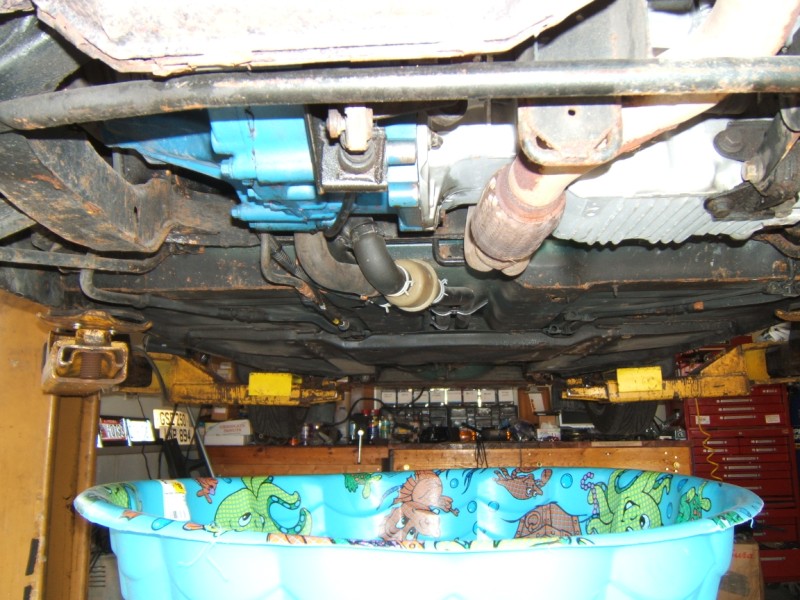 |
The service manual says to drain the cooling system by disconnecting the hoses from the rear of the underfloor coolant pipe. This has the potential to make quite a mess. It can be avoided with the technique shown. A cheap childrens splash pool on a trolley eliminated any mess! |
 |
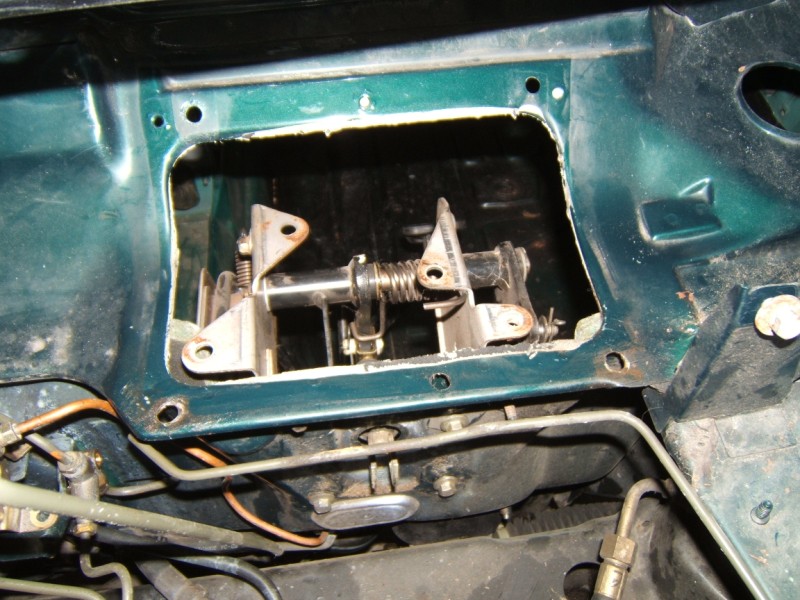
With just the pedal box remaining we are almost finished inside the car. |
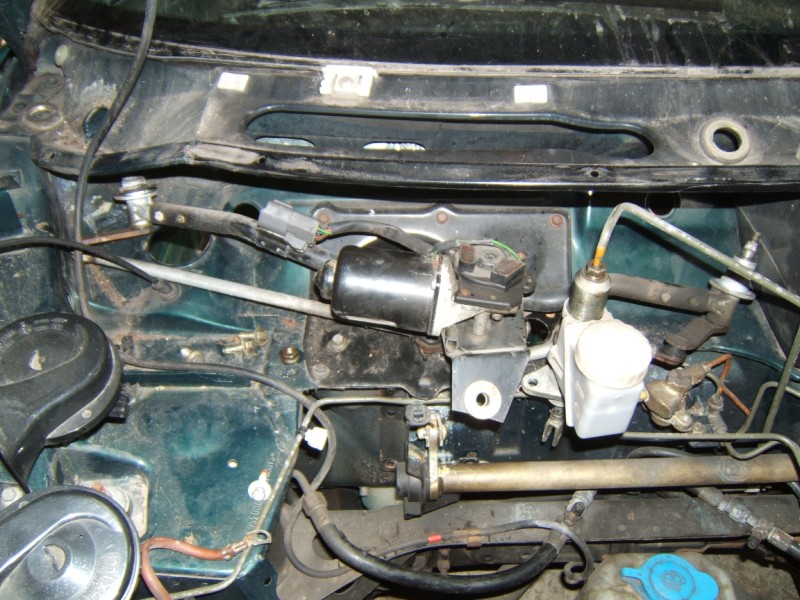 |
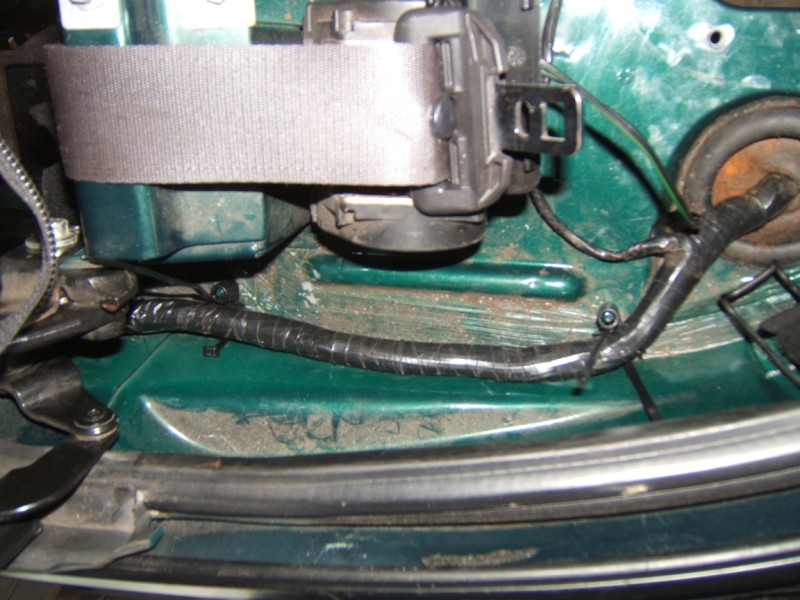
The pedal box is attached to the closing plate in the front compartment, so now was the time to remove the wiper linkage & clutch master cylinder. |
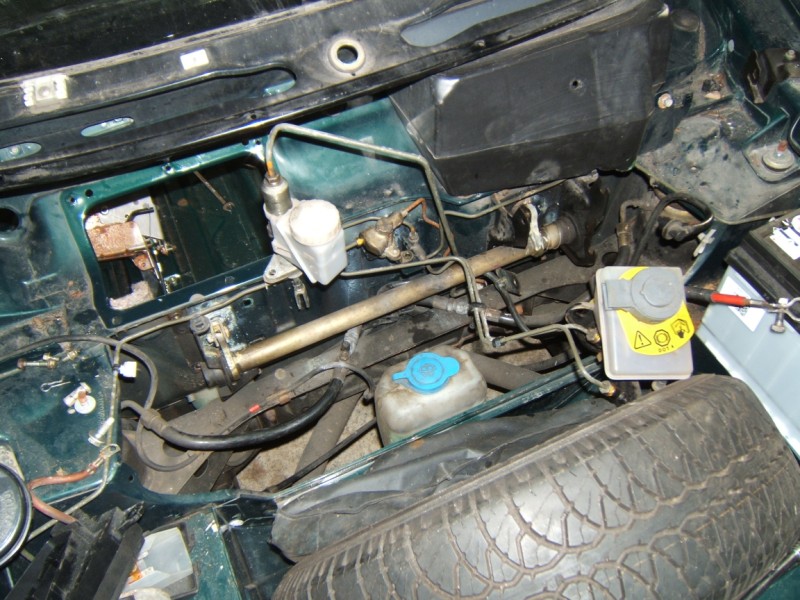 |
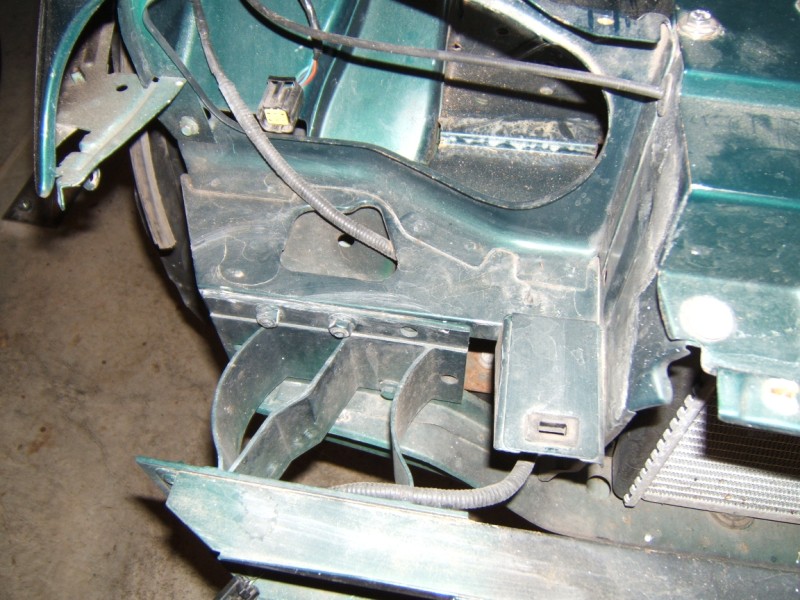
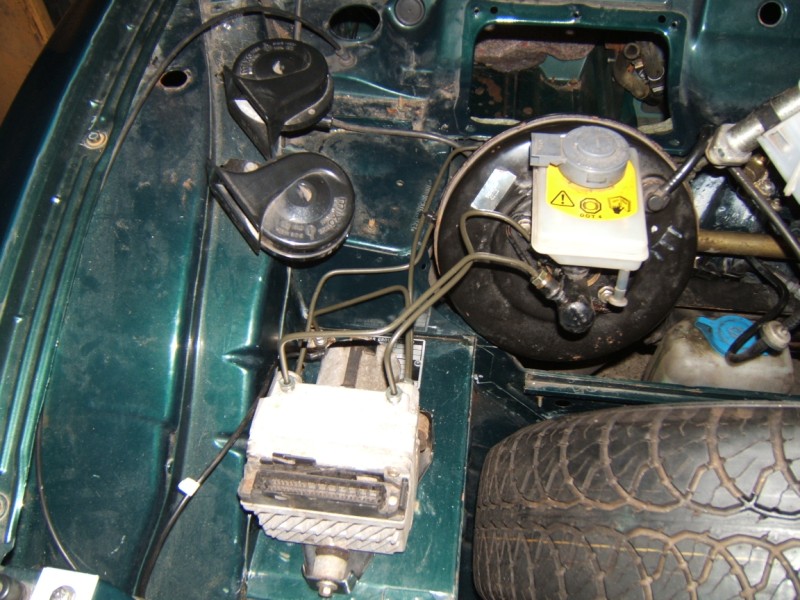
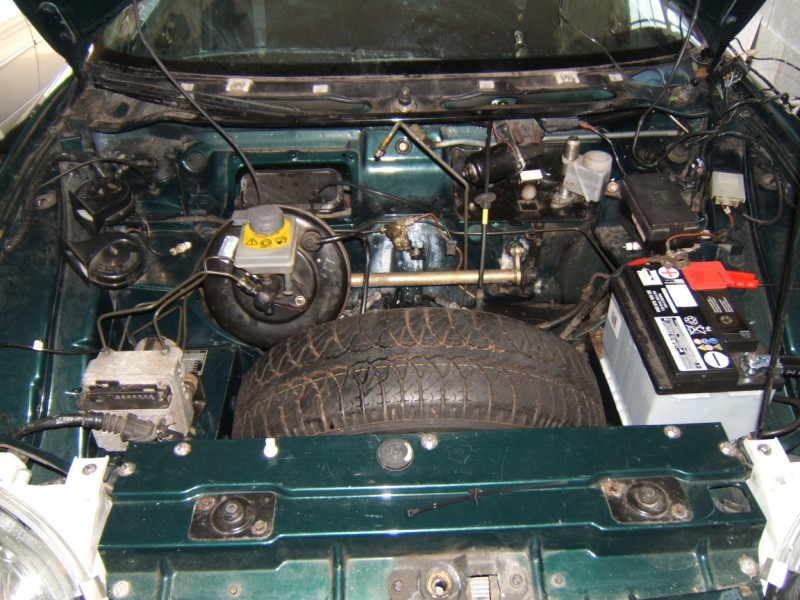
Removal of the fresh air intake first requires removal of the brake servo. Destructive means were necessary to remove the air intake so it will be replaced with the later style that seal better at the bulkhead. |
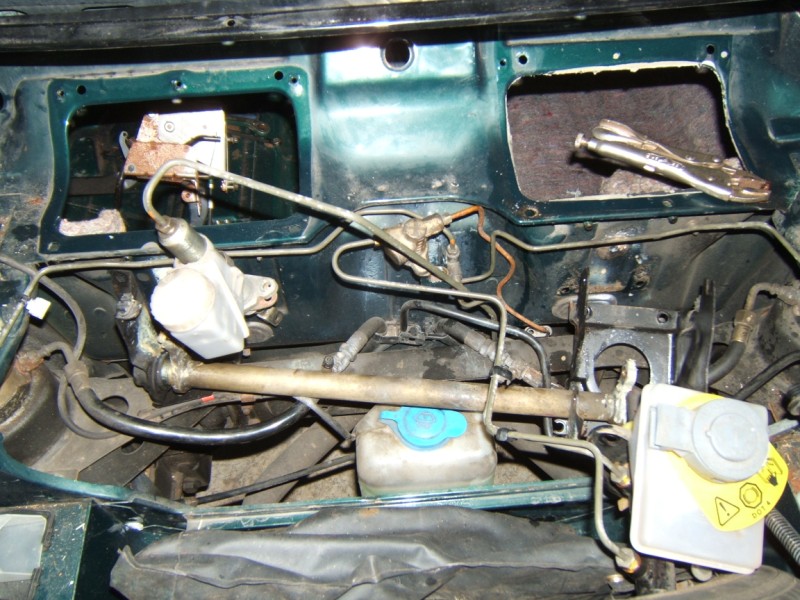 |
Now, the cross tube assembly can be removed. Note the vice grips related to the air intake! |
 |
This penetrating oil from BG (called In Force) is perhaps the best on the market as it foams when first sprayed (such as into a closed area) and then seeps down nice and evenly. This would prove invaluable for the next step.... |
 |
Which is steering rack removal. That requires dropping the rear of the subframe slightly and if the aforementioned In Force is first used to coat the rear subframe bolts by spraying into the closed box section containing the captive nuts, the chances of a bolt head shearing are much less. |
 |
The rack marked the turning point! Here we see the LHD rack installed along with the ever so hard to find cover plate. Europeans: If you must break a LHD car - save these!! |
 |
Installing the pedal box goes hand in hand with the cross tube & cover plate. |
 |
The service manual calls for a second pair of hands but it can be done solo. |
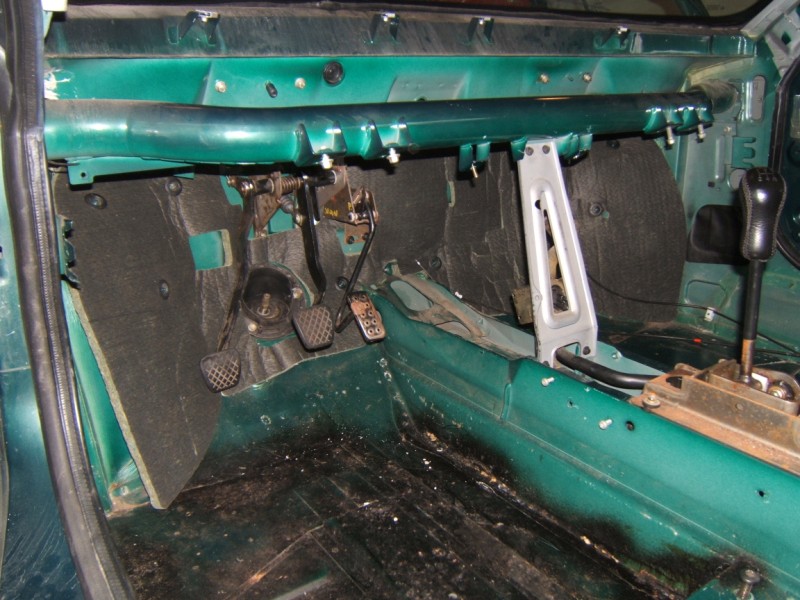 |
The LHD pedals installed along with new padding as a rodent had helped itself to the old one. The replacement is not quite as good a fit as the original with respect to LHD but the parts catalogue only shows one part number, even presumably for later TF models. |
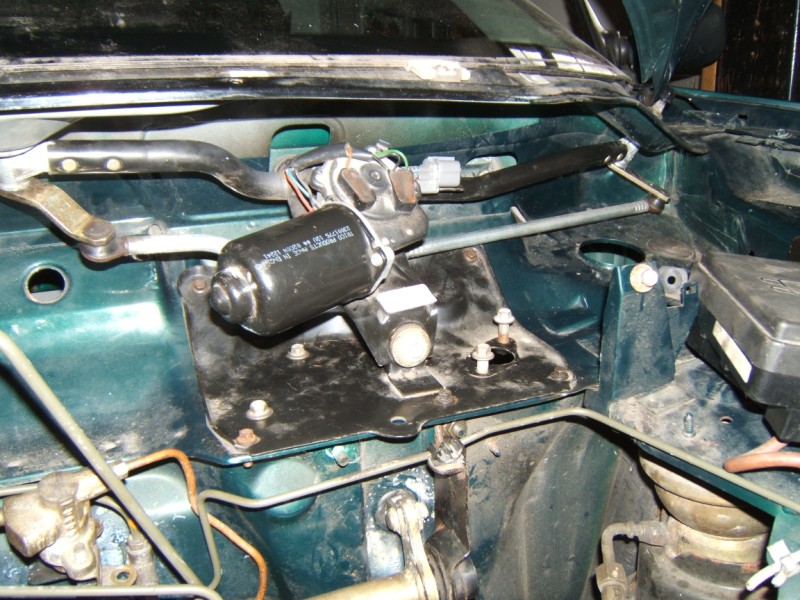 |
Might as well put the LHD wiper mechanism in at this stage too. |
 |
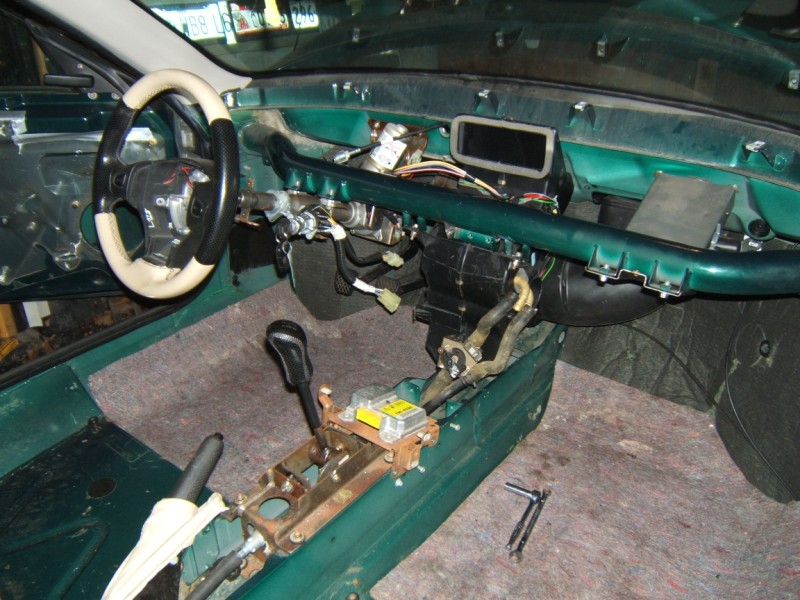
The steering column is next and the EPAS unit is relocated to the right side of the car. |
 |
Changing to LHD involves making up new brake lines but in this case three additional lines were required for adding ABS. |
 |
Next, a new heater box is installed. Many thanks to Mike Cremonini for stopping by and welding the upper brace bracket. |
 |
And now for perhaps the most time consuming part to be installed. It does not look too intimidating here but... |
 |
... laid out roughly where it needs to go, one can see it will not be a quick job. |
 |
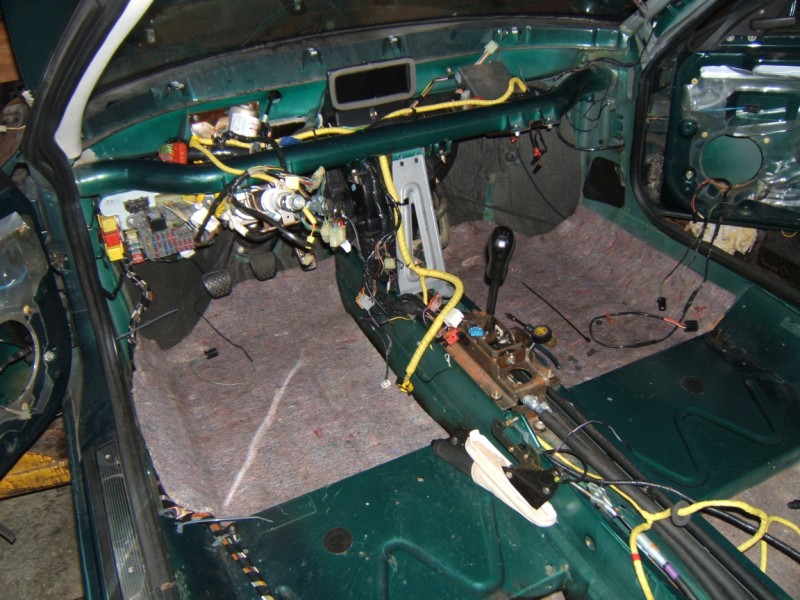
Pressing on though, it gradually starts to come together. |
 |
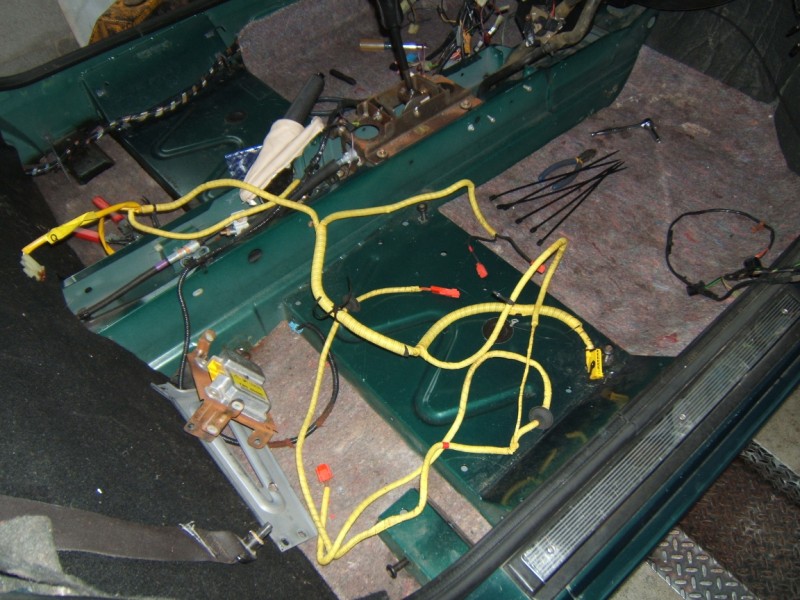
Removal of the old harness involves cutting many wire ties. At MGF Cars we try to restore the factory install as far as possible by duplicating specialty cable ties as can be seen in this photo. |
 |
Someone had detached the SRS harness from the main harness. Again, to keep things as close to original as possible, we sourced the correct double loop (figure of eight) cable ties for the job. |
 |
Note also the correct cable ties securing the rearward portion of the harness. |
 |
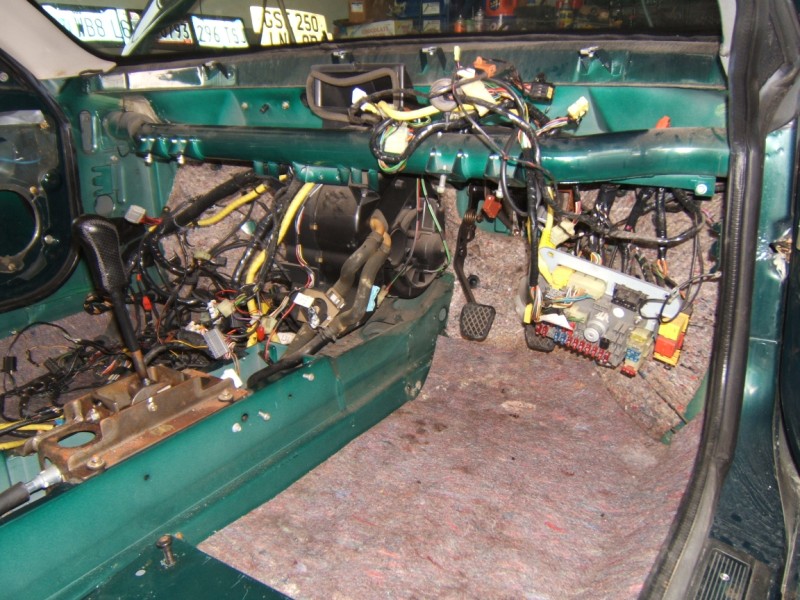
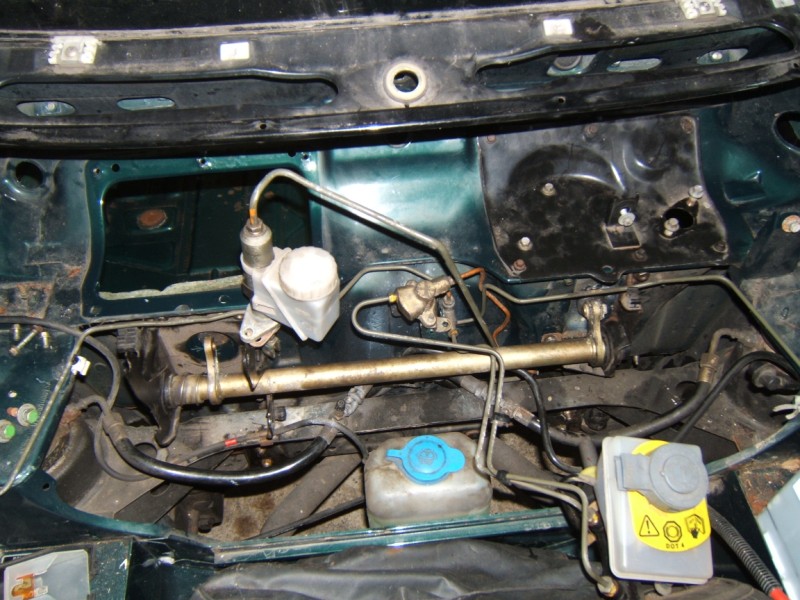
In the front compartment we are more or less finished except for a new clutch line & revised fresh air intake. |
 |
Putting the dash back in really moves the project along. Don't forget to transfer the VIN plate to the replacement dash! |
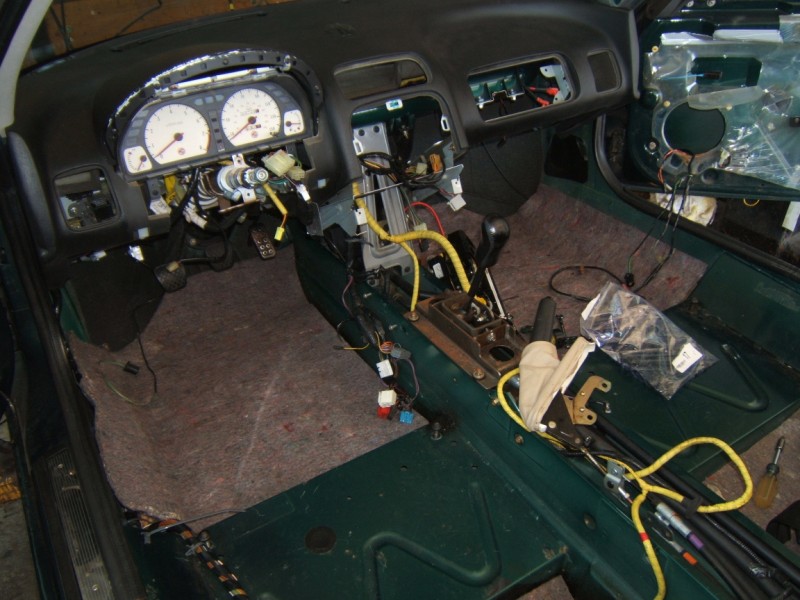 |
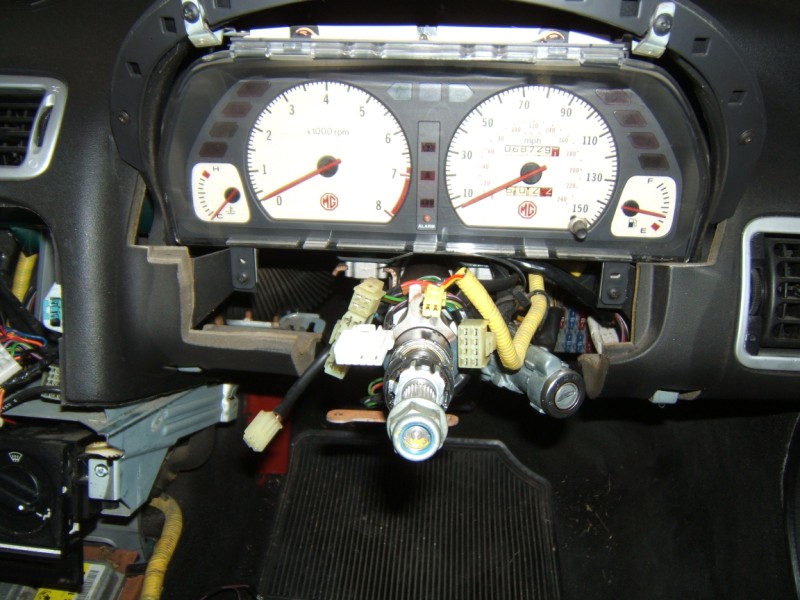
Next comes the instrument pack. |
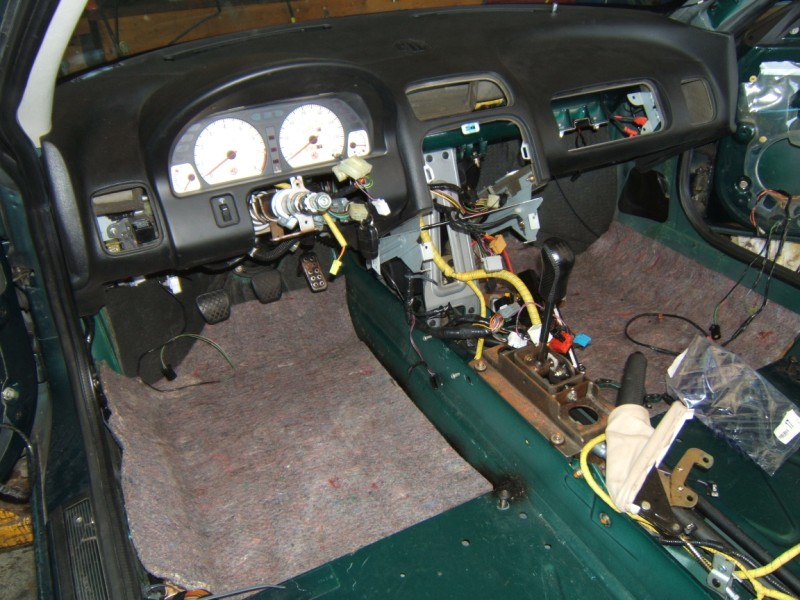 |
Along with the finisher. |
 |
The column switchpack is next. The nacelles can wait until later. |
 |
Be careful not to turn the rotary coupler more than a few degrees. |
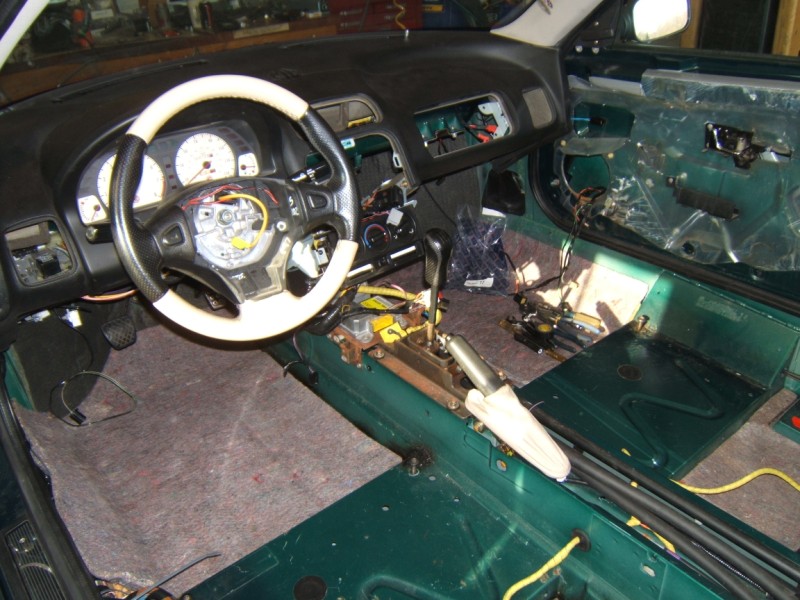 |
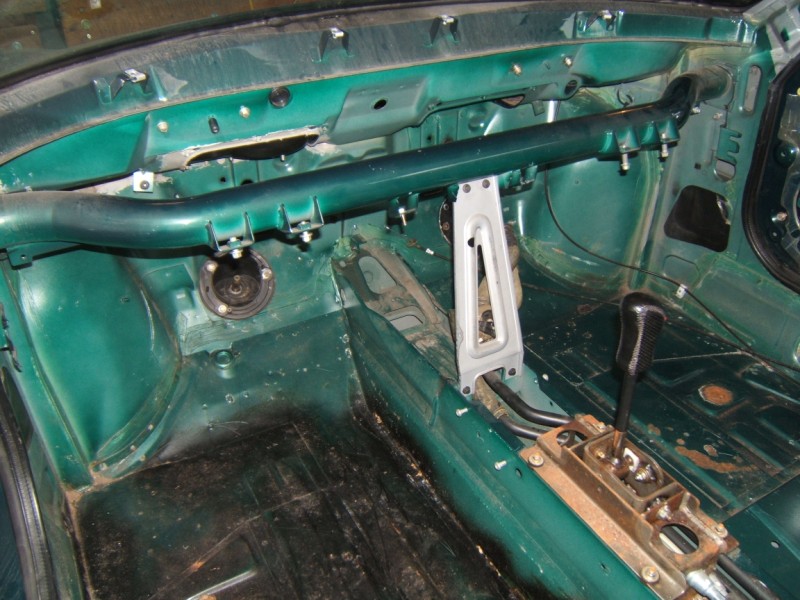
And finally the steering wheel. With the tunnel wiring sorted next comes... |
 |
... the centre console. |
 |
Next comes a new set of carpets followed by ... |
 |
... the seats. |
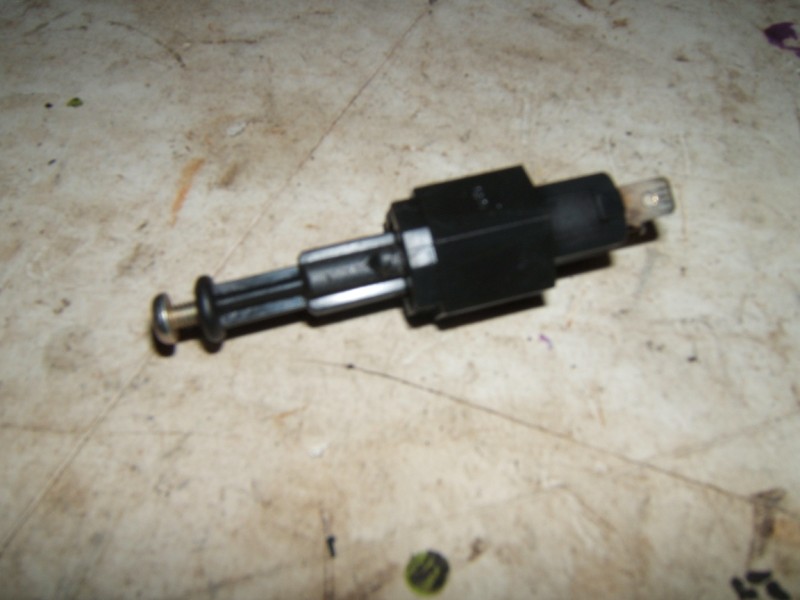 |
Evidently, England too has their share of 'rednecks' who like to rig things! The brake lights were staying on so this brake light switch was replaced with the correct MG Rover part. |
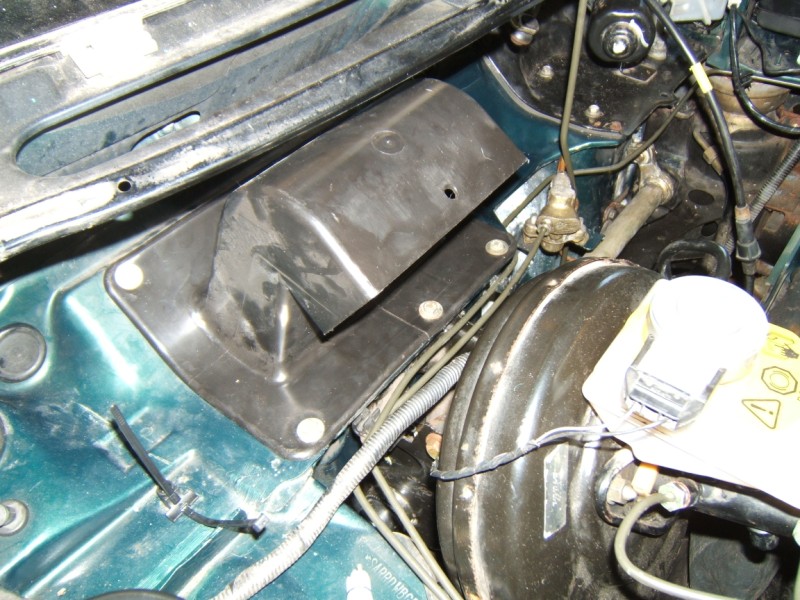 |
Here we see the later style air intake which seals better against waterleaks. |
 |
LHD wiper arms installed. |
 |
We decided to stick with the silver vents although not strictly original in the 1996 models. |
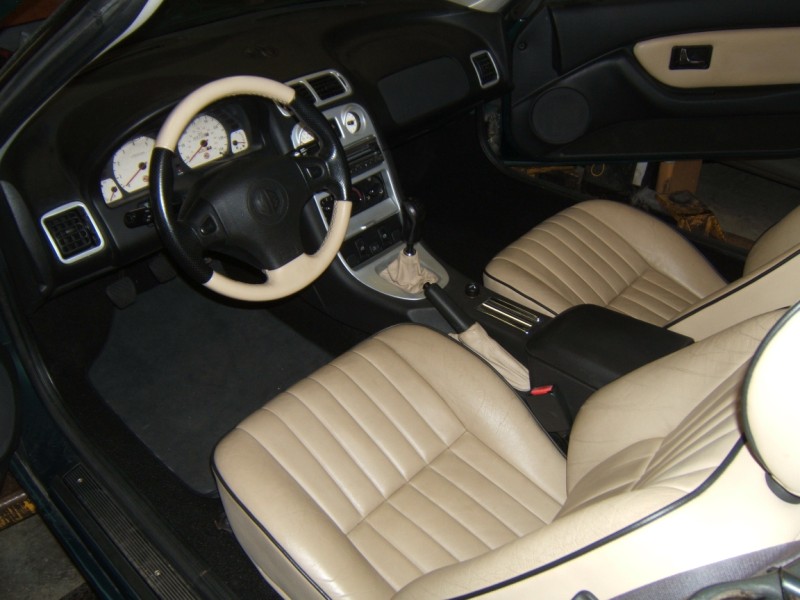 |
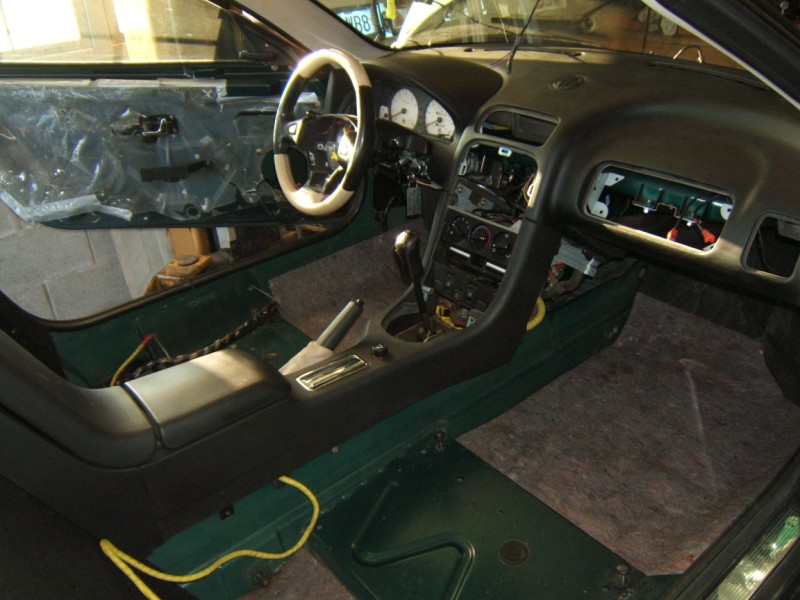
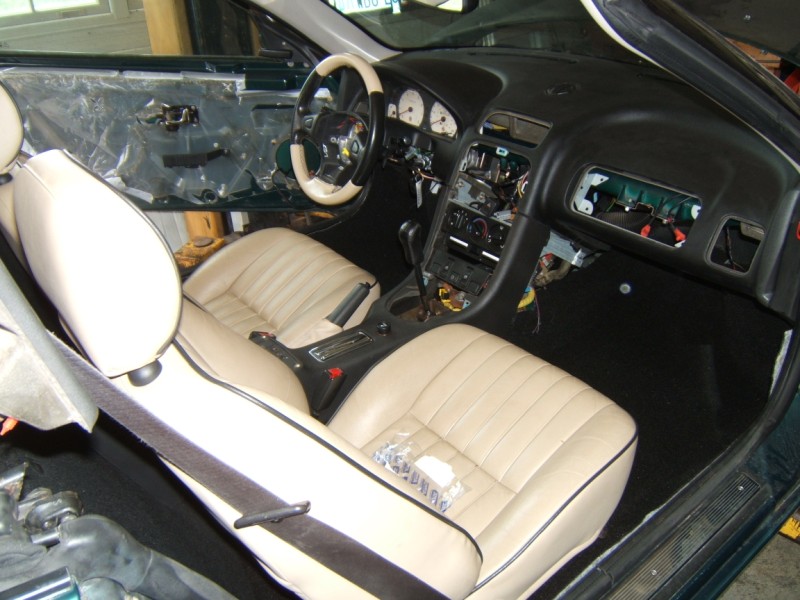
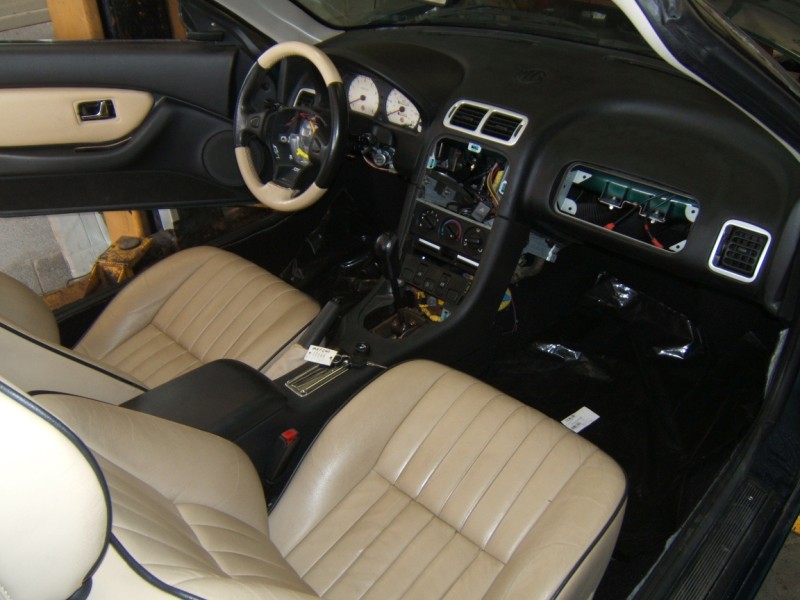
With the airbags & centre console finisher installed we are finished with the interior. |
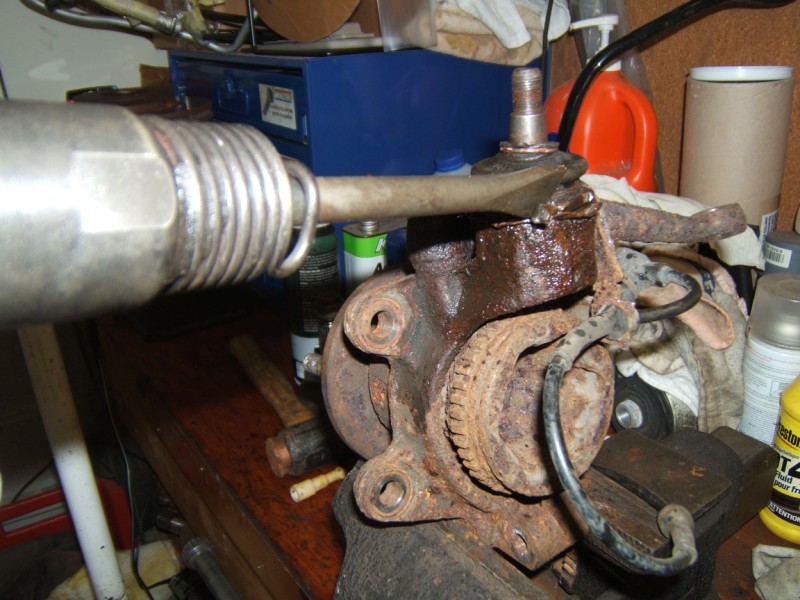 |
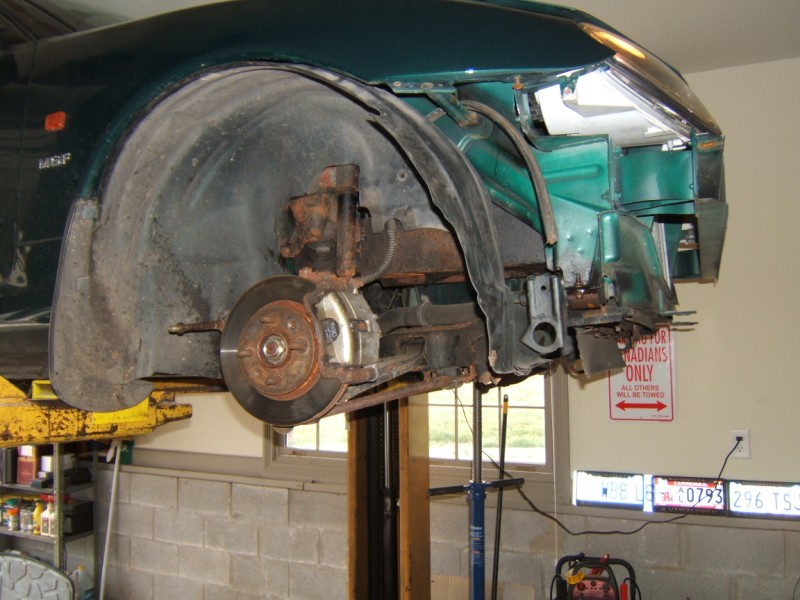
We decided to replace the upper ball joints on all ABS hub units as their history was unknown. Forget simply undoing these with a socket! It took all the might of Messrs. Ingersoll & Rand to persuade them to turn. |
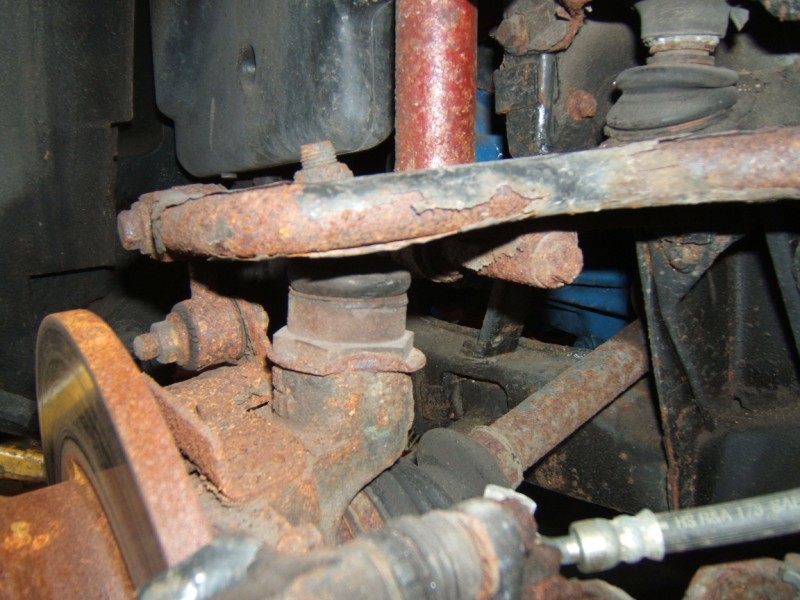 |
If you thought the brake switch was bad, wait, it gets better: Some bonehead had installed a later TF hub on the left rear with the noticeably taller ball joint! |
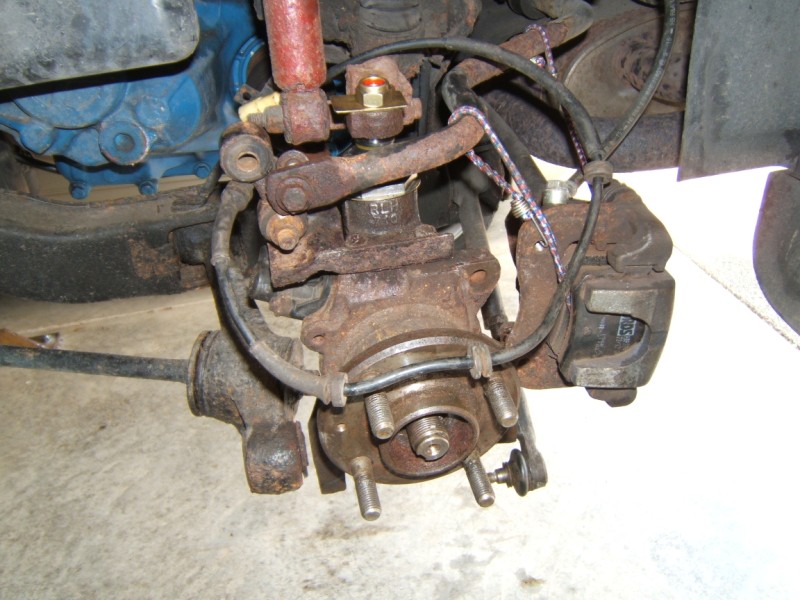 |
In the process of installing the ABS hub at the left rear. |
 |
 |
 |
 |
 |
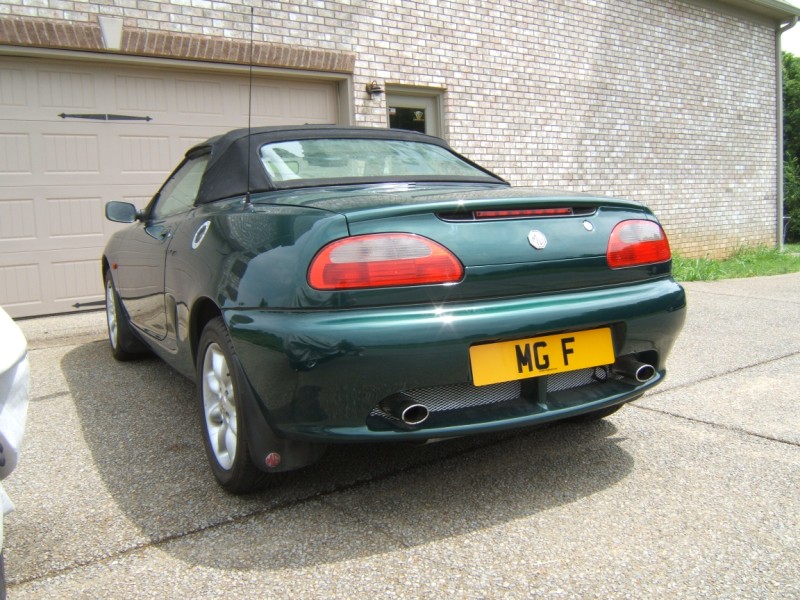 |
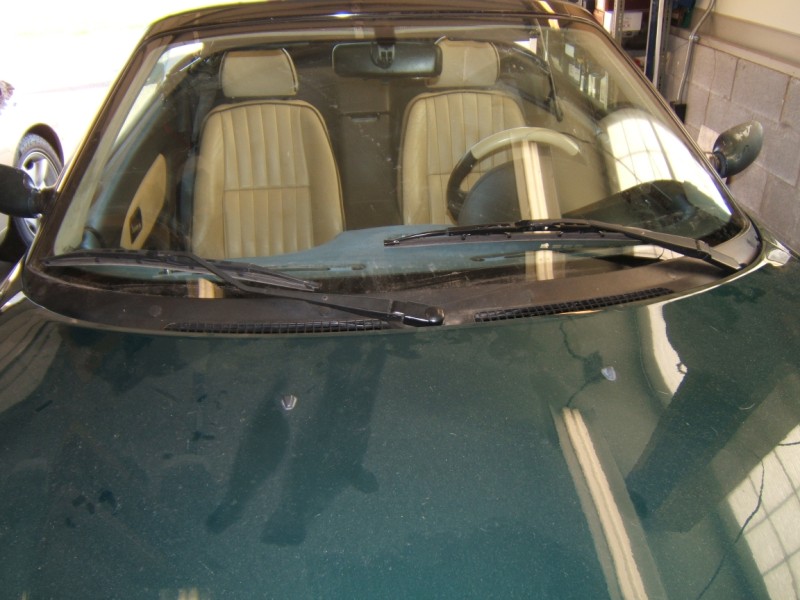
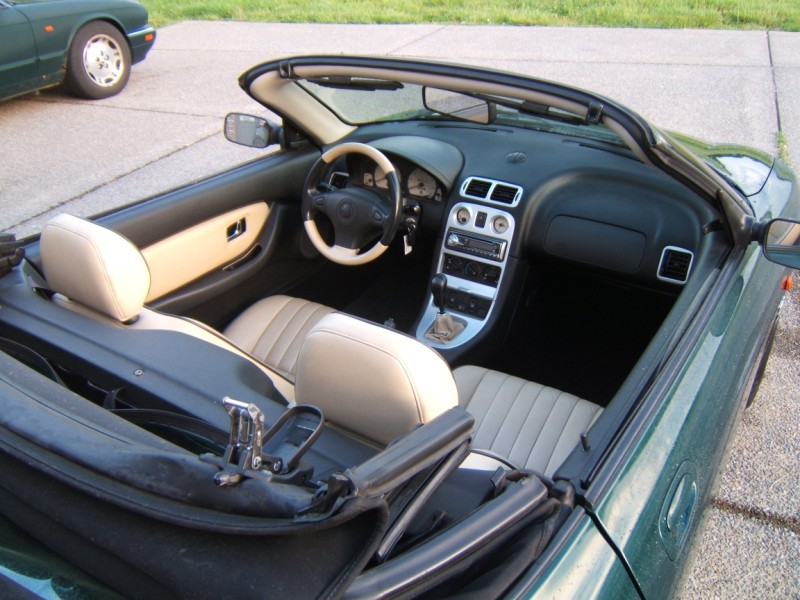
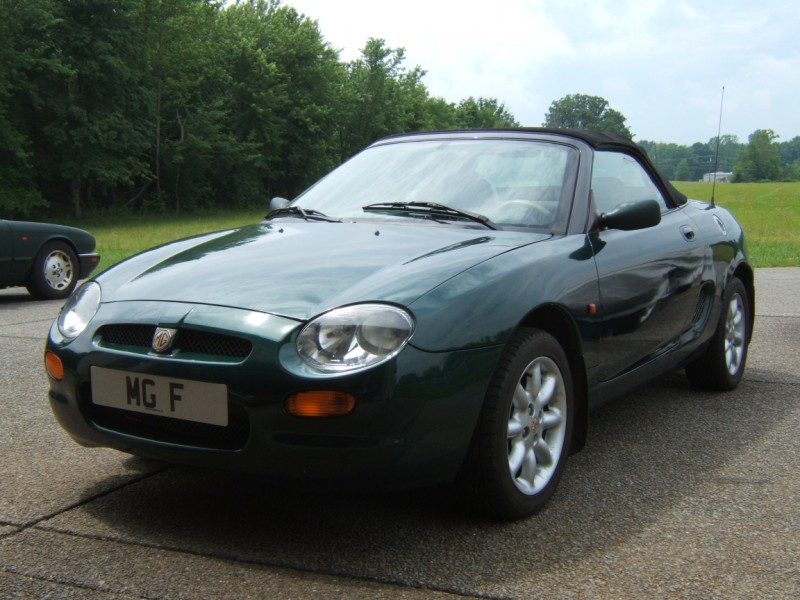
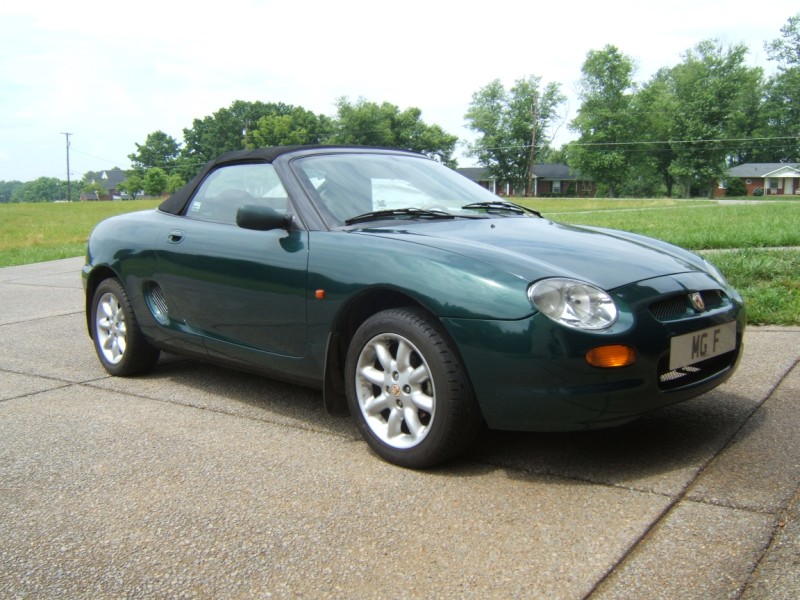
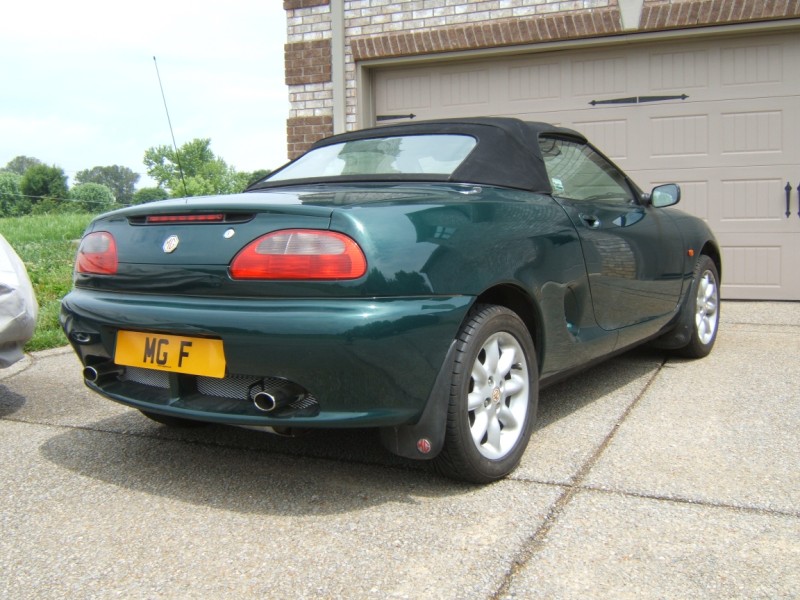
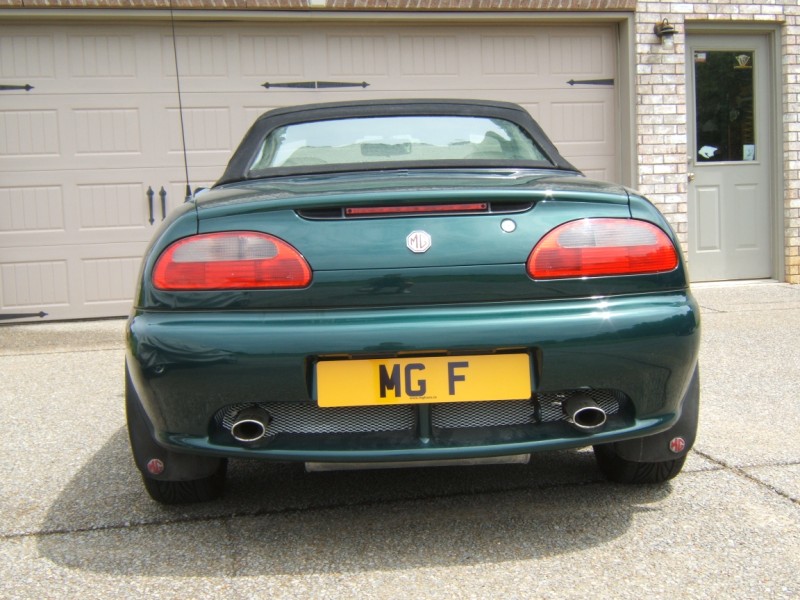
| Some views of the finished car. We are debating whether to install Suplex springs and air conditioning. |
|
|
The biggest long term challenge to this project will be sourcing components as there are a finite number of LHD MGF's in scrapyards (as it should be, we hate to see a car scrapped). Thus, if demand for the car proves sufficient in Canada we will resource the necessary components to perform this conversion. Such an undertaking will require volume, however. Even a die to stamp the aforementioned cross tube bracket costs hundreds of Dollars.
|