| MGF Cars: SUPLEX Coil Spring Conversion |
| Update April 2022: After a few years and about 1,500 miles, we decided to delete the Suplex system and restore the original hydragas setup. The Suplex units were noisy and they provided poor damping over anything other than a smooth road. We do NOT recommend the Suplex kit. We suggest retaining the orignal hydragas system and highly recommend the reconditioned units provided by Hydragas and Hydrolastic Service Ltd. |
When introduced twenty years ago, pundits praised the new MGF for the exceptional ride and handling that such a small car provided.
Whilst not a new concept, the hydragas suspension system fitted to the MGF represented the ultimate development of Dr. Alex Moulton's original design concept; comprising front to rear, interconnected nitrogen gas over liquid "springs".
However, as the years have passed, MGF owners have experienced their cars gradually losing ride height at best.
The usual reaction is to "pump-up" the suspension by putting in more hydraulic fluid.
That will restore the height but is a classic case of treating the symptom, rather than the cause, because as the
nitrogen charge in the upper chamber becomes depleted, suspension travel will be reduced and ultimately eliminated, giving a rock hard ride.
Since the hydragas spheres are non serviceable and supplies of new units are essentially exhausted since some moron(s) at Dunlop, the manufacturer,
decided to scrap the tooling several years ago rather than turning it over to British Motor Heritage
(as should be done with all classic car tooling once British manufacturers no longer deem it current),
MGF owners were fixing to be in rather a bad place had it not been for X-Part taking the initiative and developing an alternative solution.
The Suplex company came up with an elegant kit that does not require any irrevocable modification to the vehicle and can be fitted relatively easily.
Each sphere is replaced with a metal cannister containing a coil spring and the dampers are replaced with new units
specifically calibrated for the new spring setup. The fluid pipes can be left in place and blanked off or removed completely.
|
|
 |
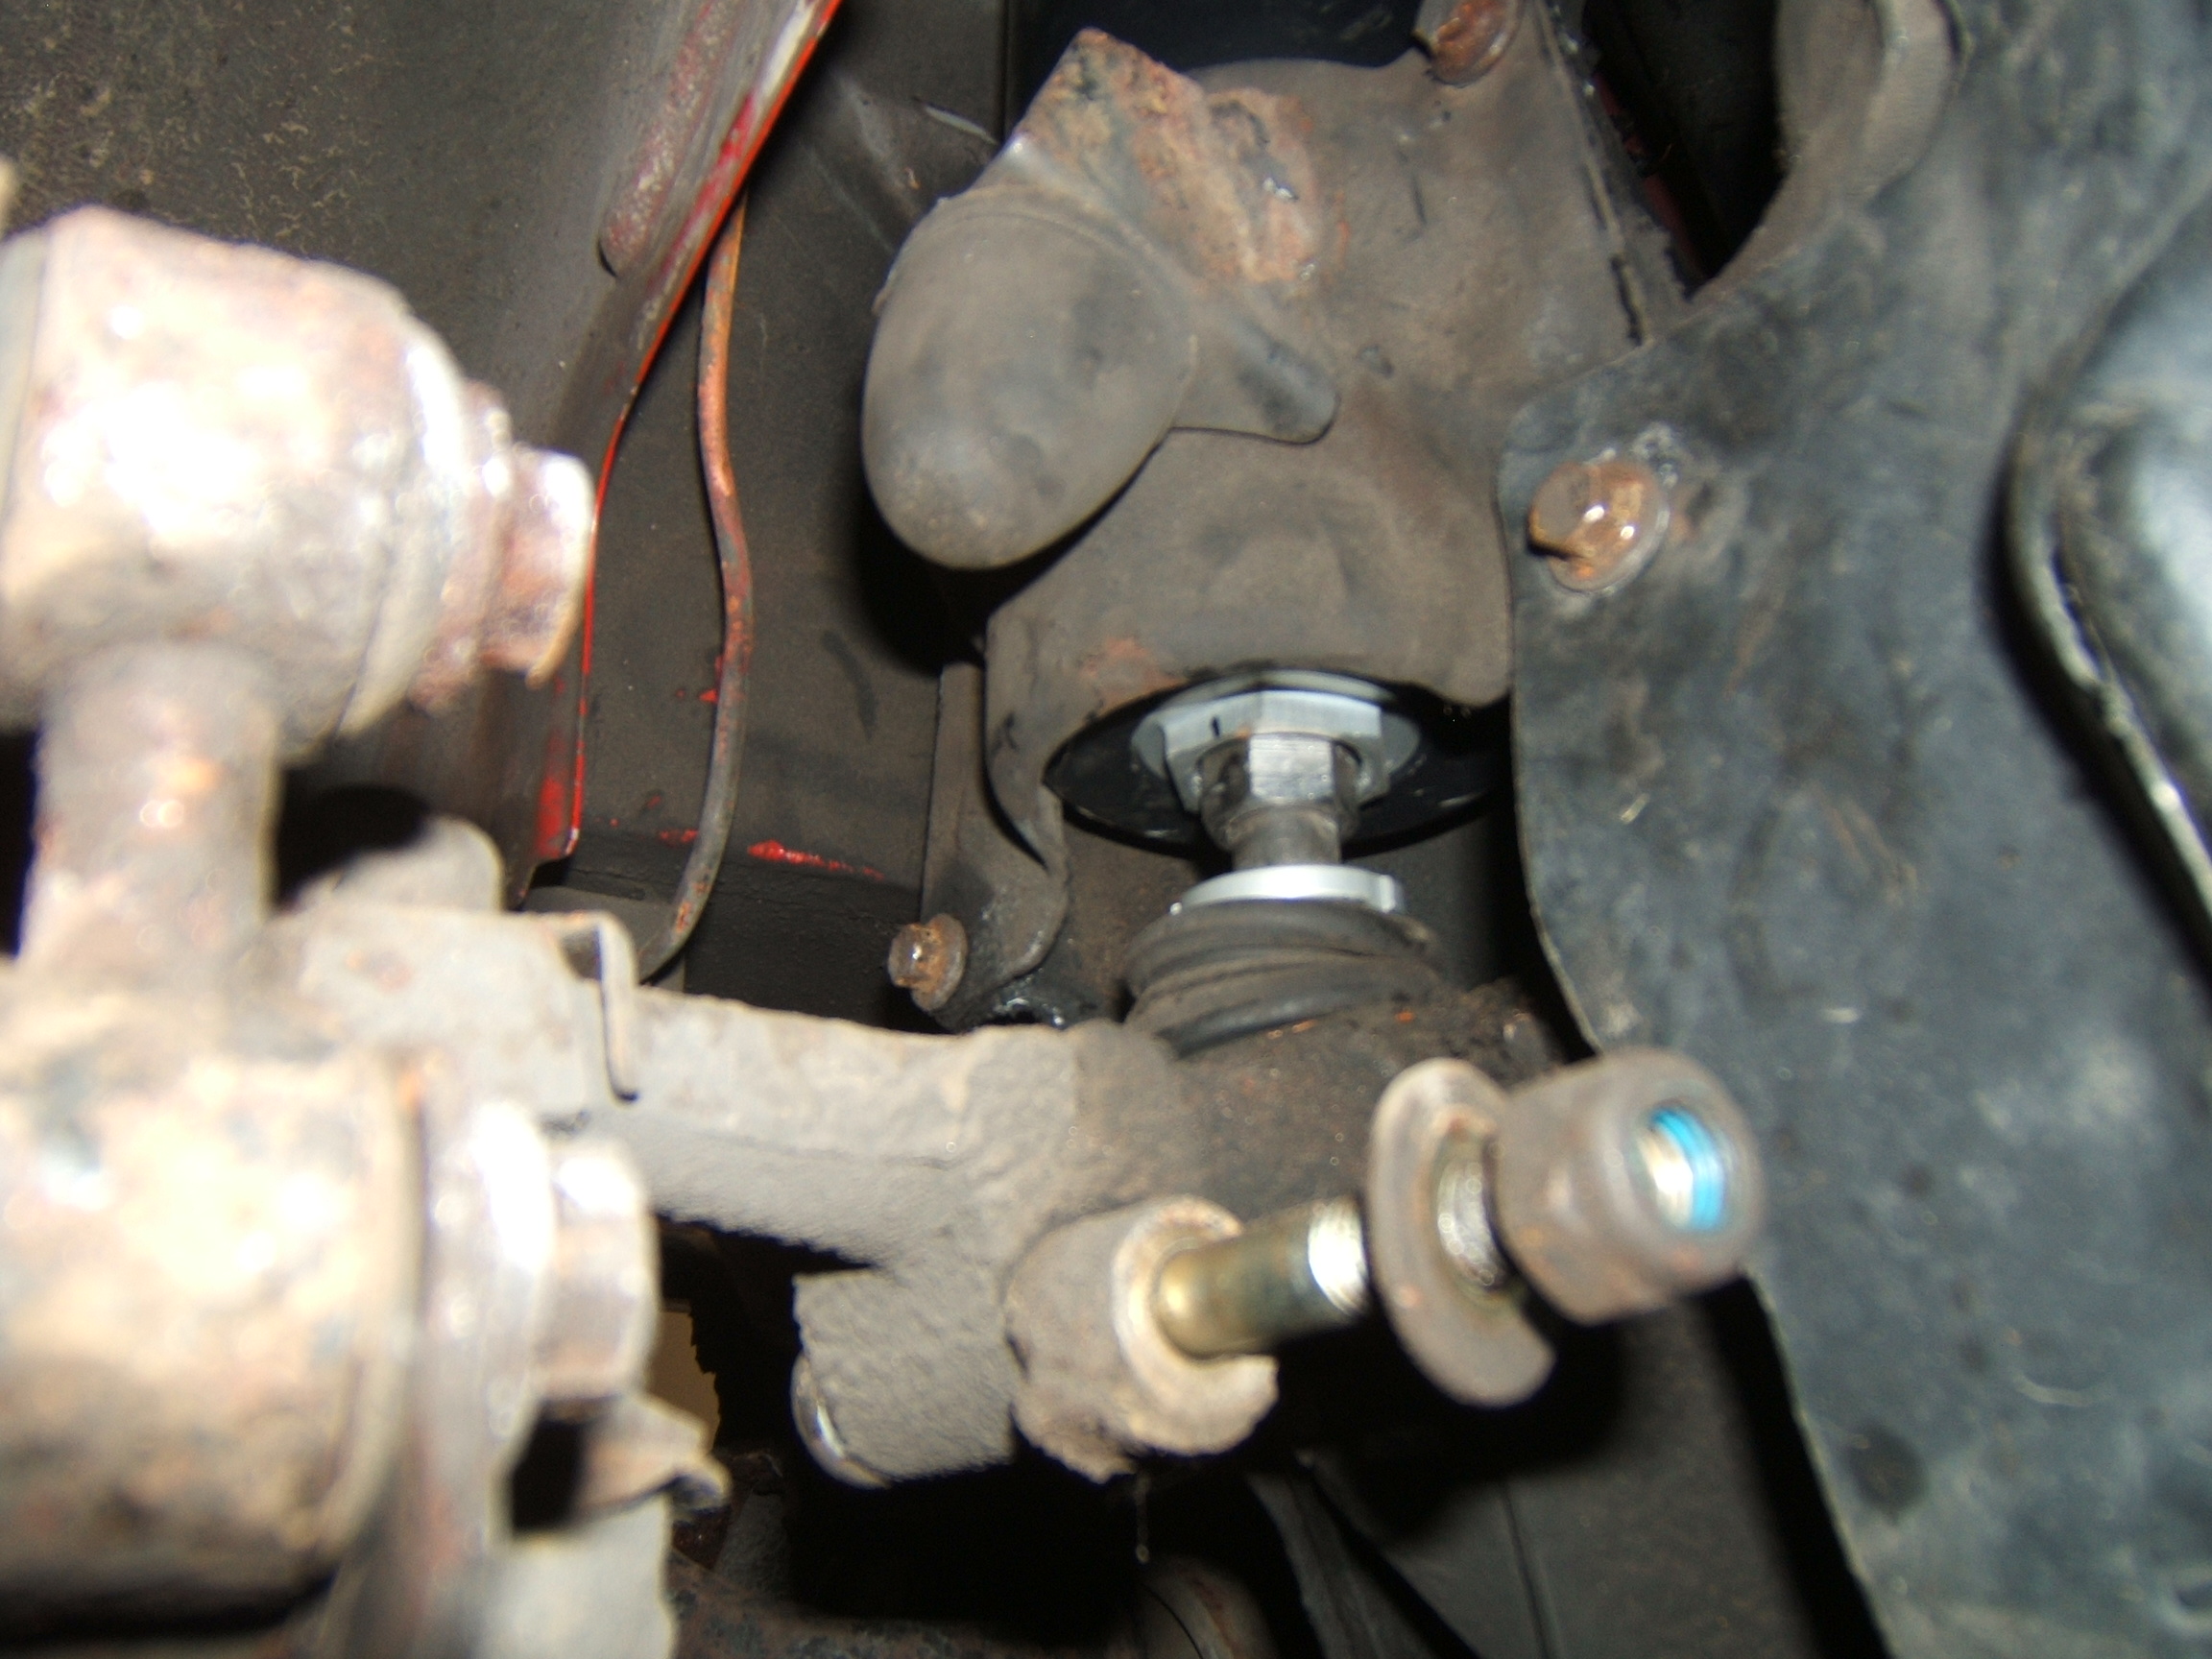
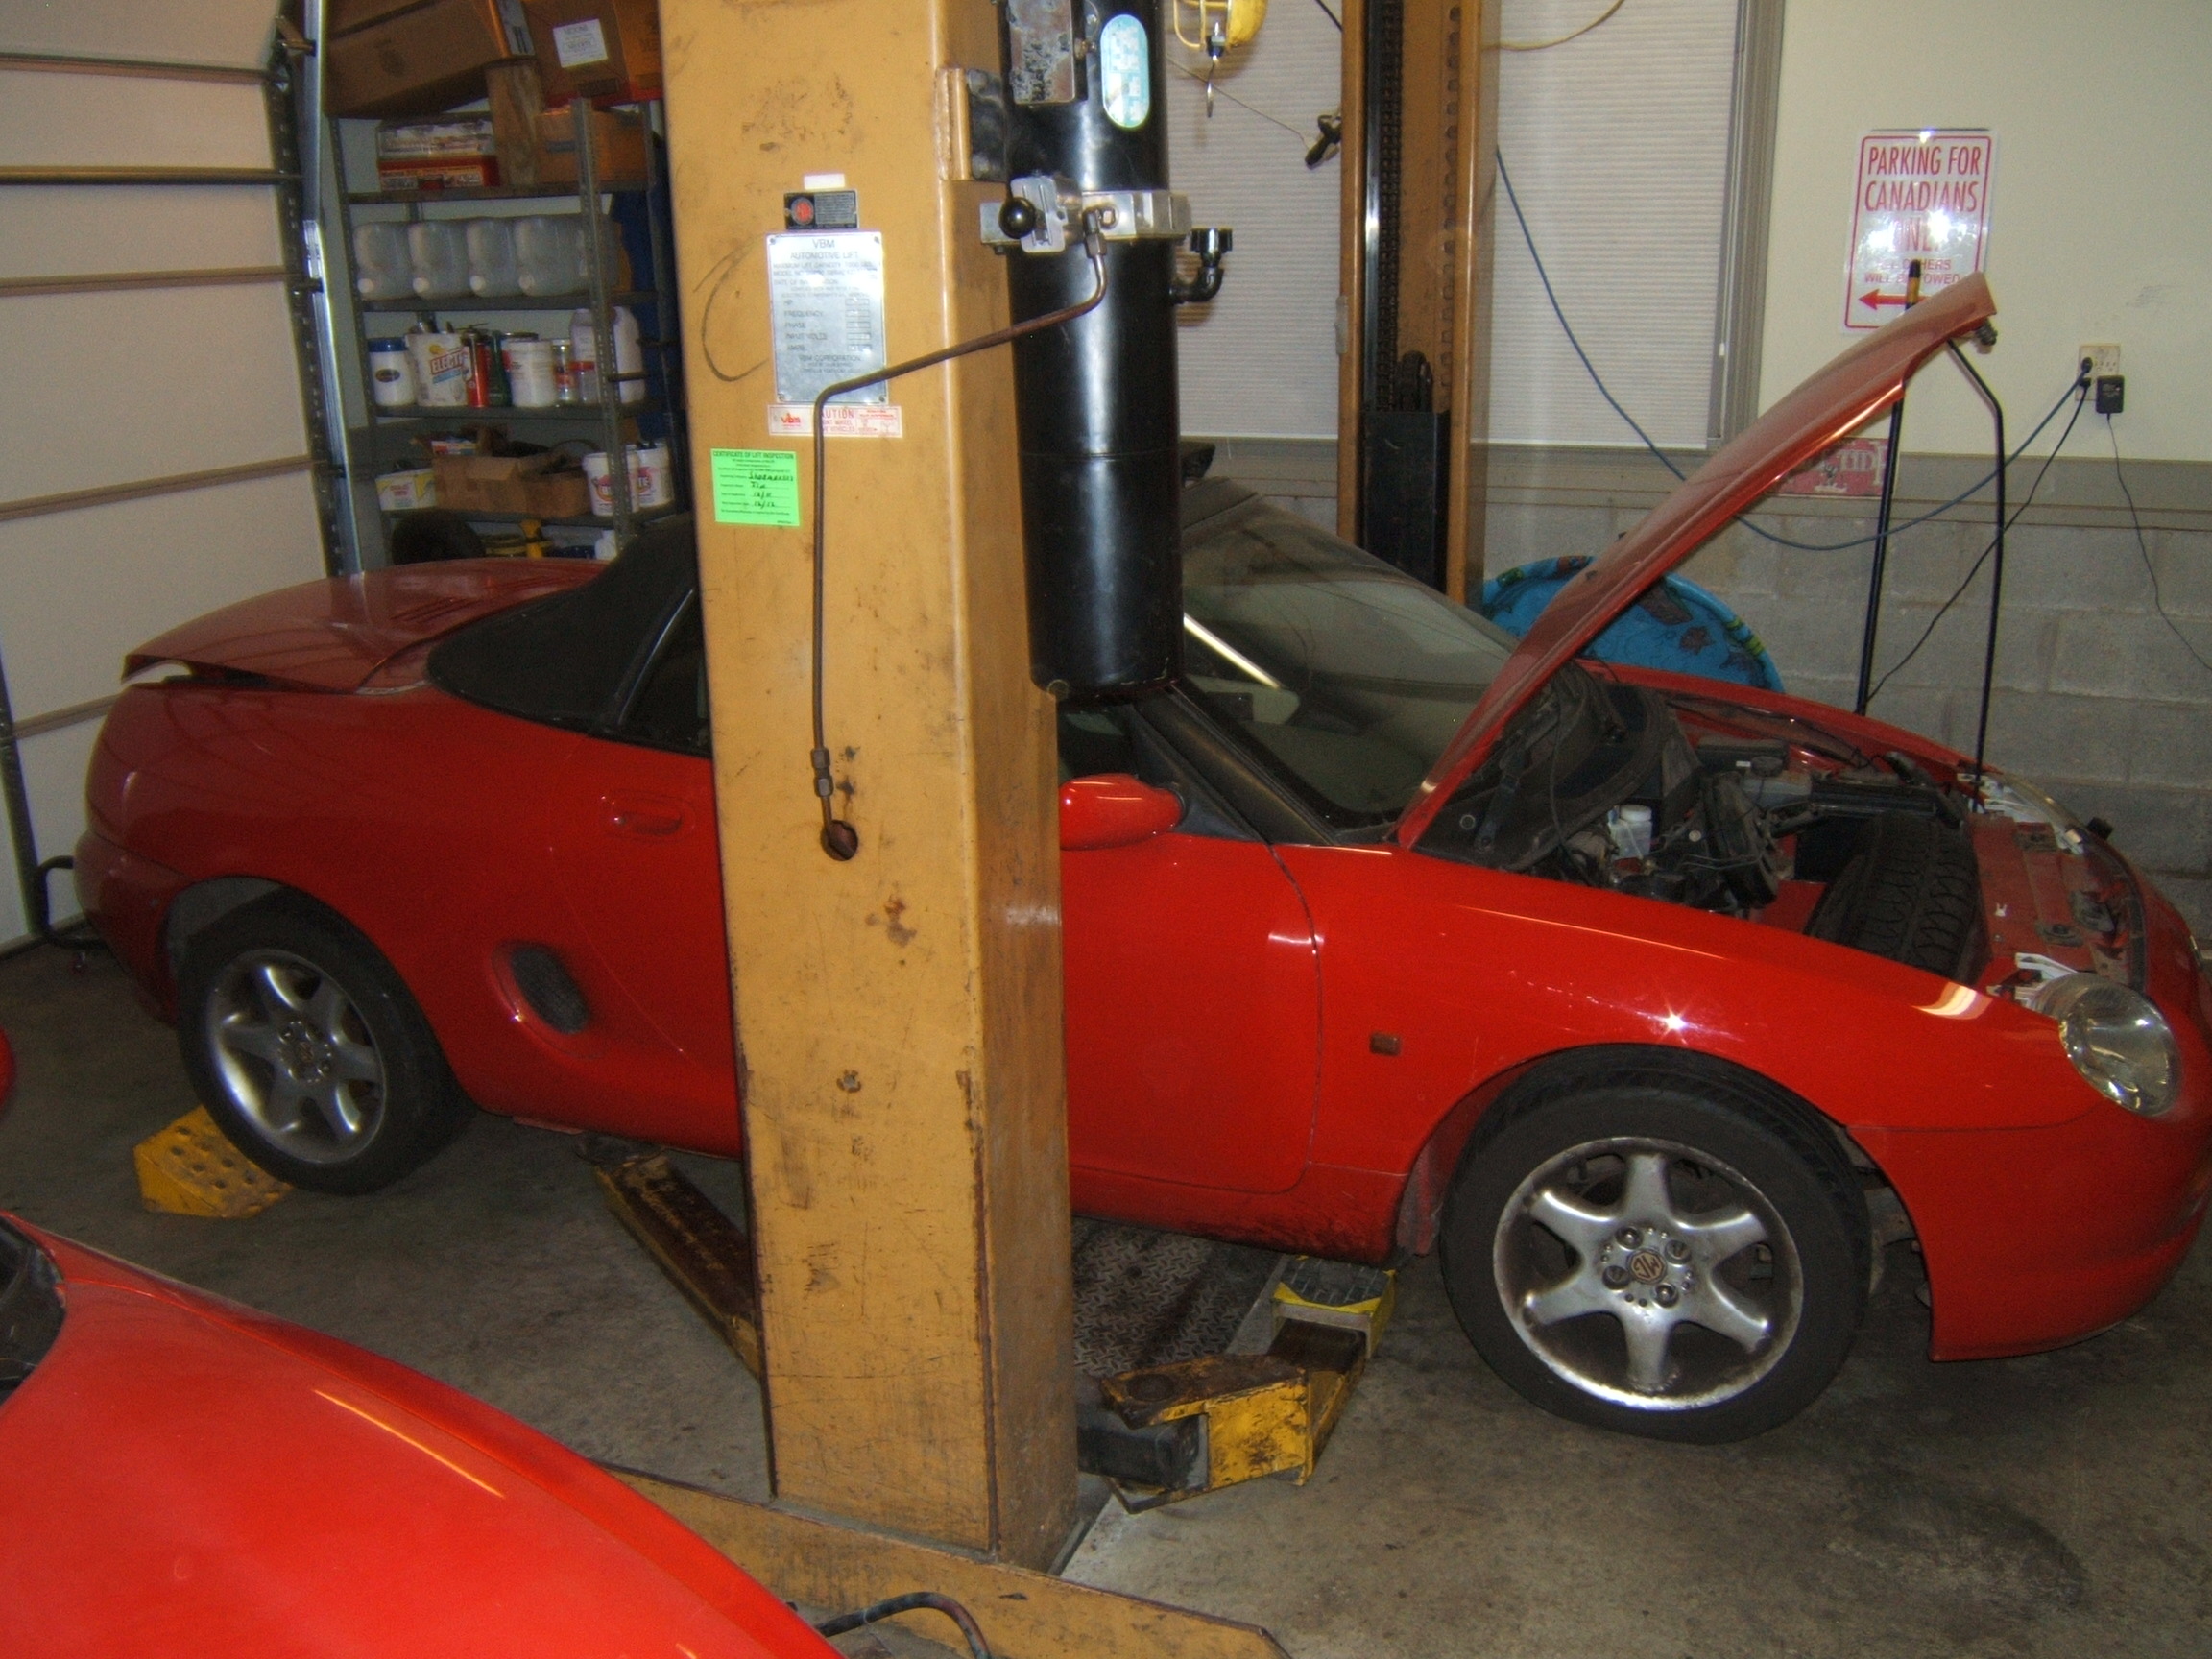
The first car in our inventory that we examined is a 1995 MGF with around 140,000 miles. This photo shows the right rear. This car rides very poorly, especially over a local motorway exit ramp that has a "washboard" surface. |
 |
Same car at the right front. |
 |
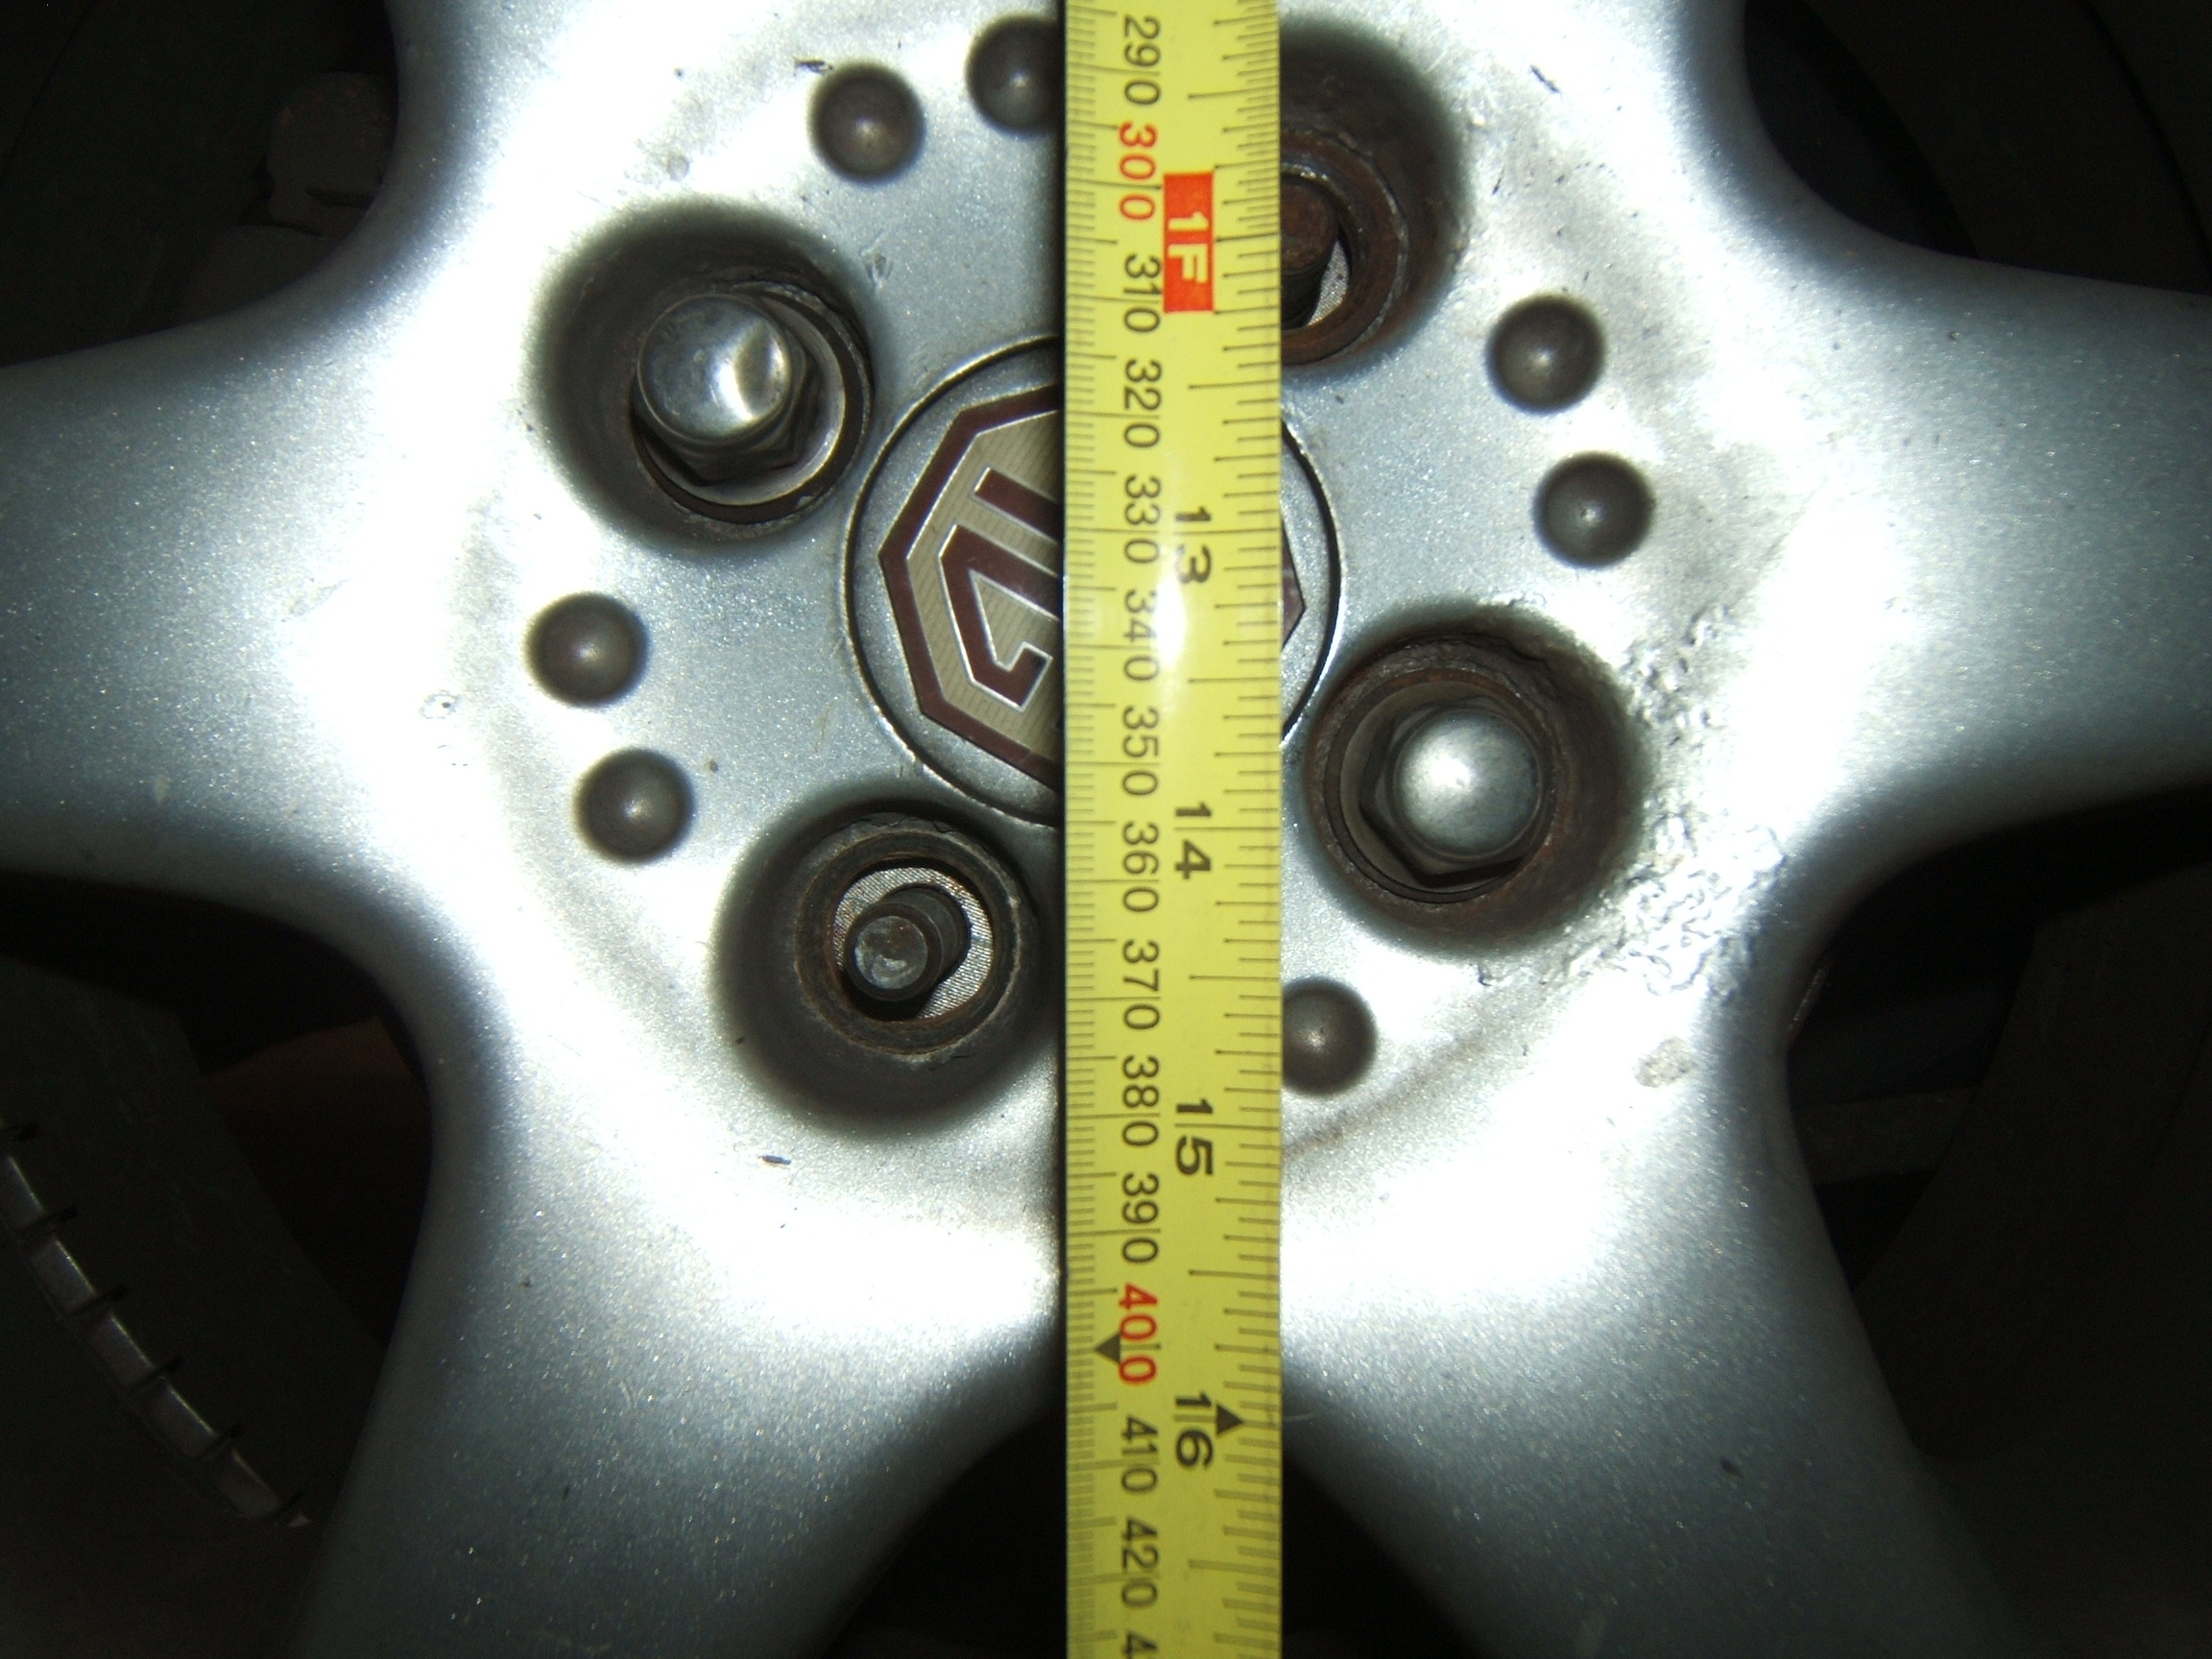
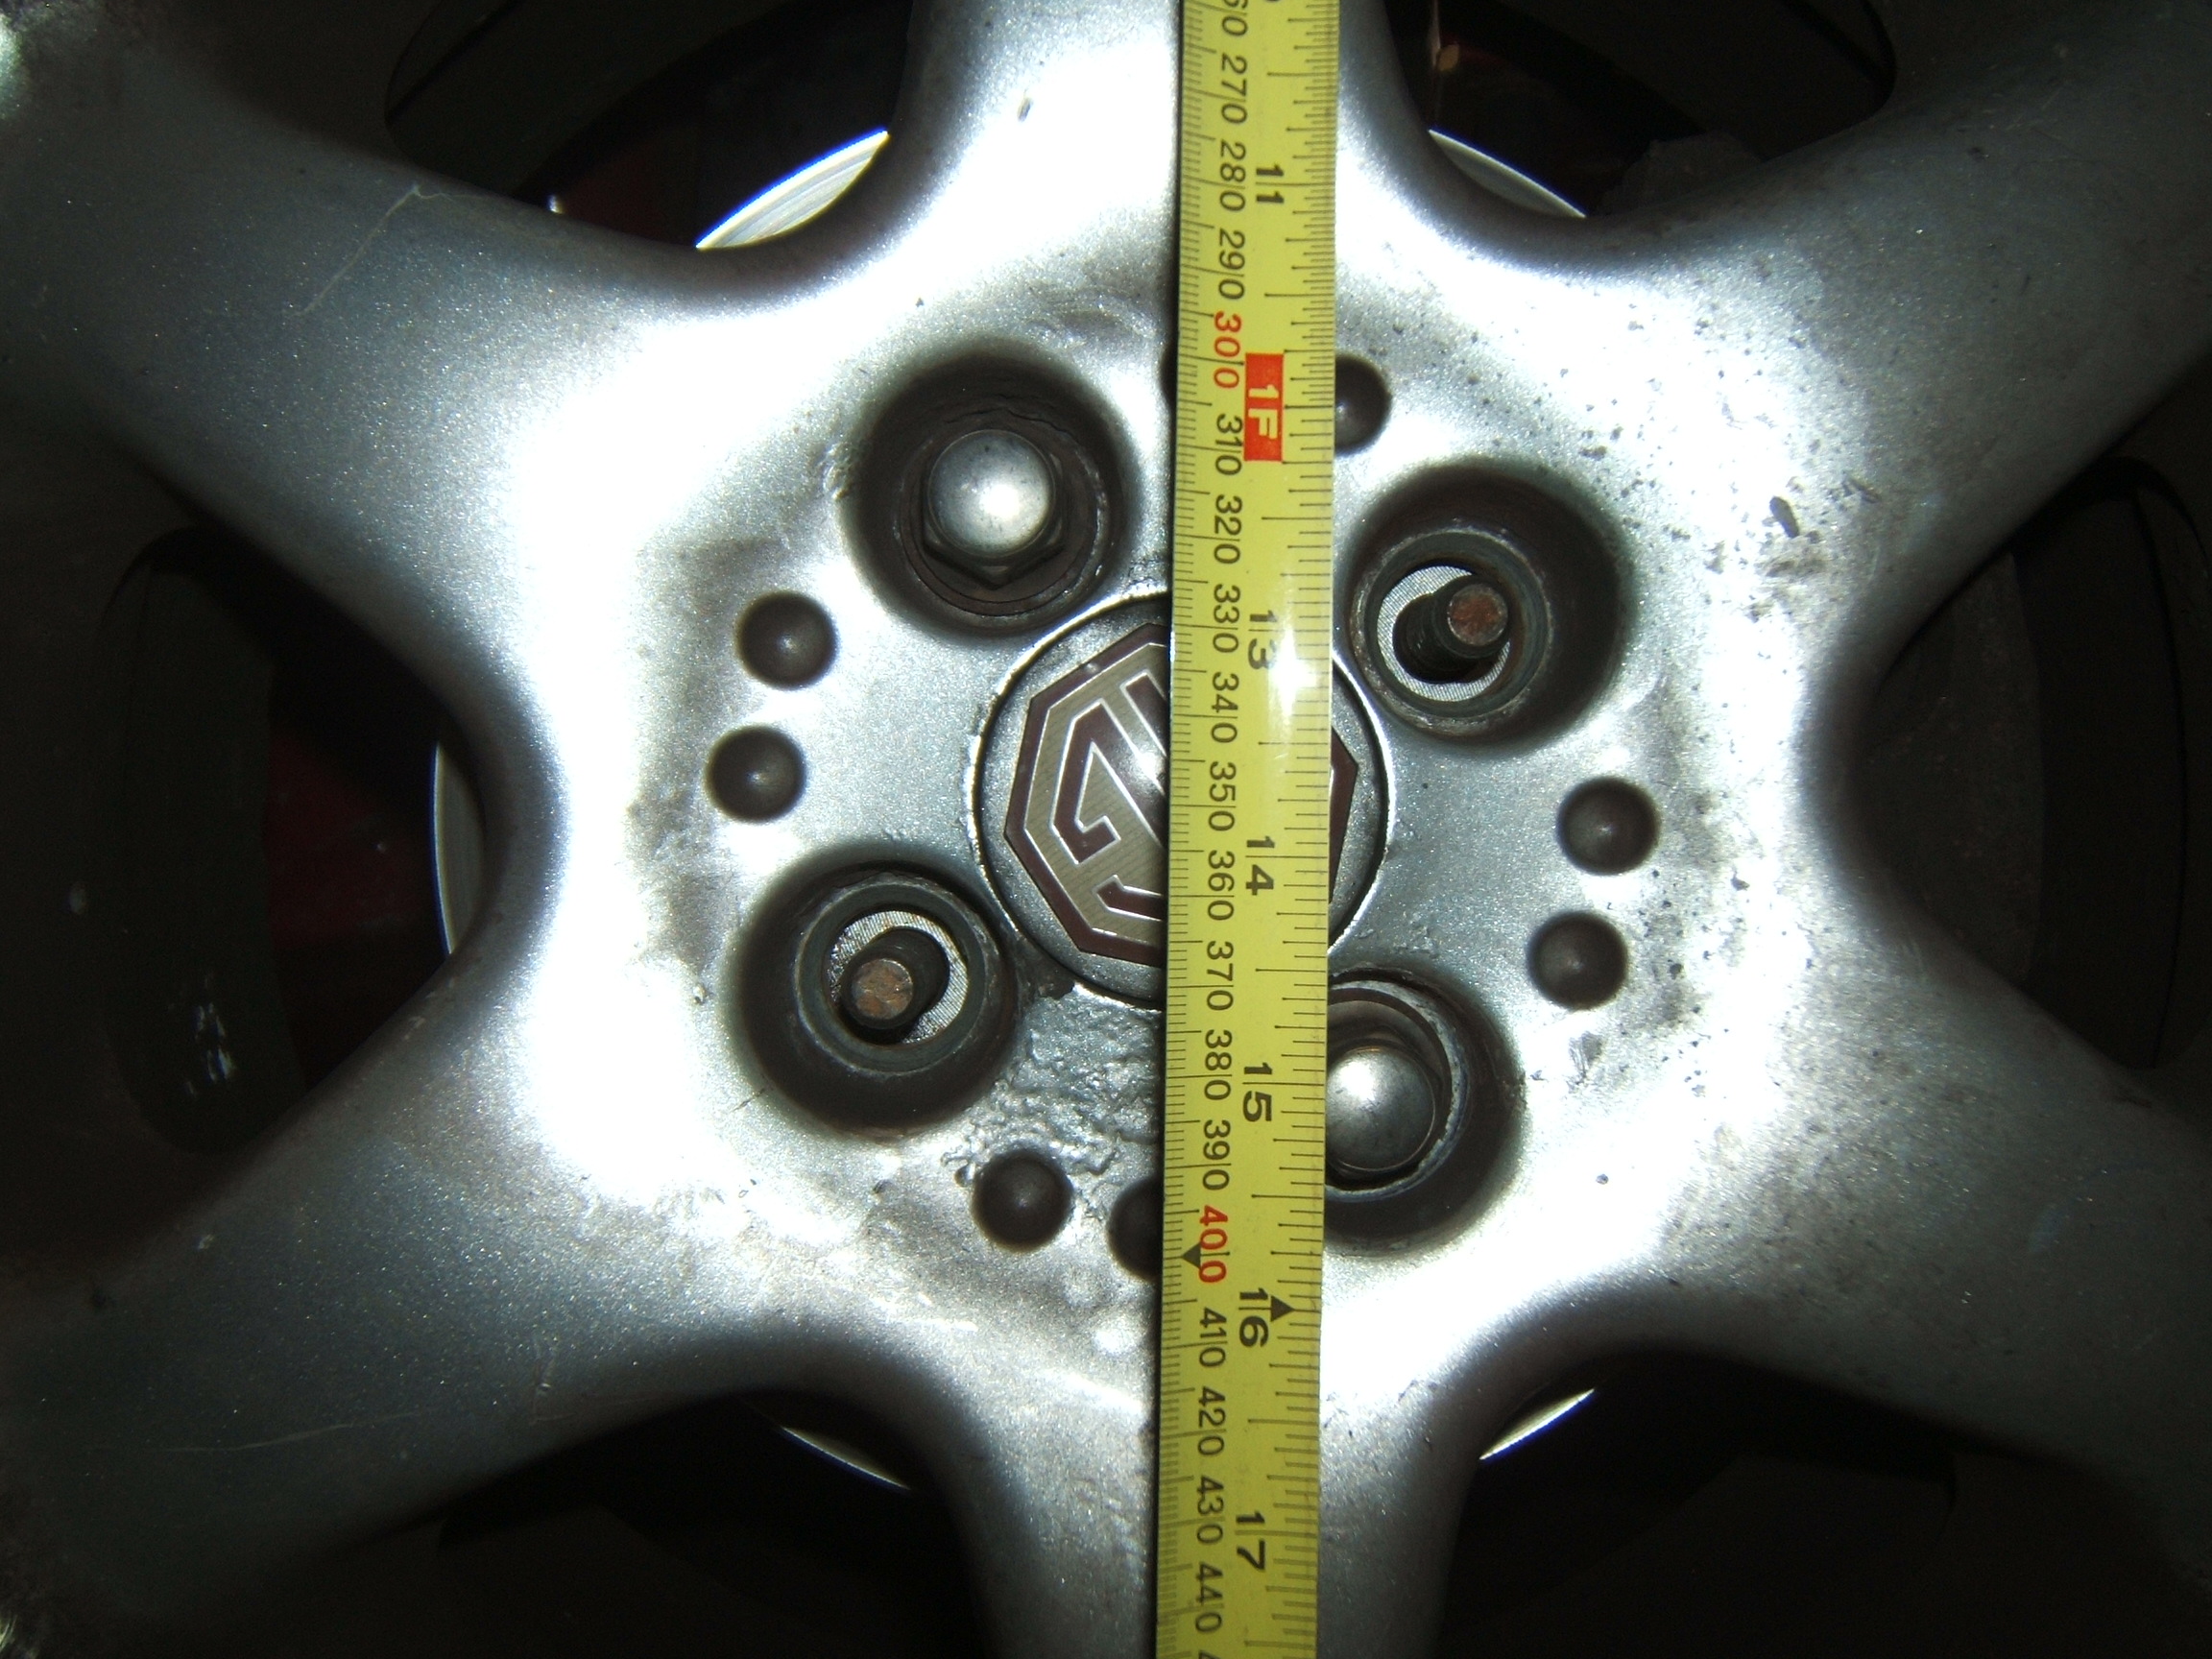
Another 1995 model with just over 100,000 miles is not much better off. Standard MGF ride heights are somewhat debated - the official spec. being 368mm in the front and 363mm at the rear, both with a variance of +/-10mm. Many regard that as too high but clearly these measurements are all far too low! |
 |
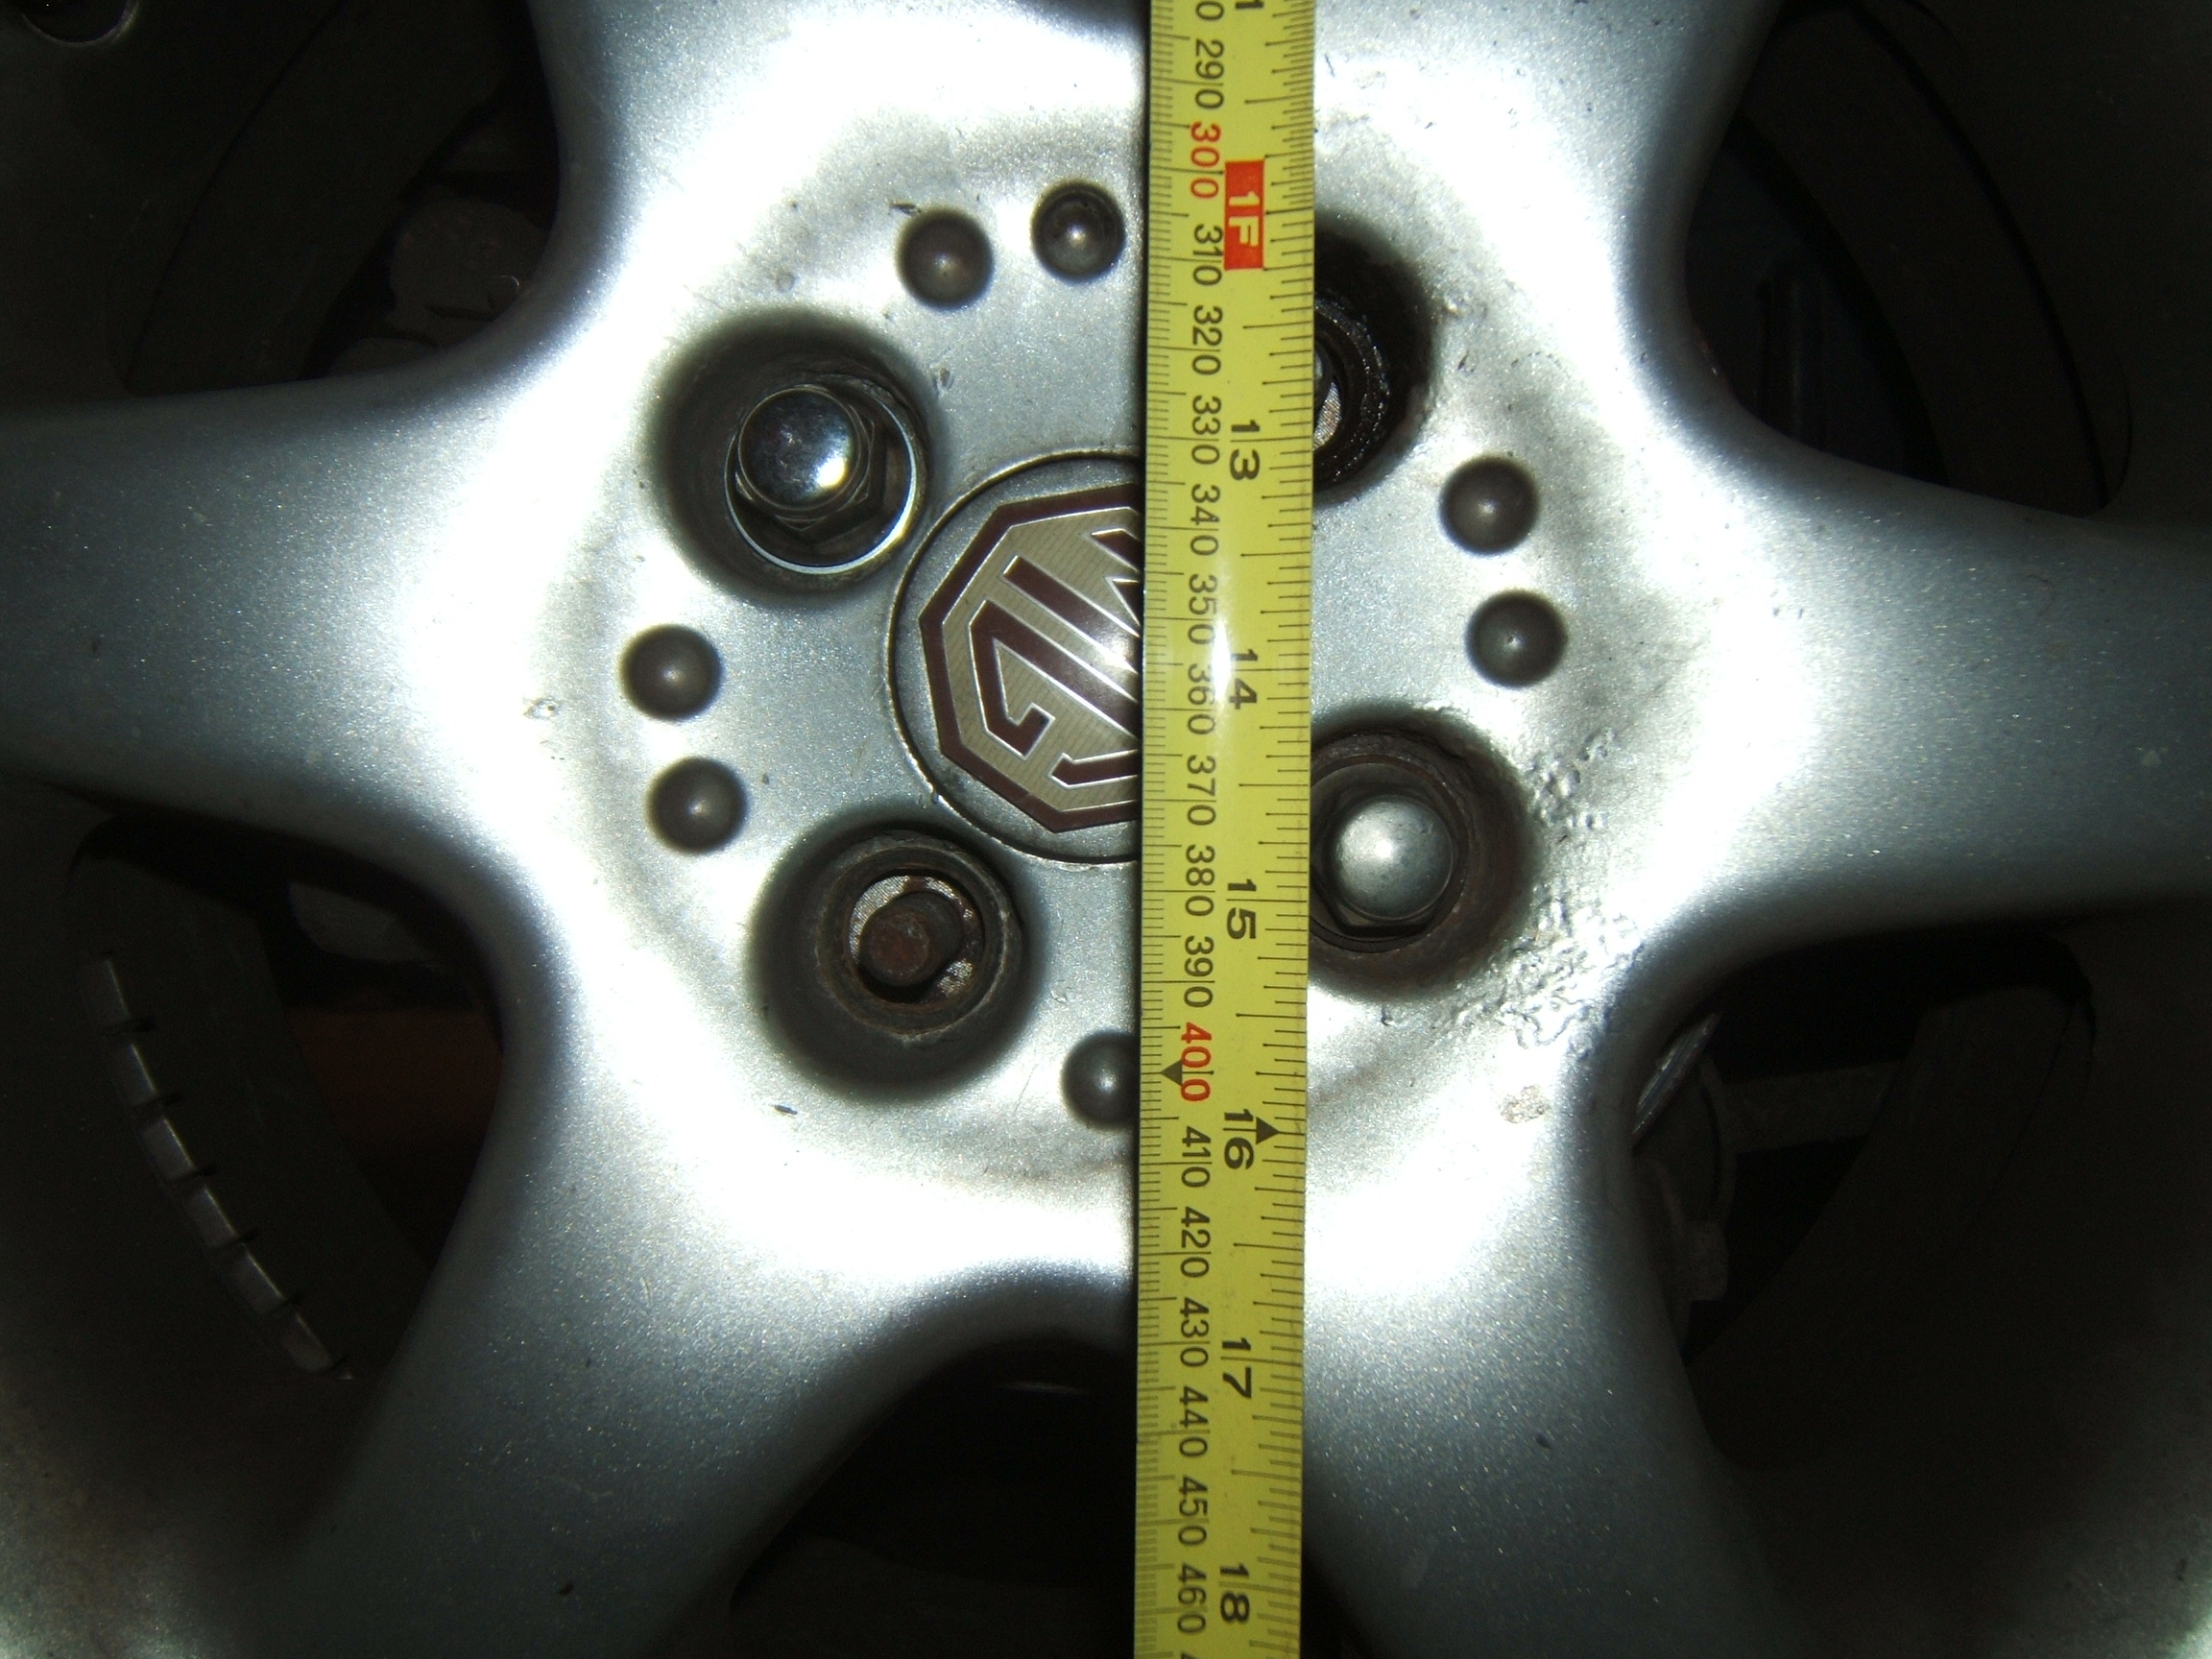
Same car at the right front. |
| So, the question is, which car should we tackle first? ... |
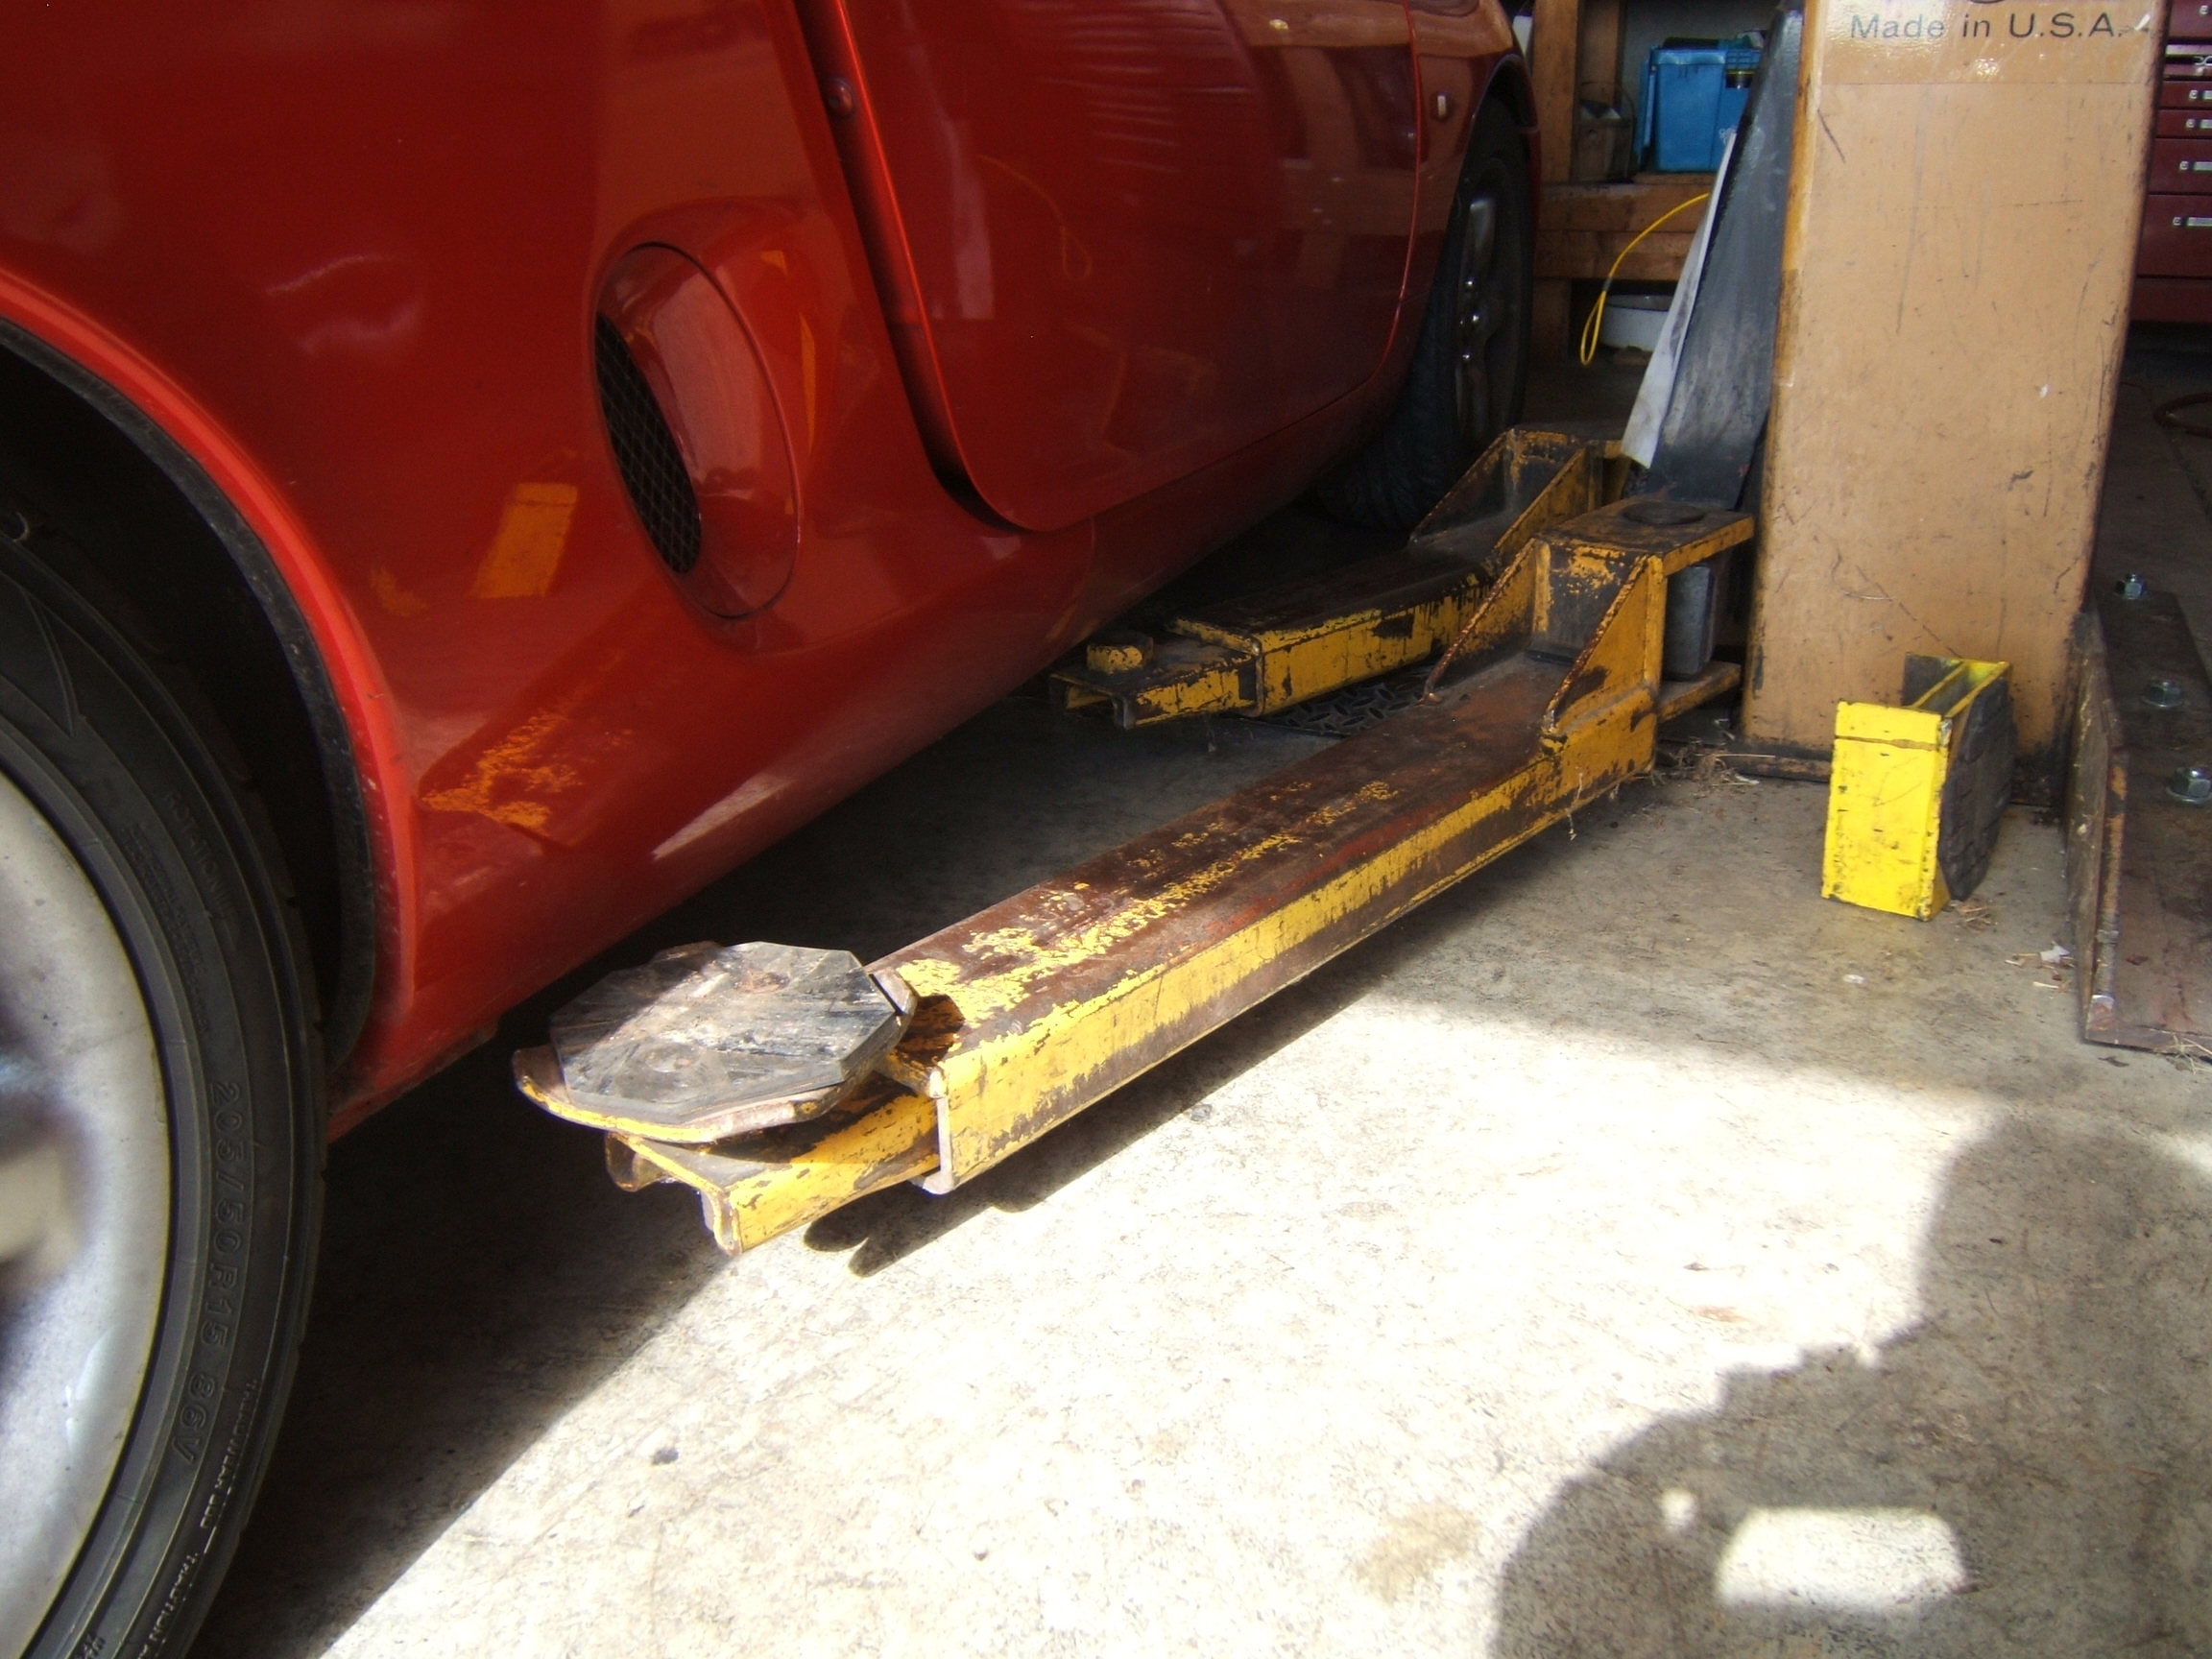 |
We decided on the higher mileage car. As one can see, this car is riding so low the lift arms would foul on the sill panels! |
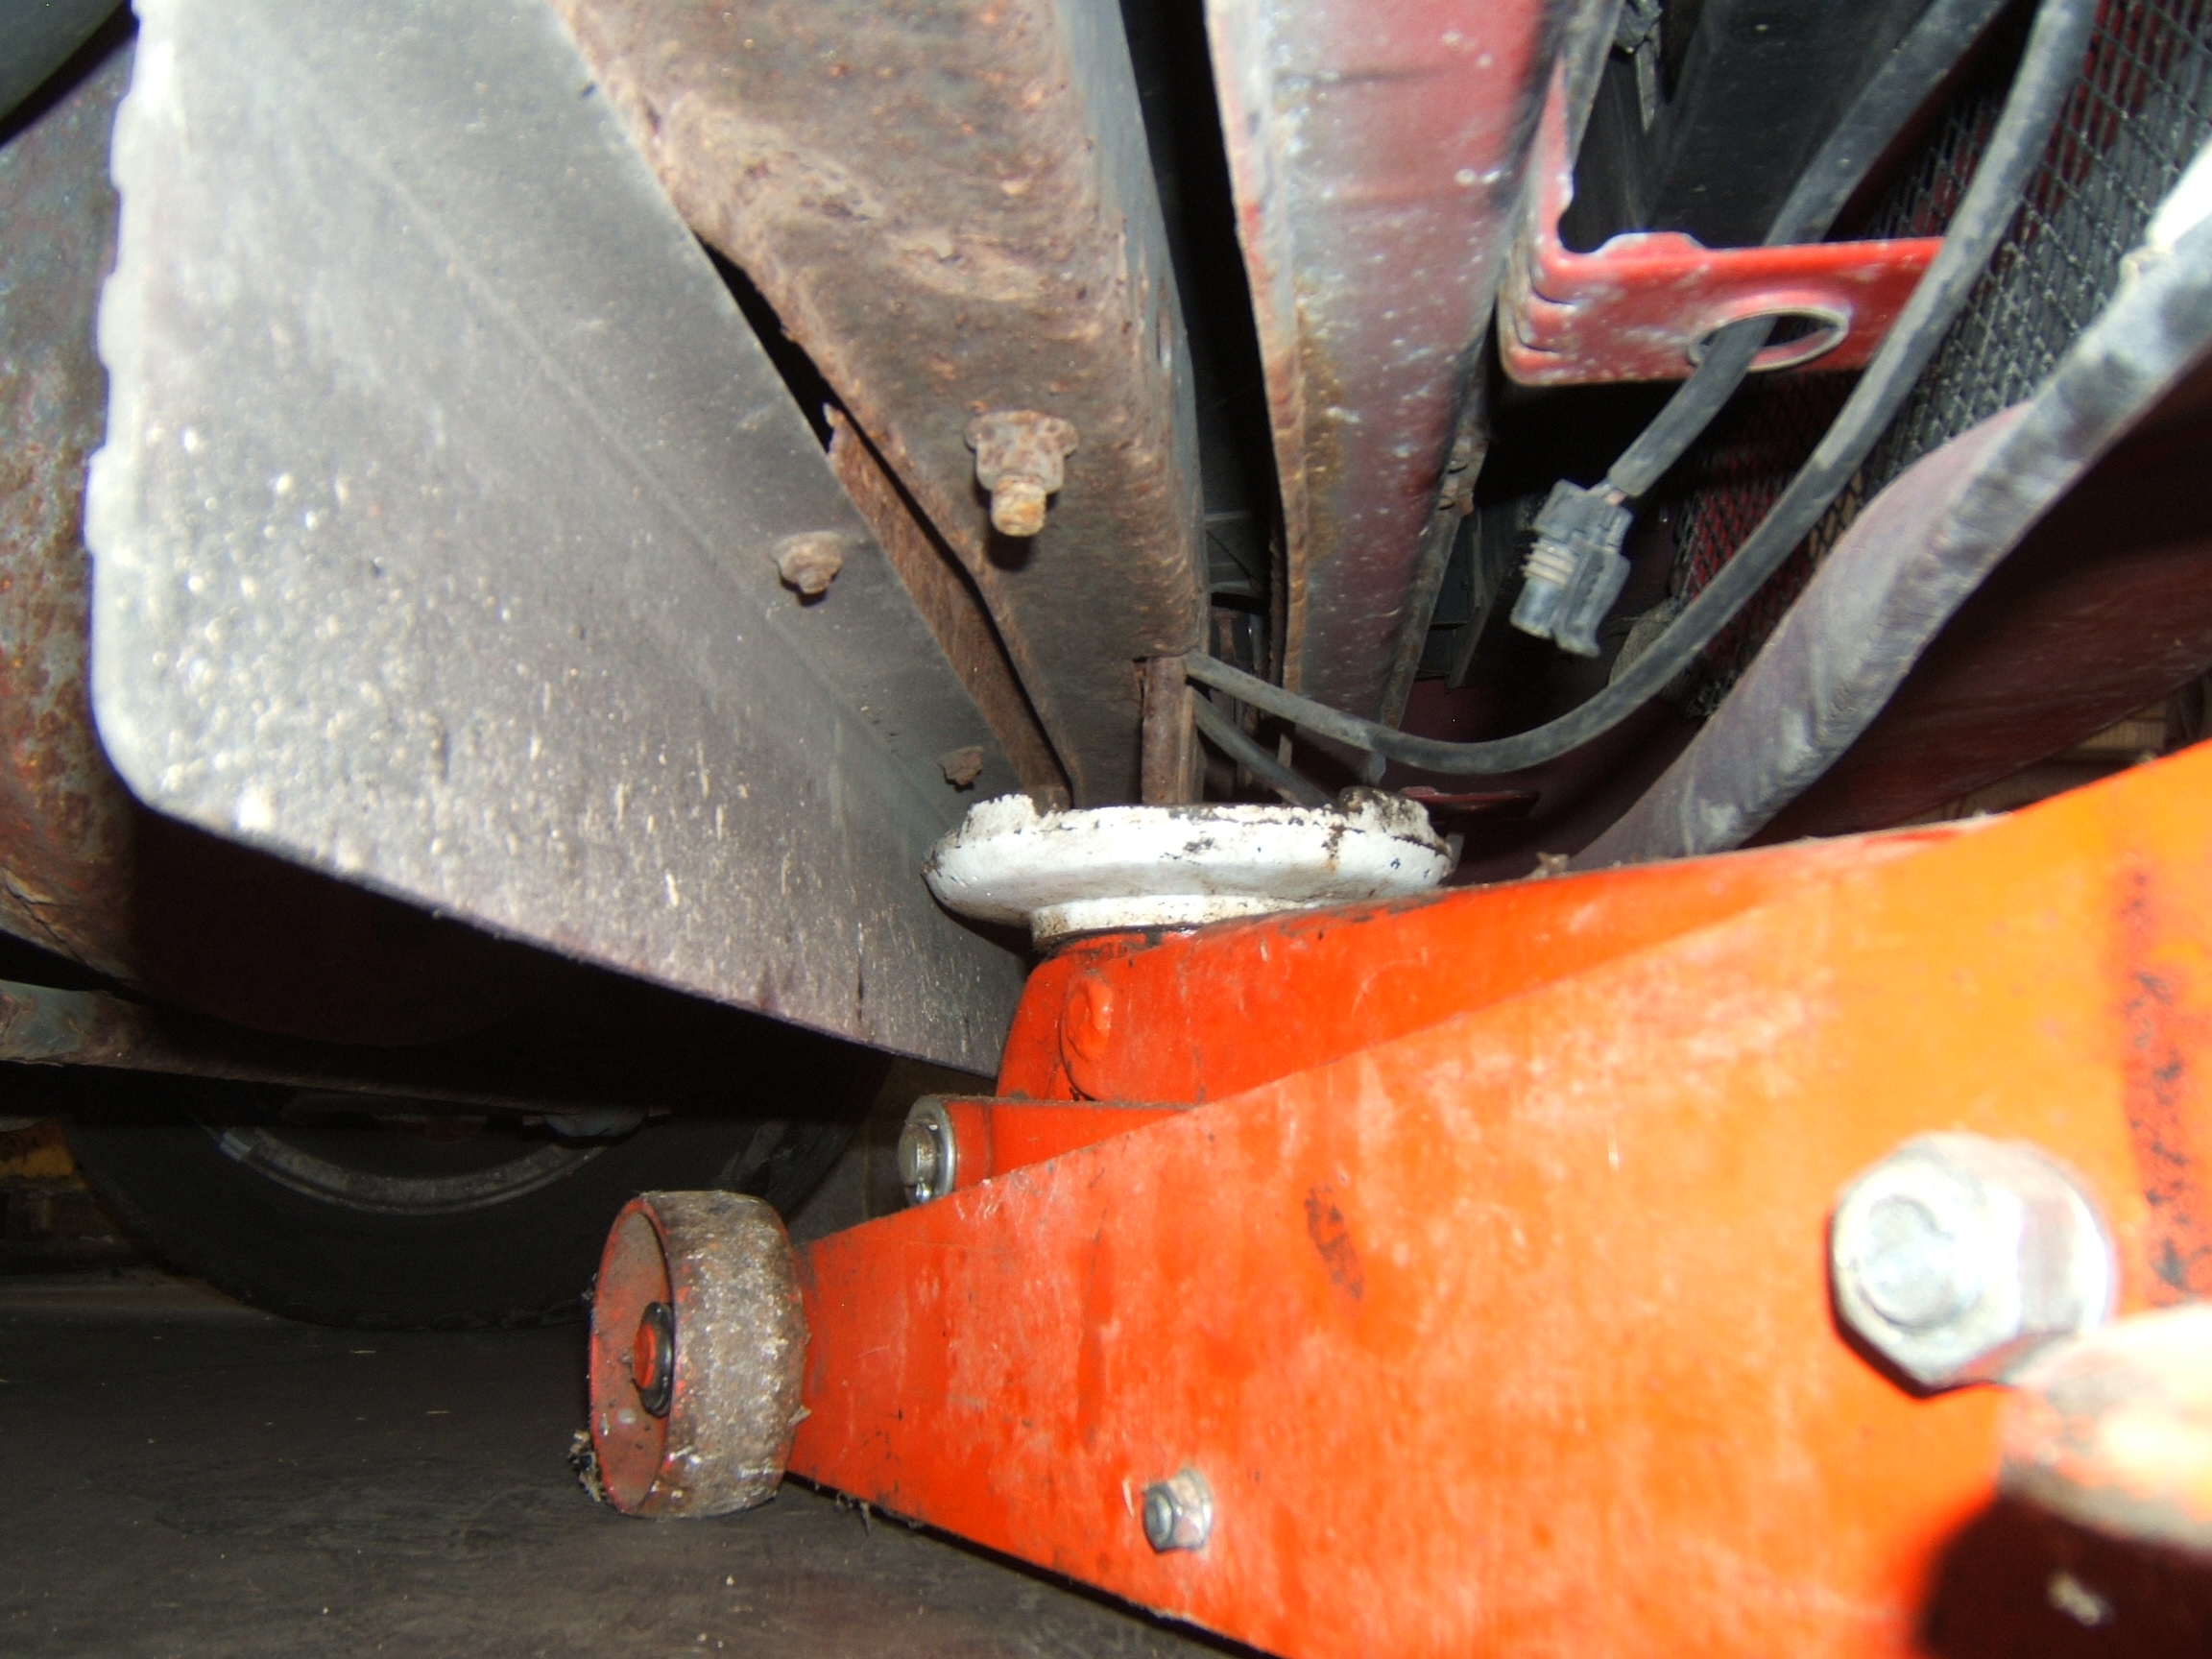 |
Thus it was necessary to raise the body with a floor jack. At the front there was an accessible jacking point but in the rear it is too far forward to clear the exhaust system. That is why one really needs access to a lift to work on these cars. At the rear we were able to gain enough clearance by gently jacking the suspension. |
 |
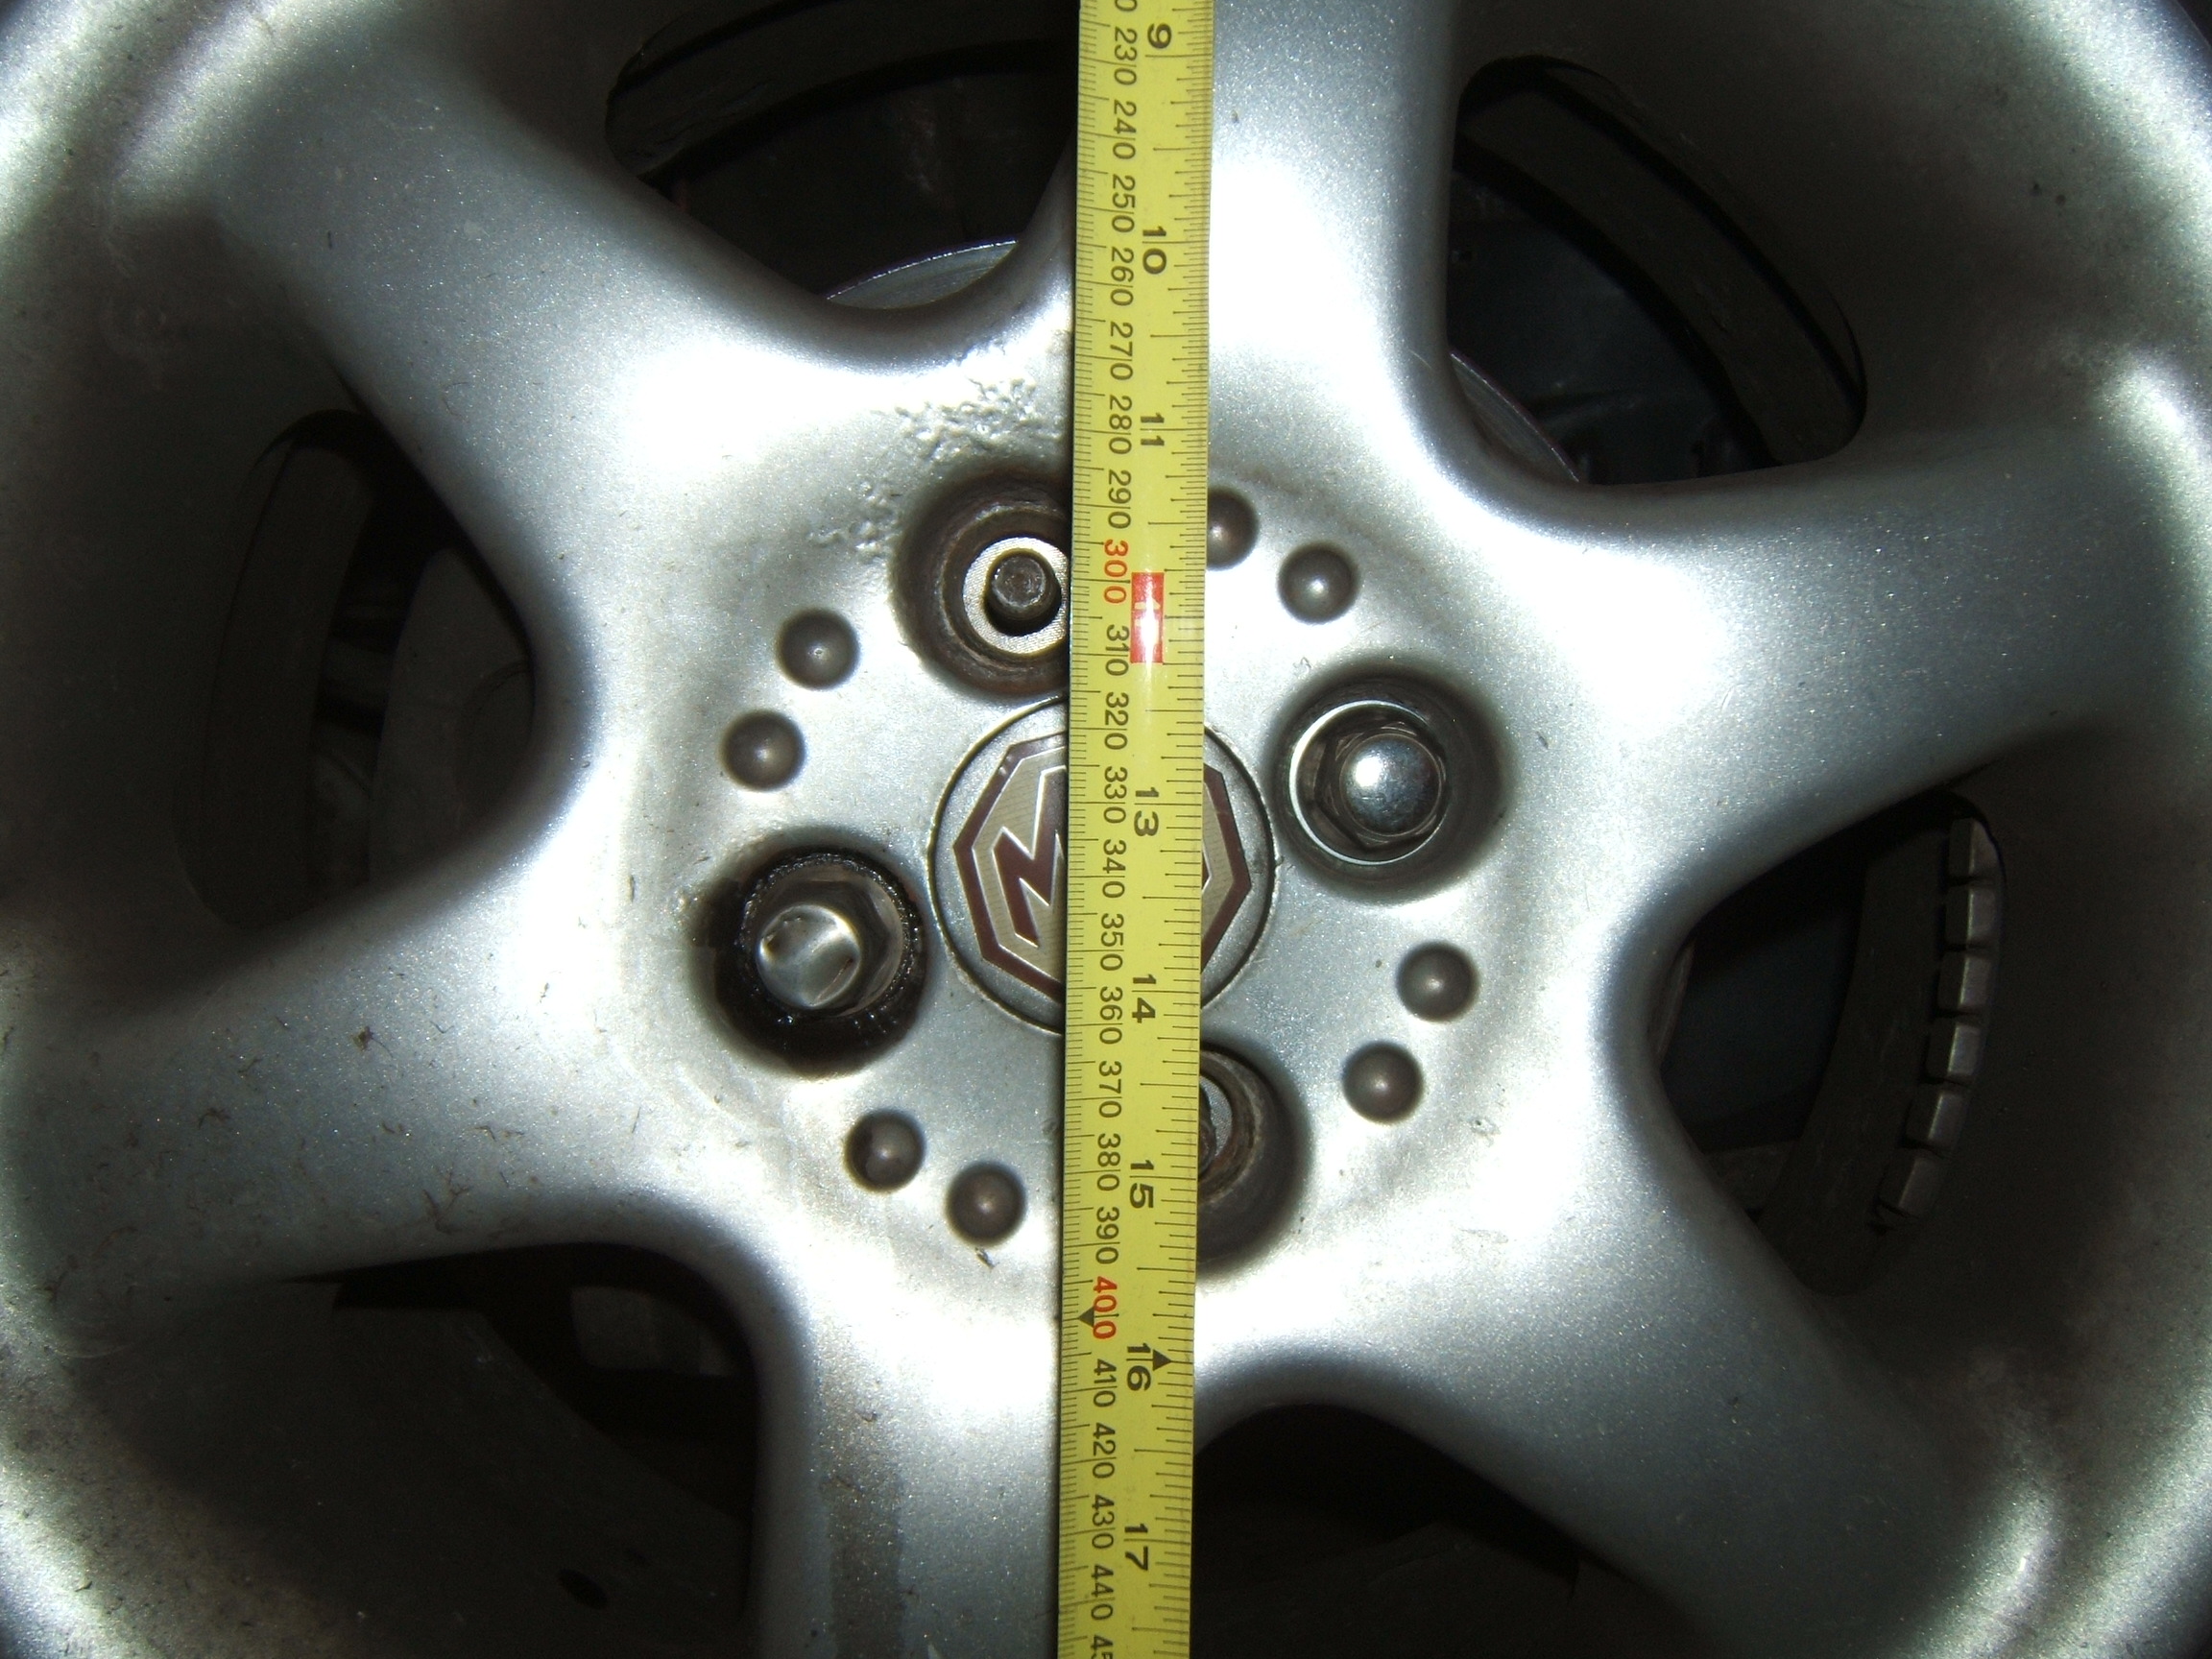
This what 365mm looks like! |
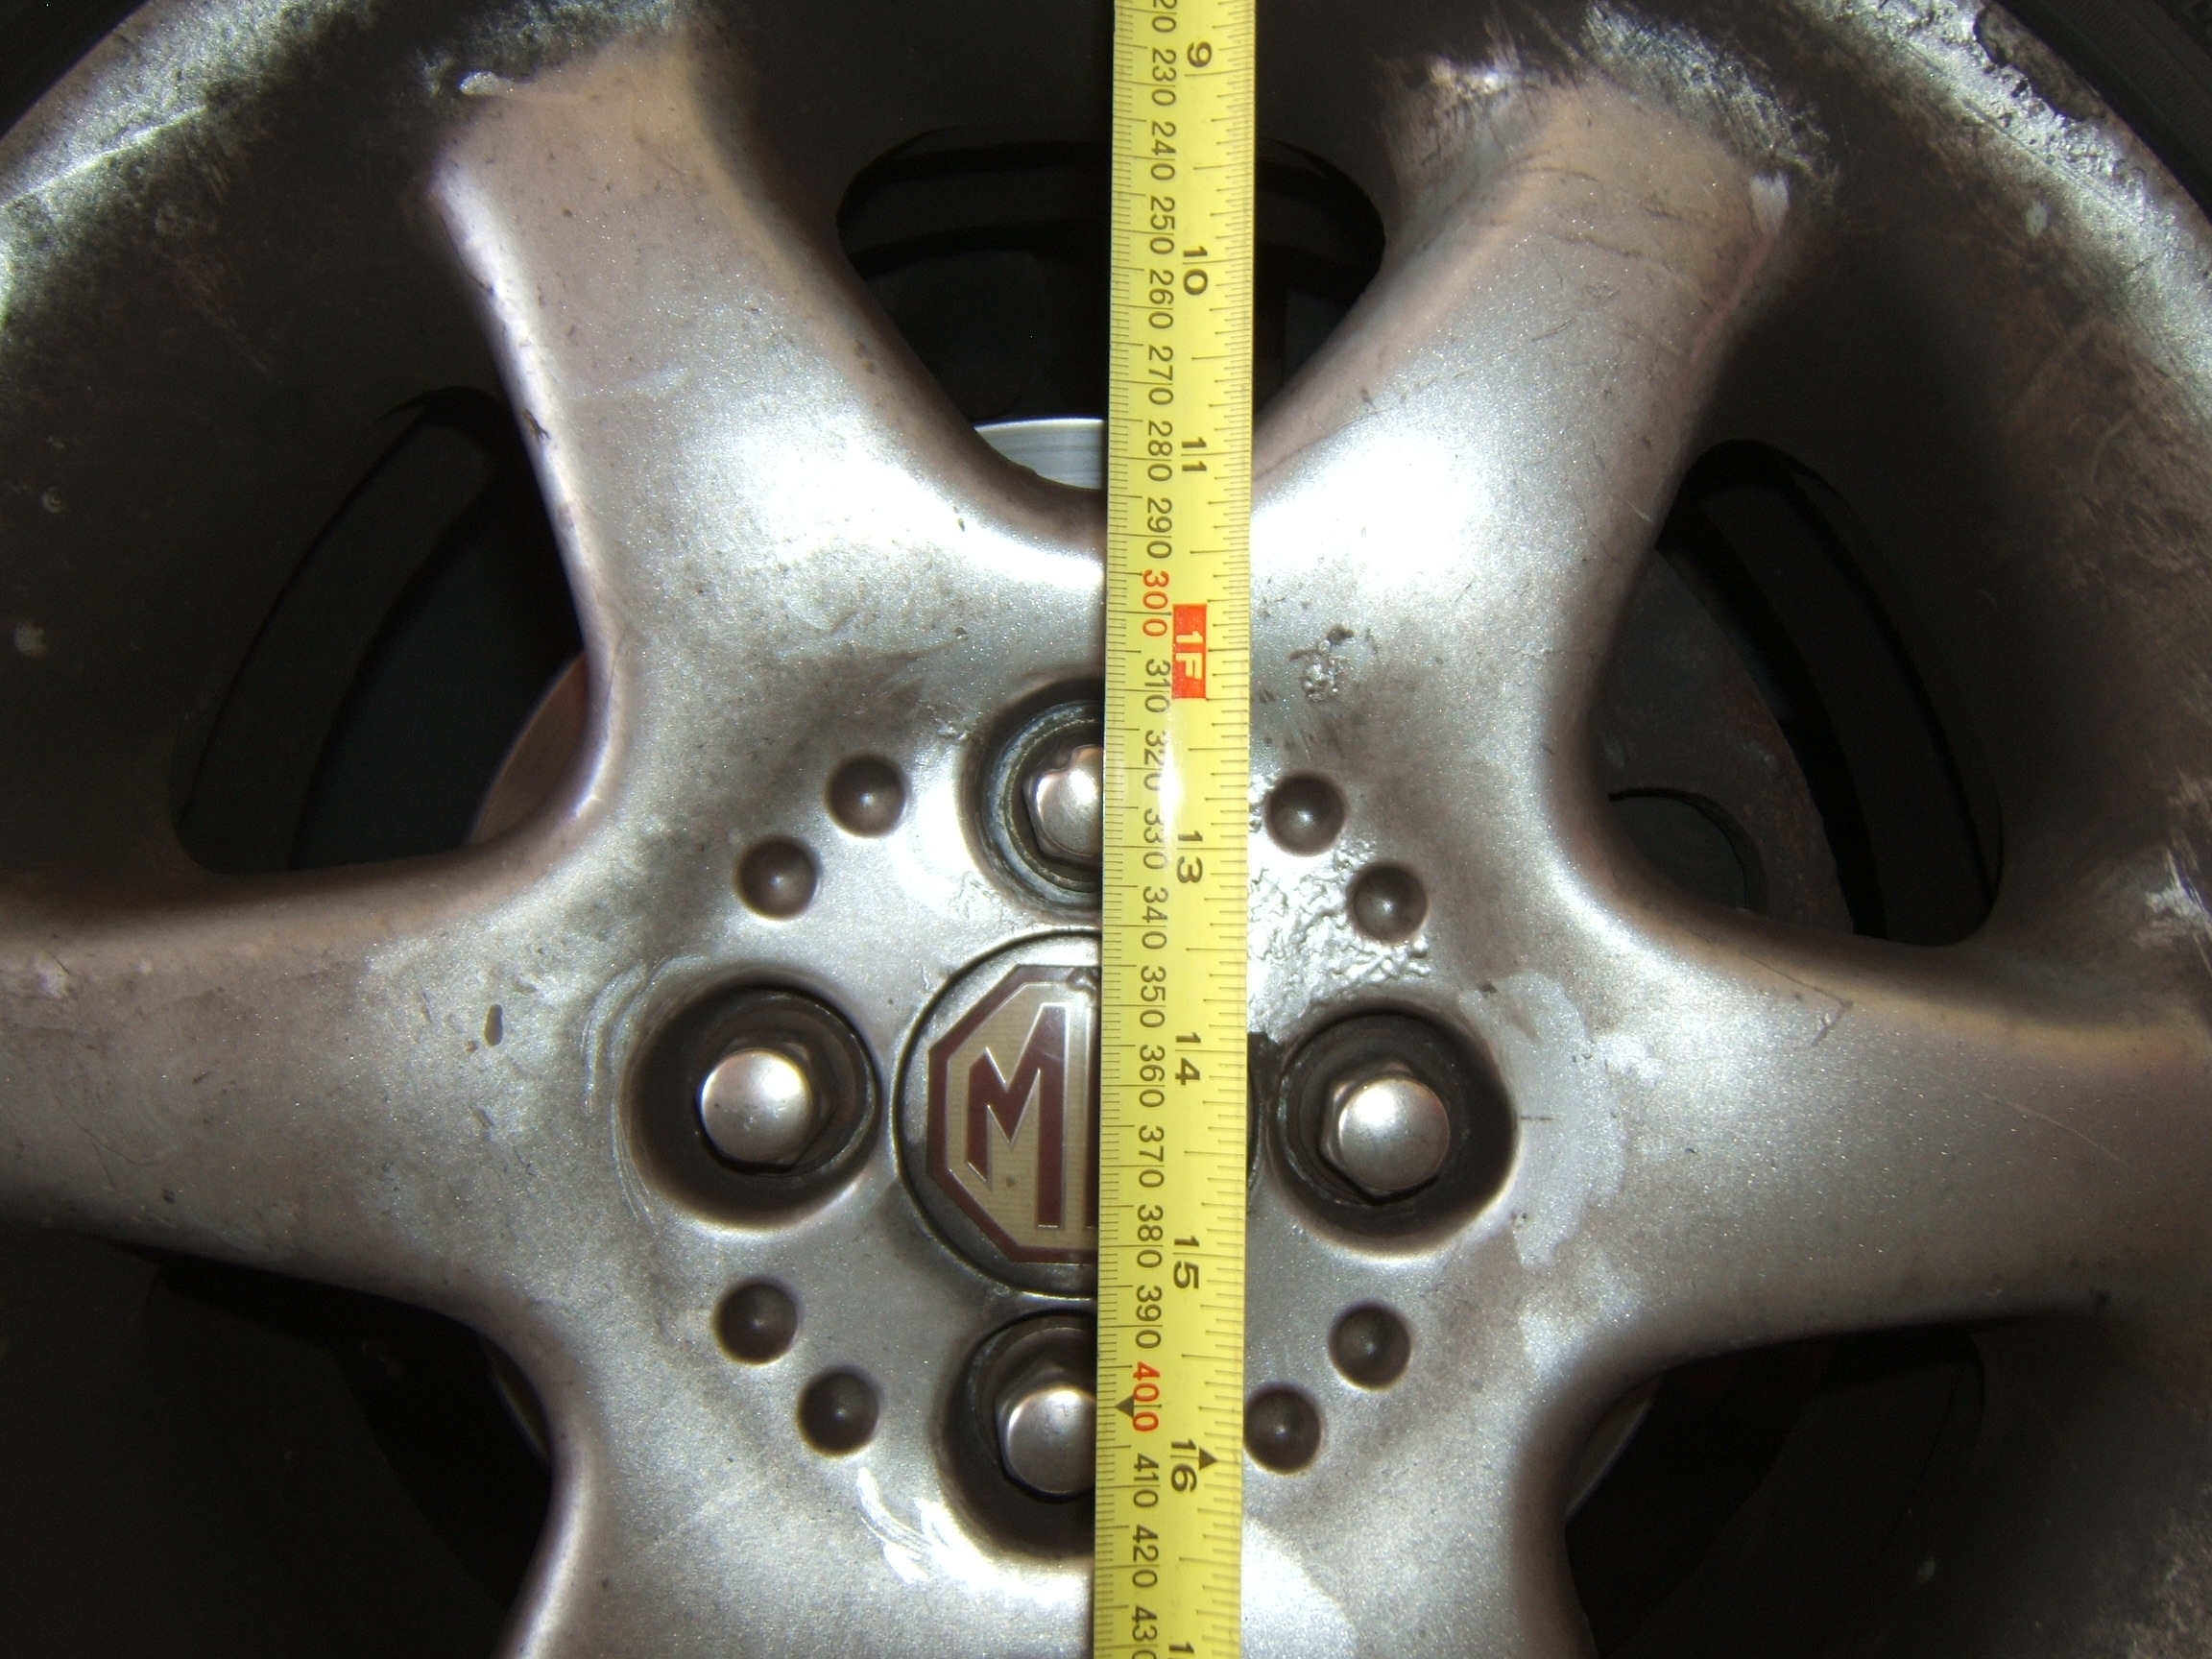 |
It does look a little high, so for a Suplex equipped MGF the suggestion is 355mm front and 353mm rear. |
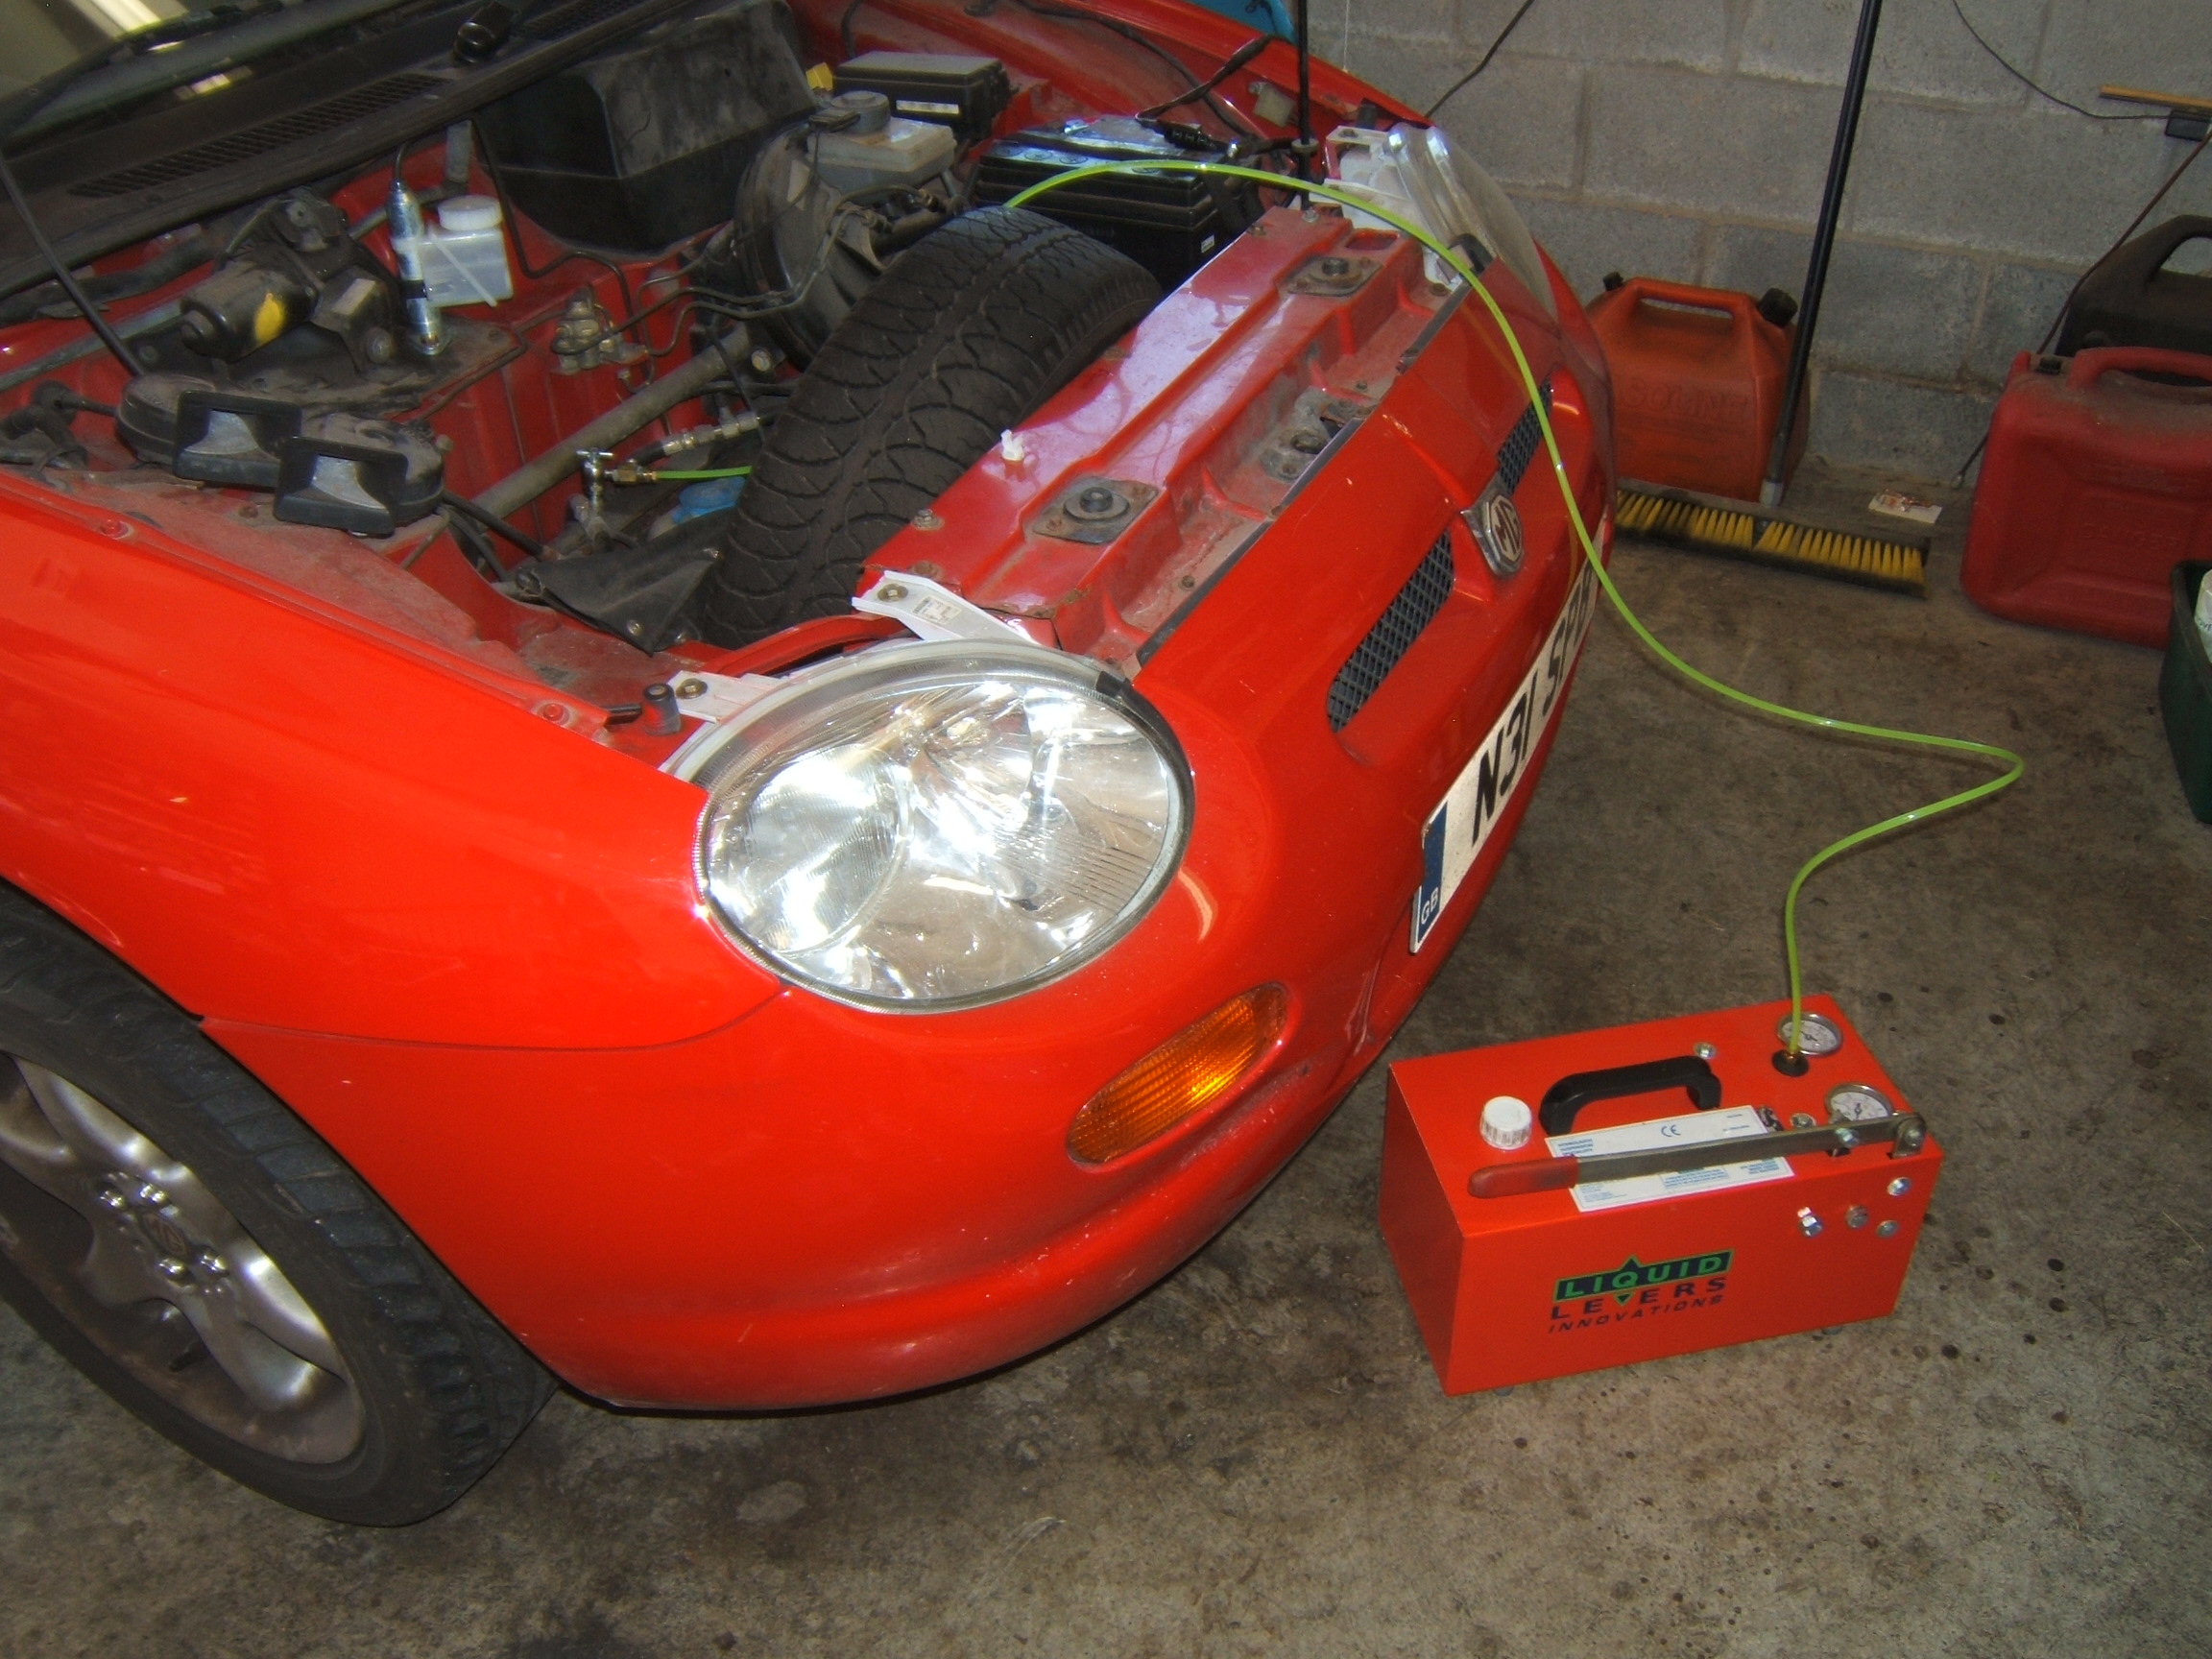 |
De-pressurising using the proper tool. If this Suplex kit works, then quite frankly that tool will have been a waste of money as the milk jug trick with a rag and safety goggles works quite well! Don't be fooled by the colour of the fluid in the tube - most of the fluid that came out was nasty and there was quite a bit of it, which suggests near complete nitrogen depletion in the spheres. |
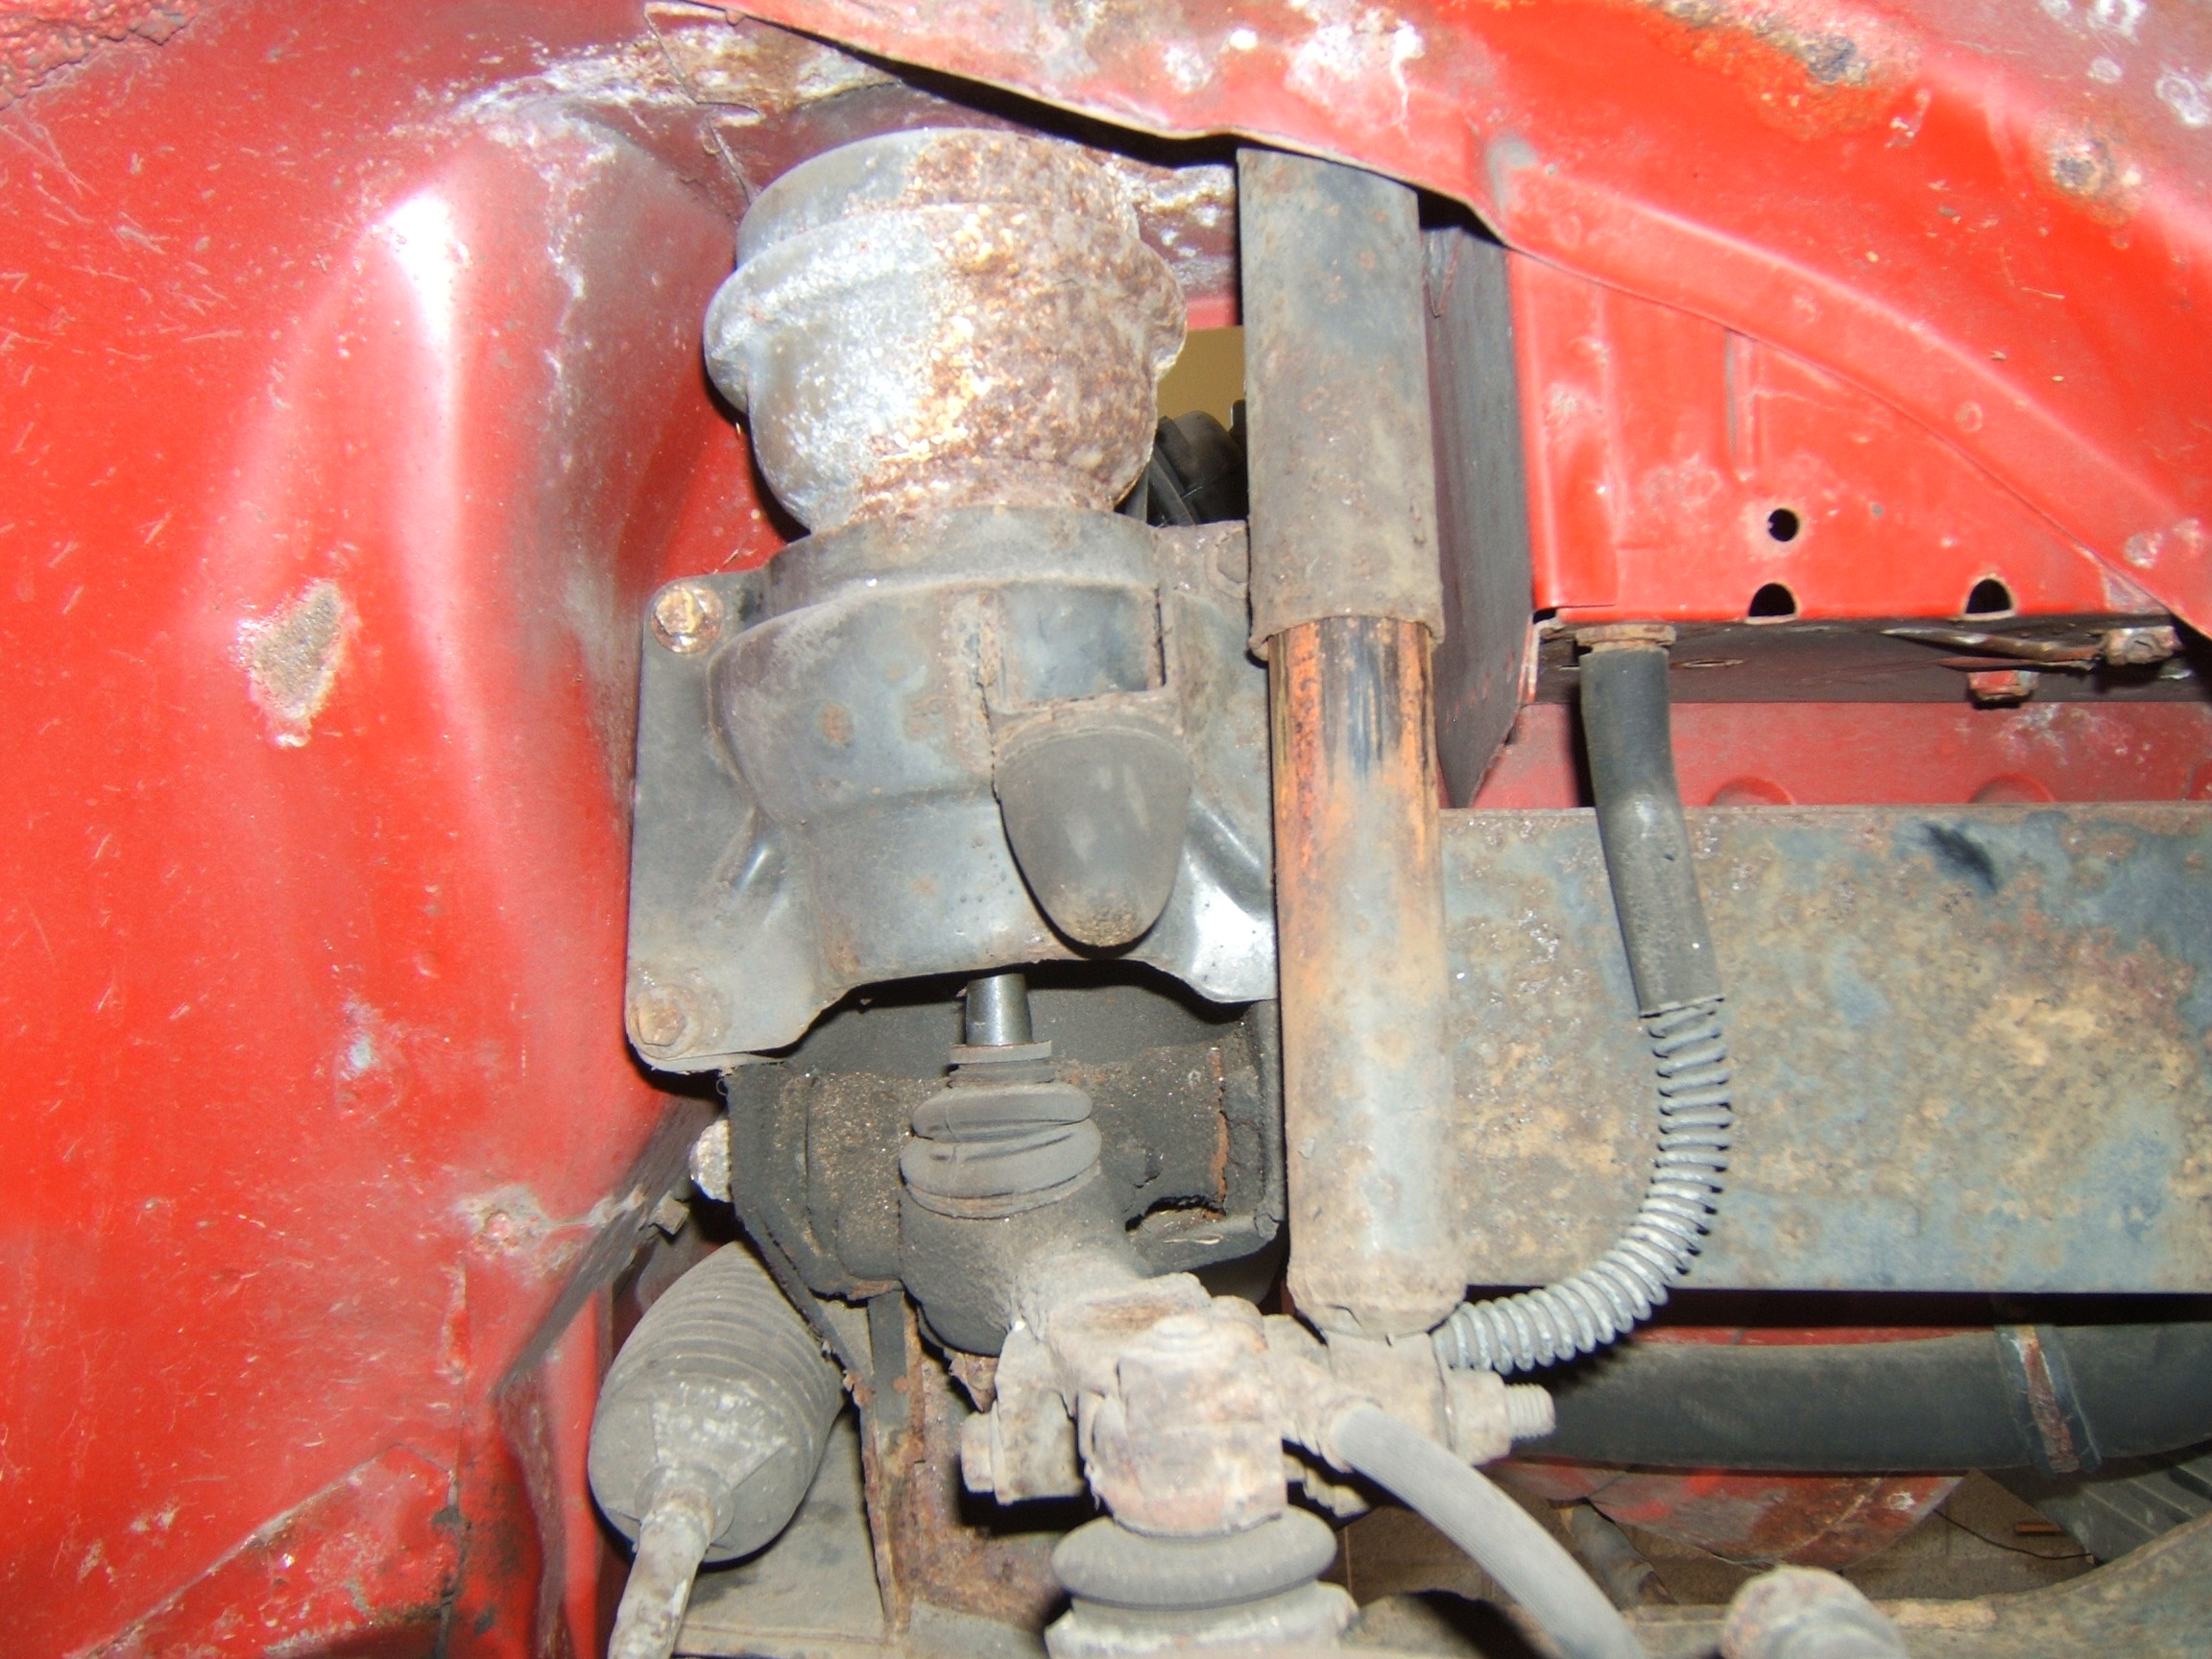 |
With the wheelarch liner removed, one can see that this twenty year old MGF's suspension has seen better days. |
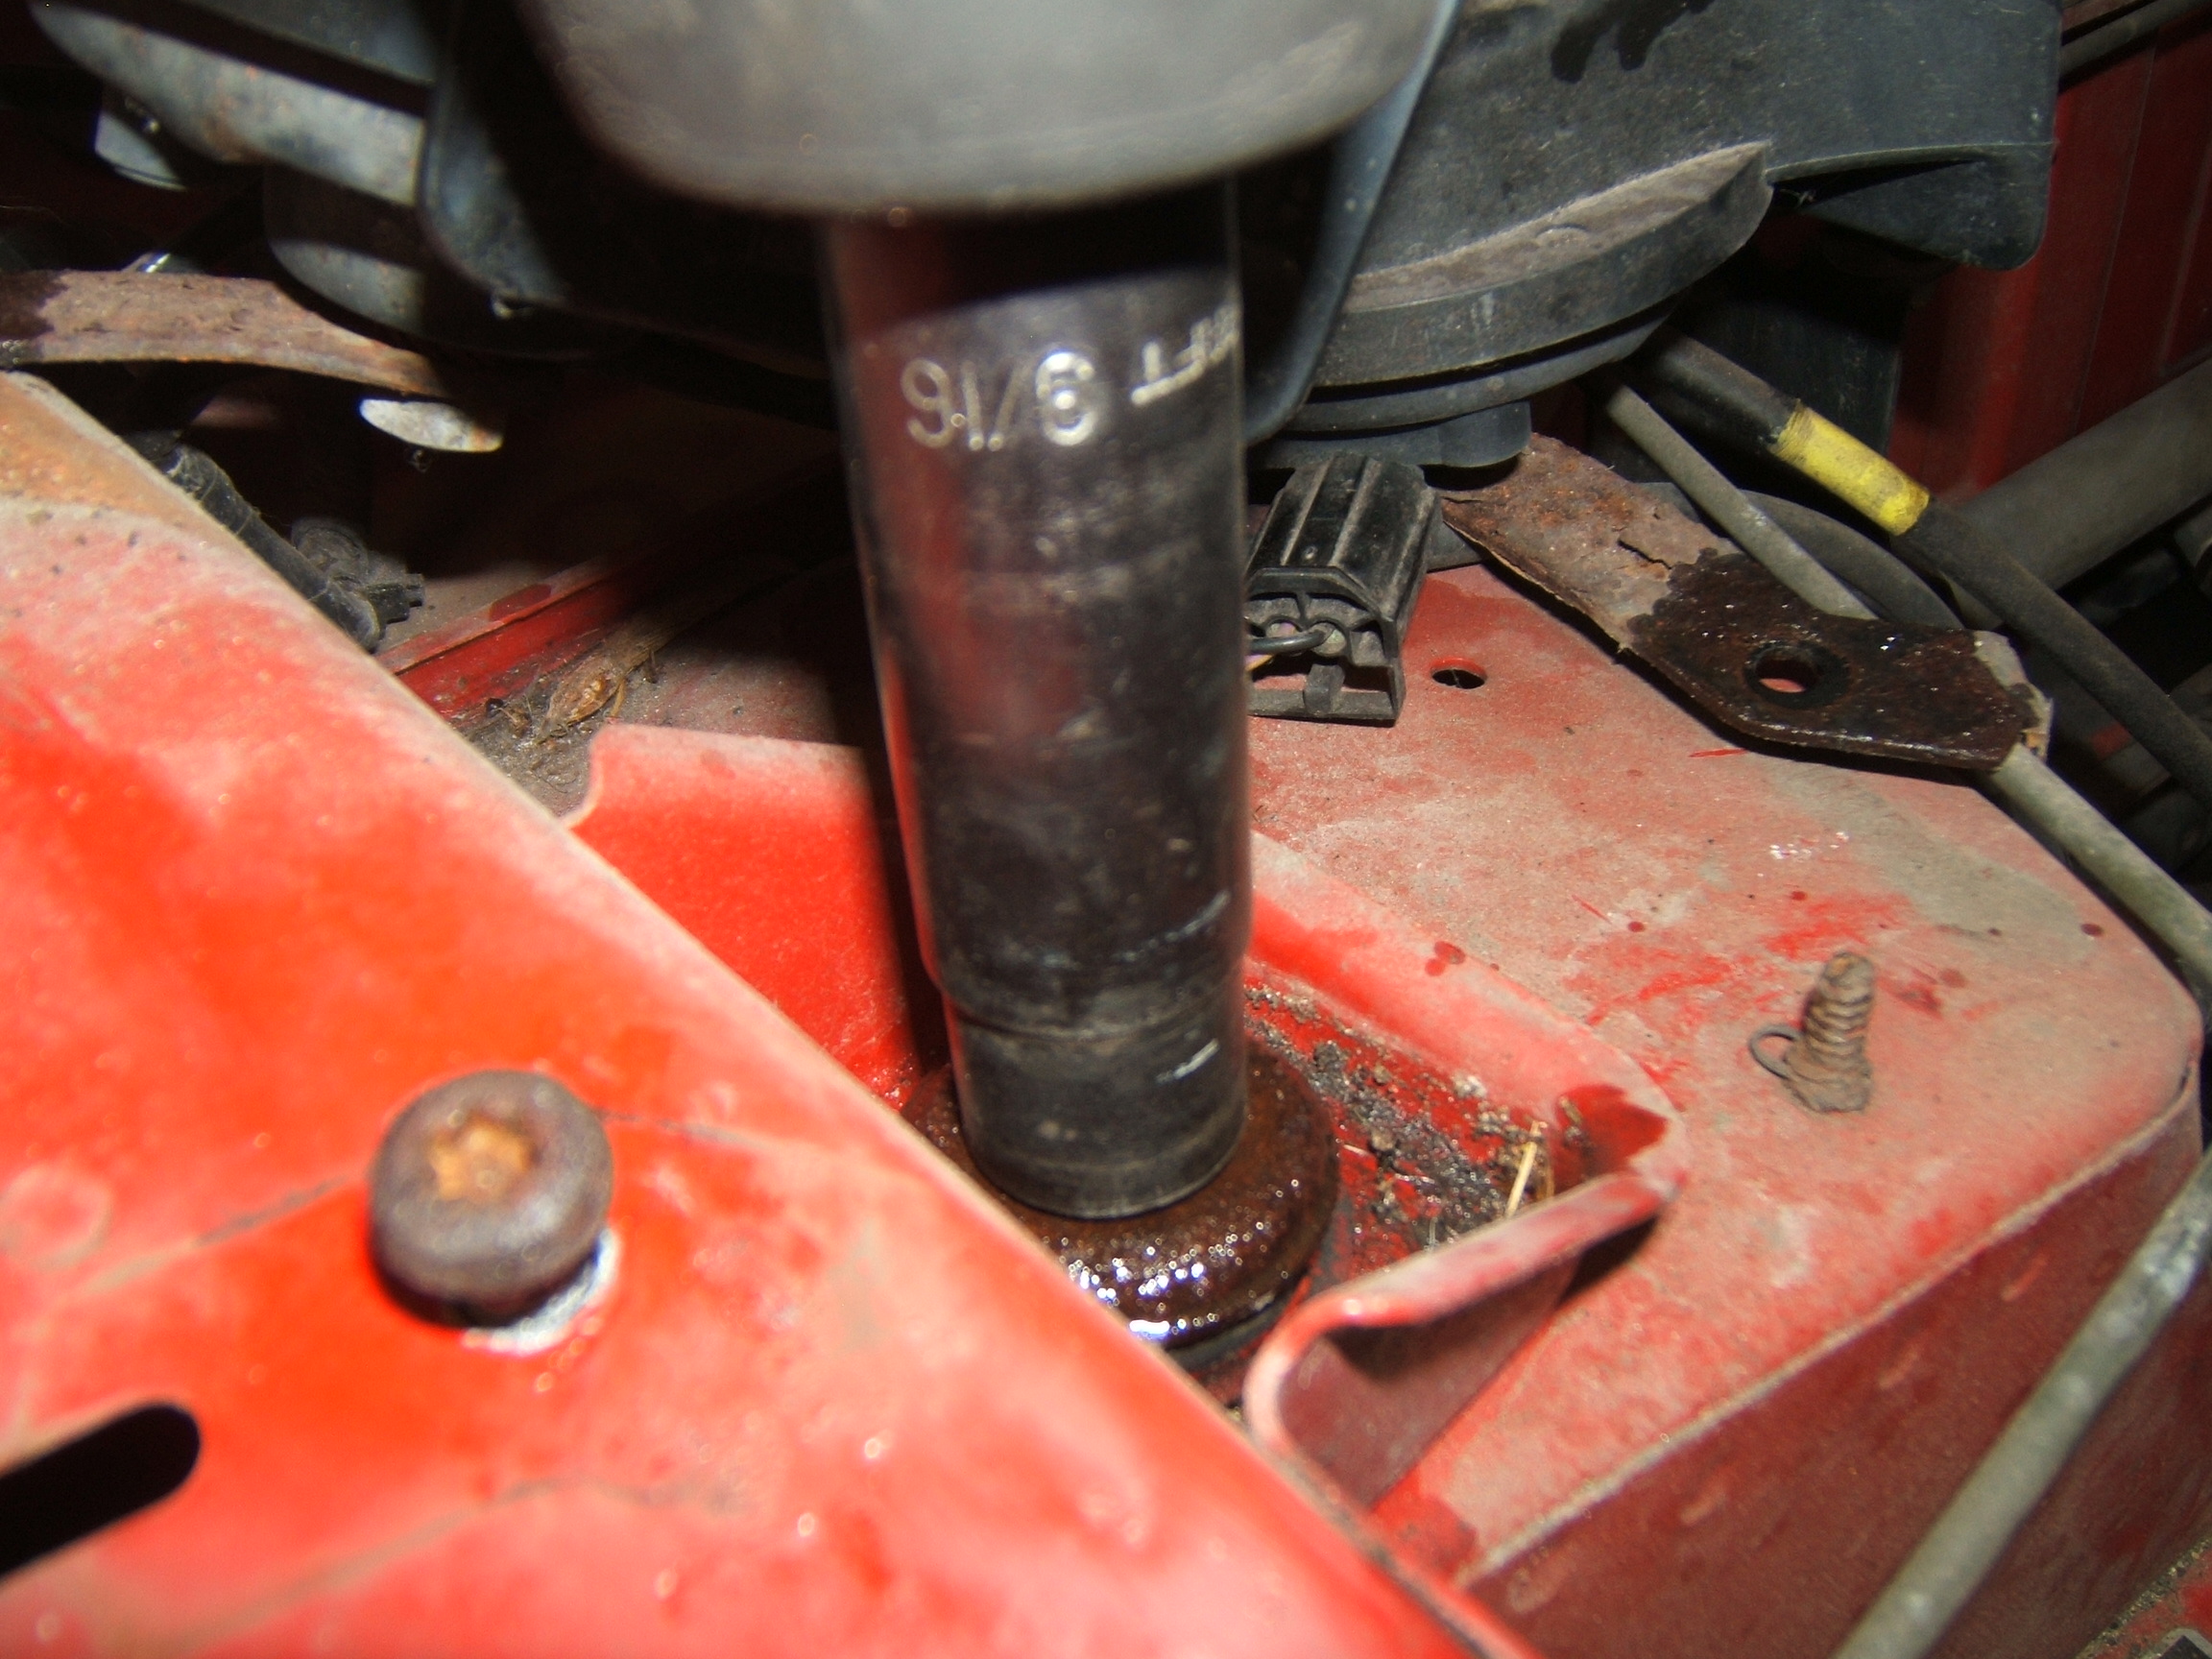 |
It is necessary to remove the front horn bracket and loosen the rear one to access the right front upper damper nut. Odd that it took a 9/16 inch socket on a 1995 car! On the left front, an impact socket will get the upper damper nut off without disturbing the fuse box, although it is best to do this before removing the lower damper bolt.. |
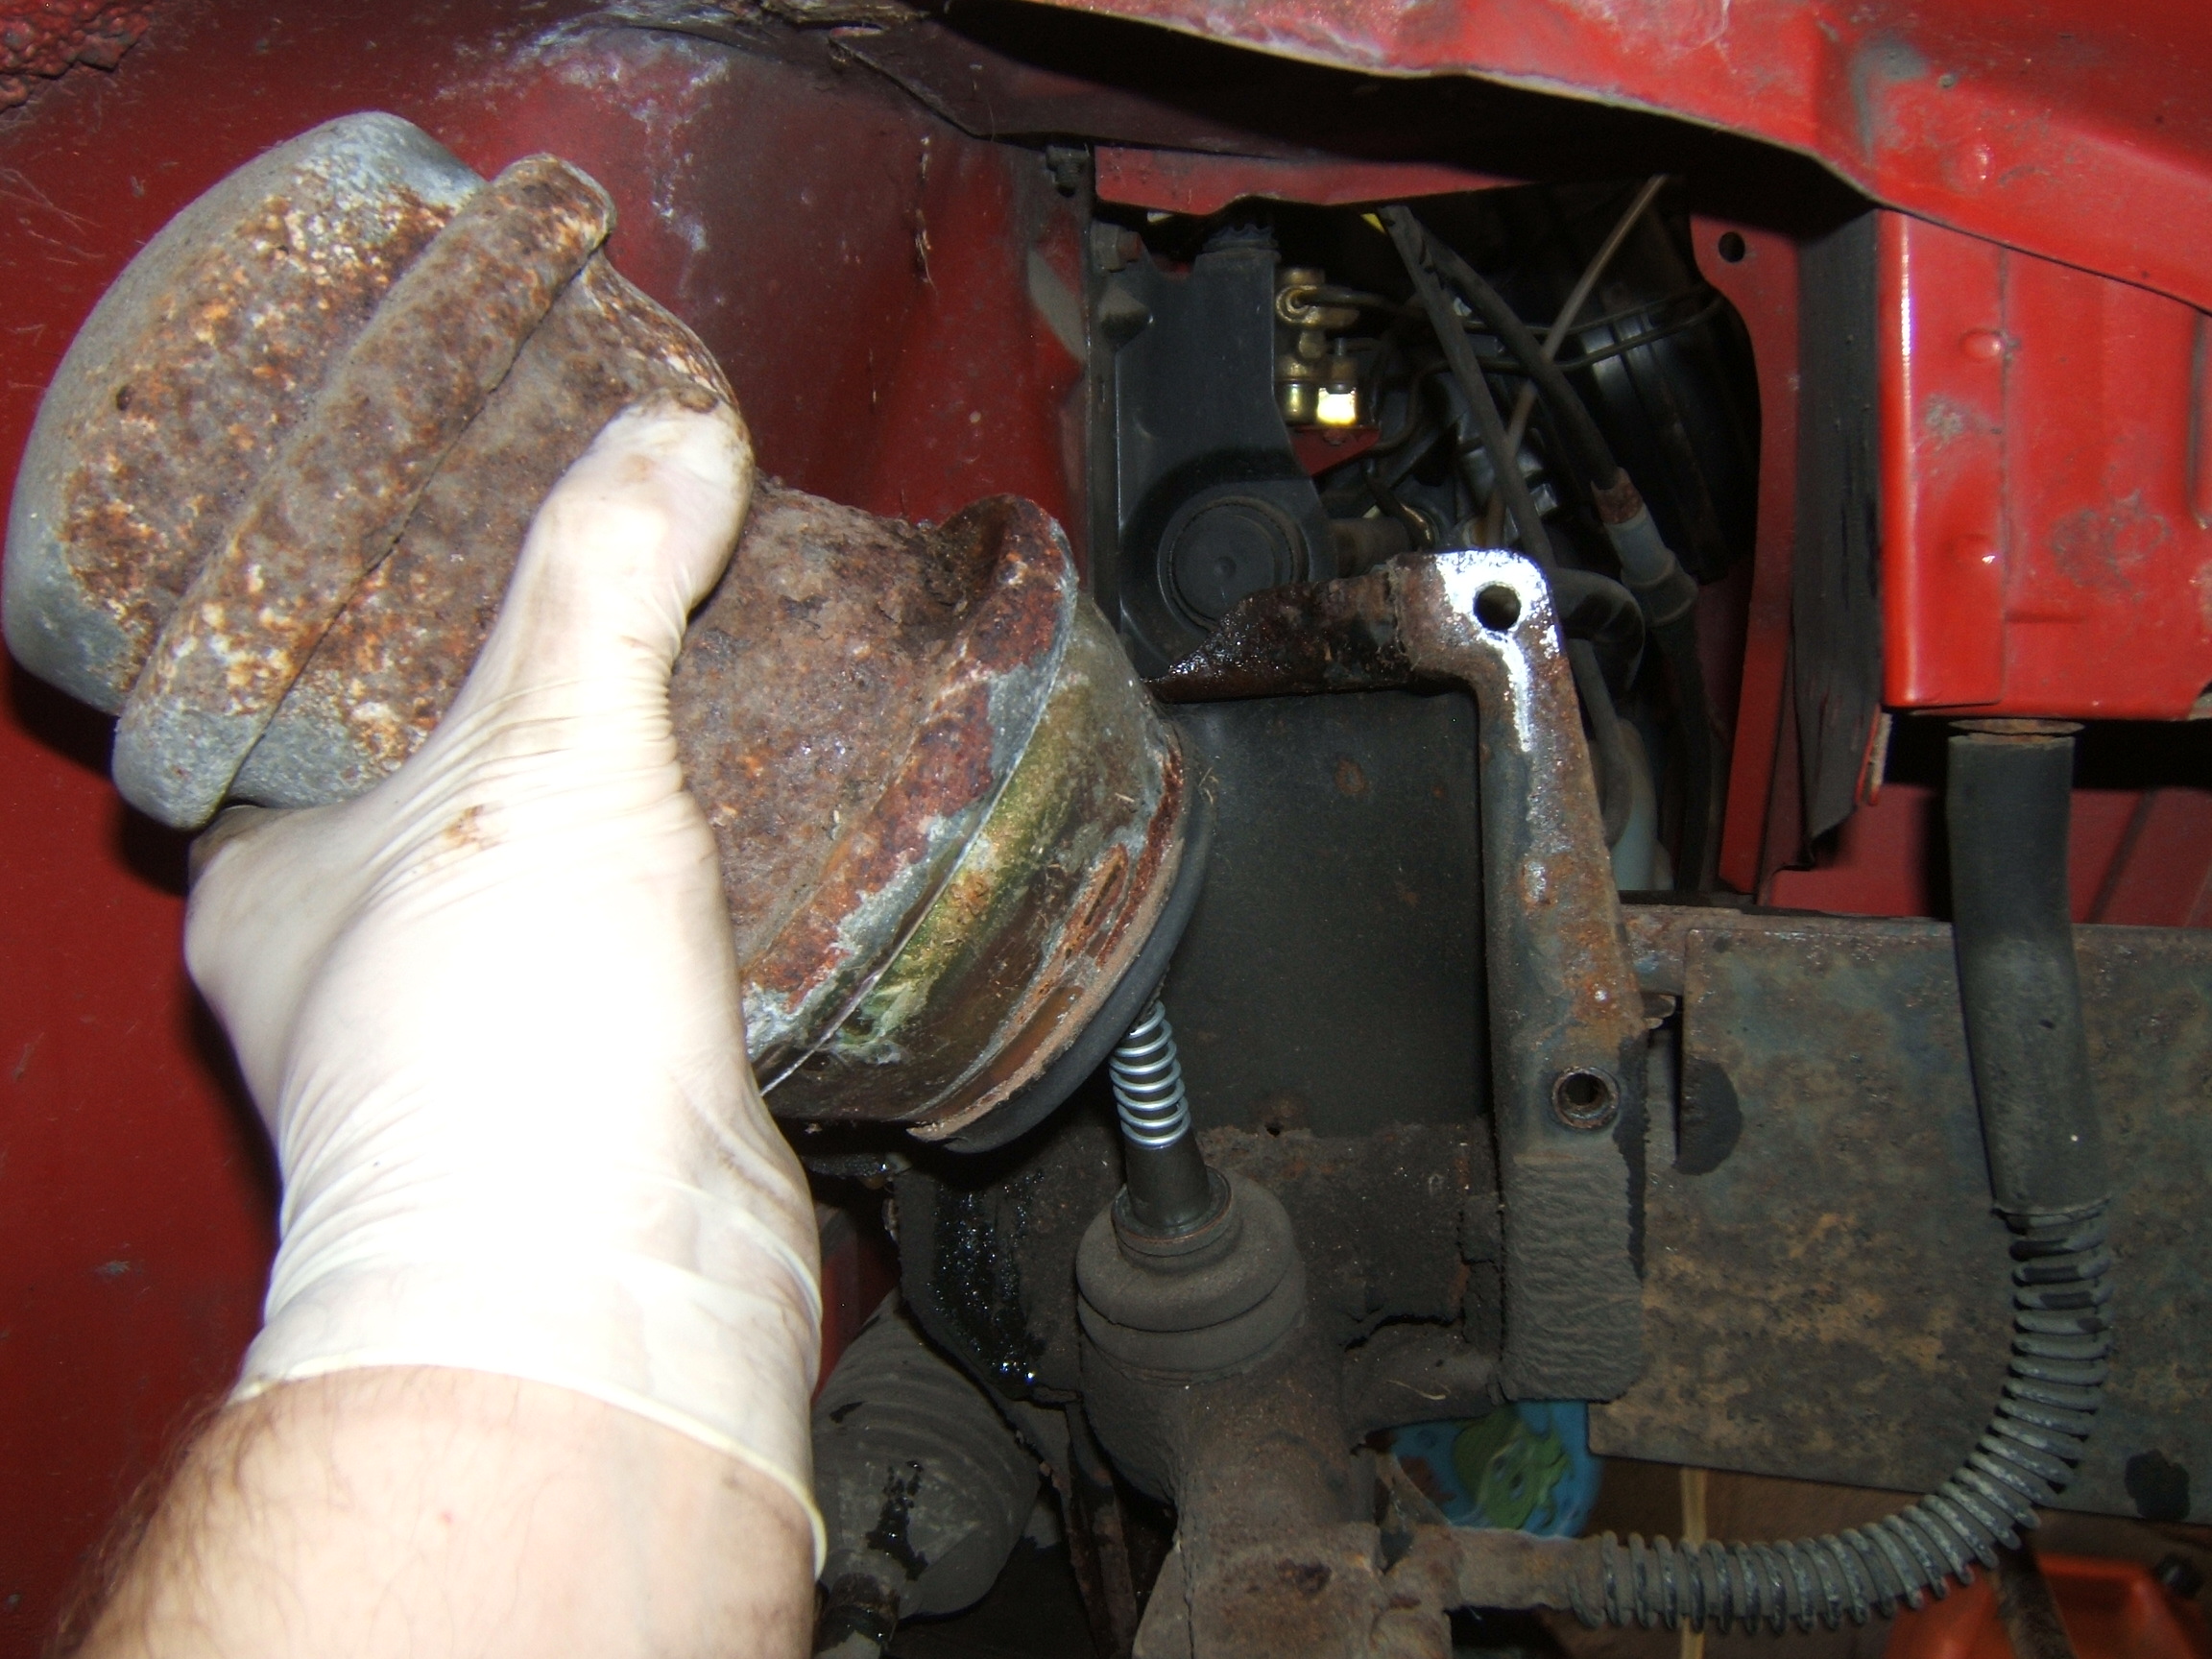 |
With the retaining plate removed the rusty old hydragas sphere can be removed. This is a whole lot easier at the front than the rear!. |
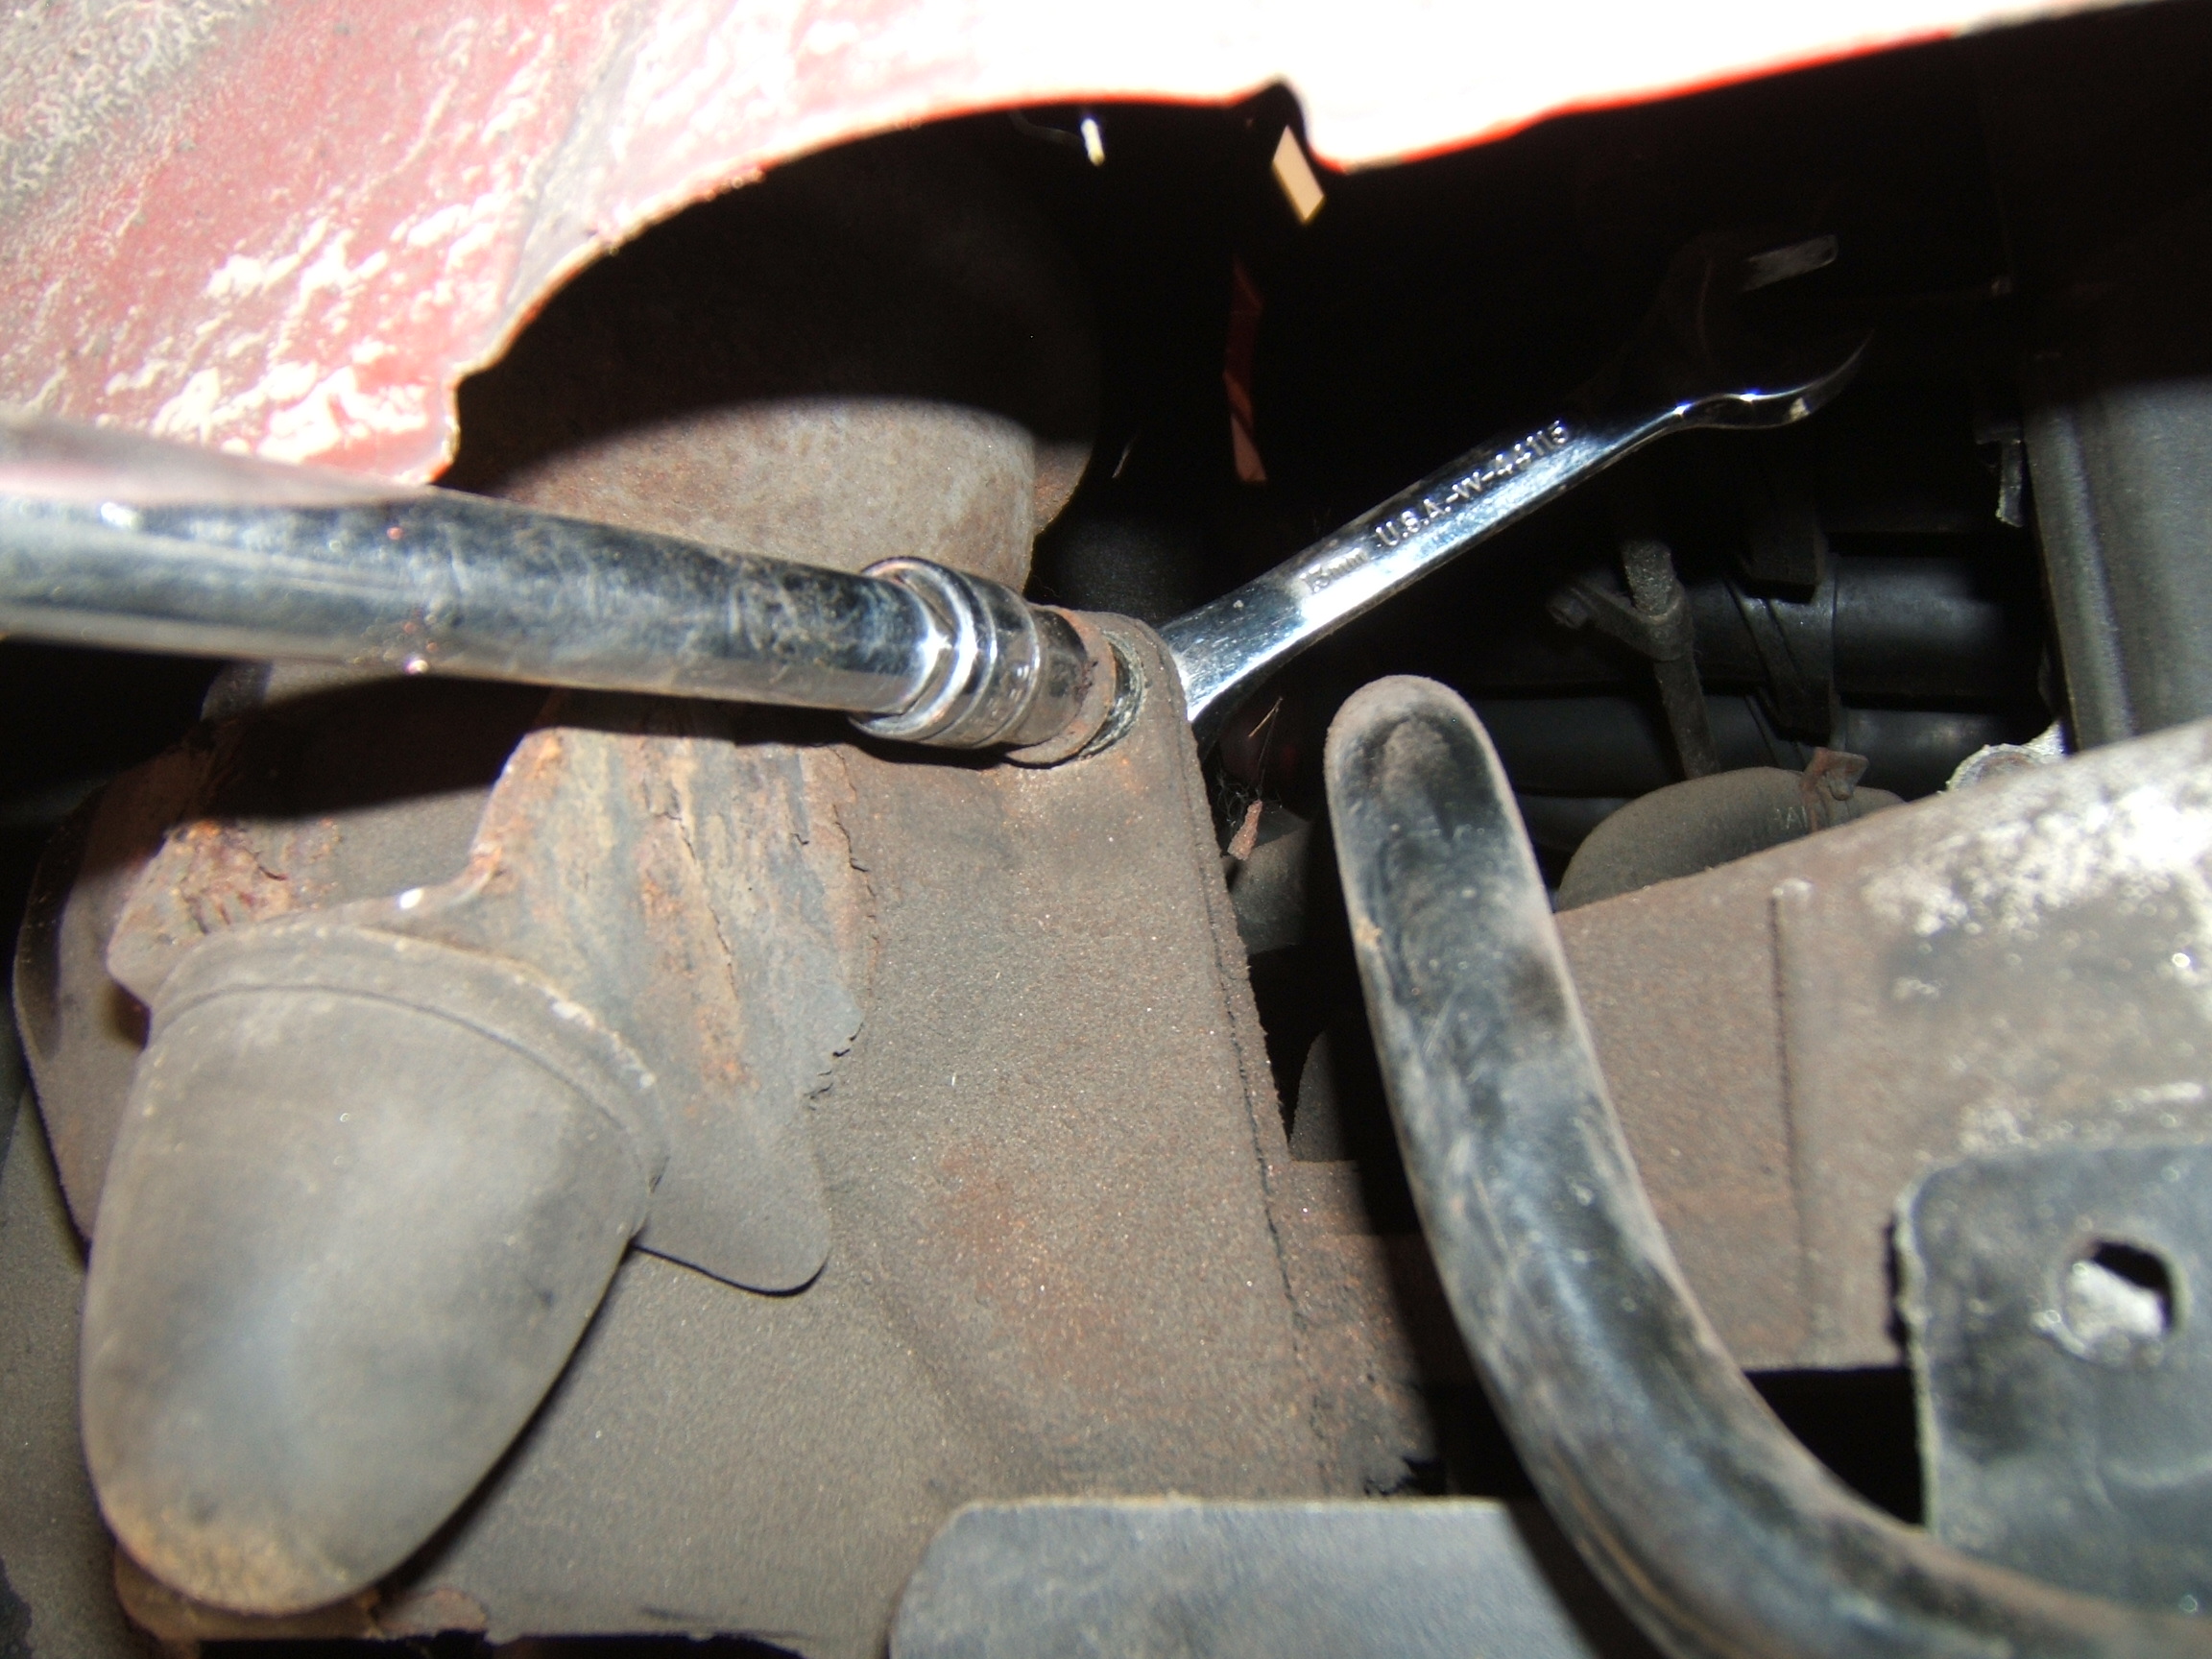 |
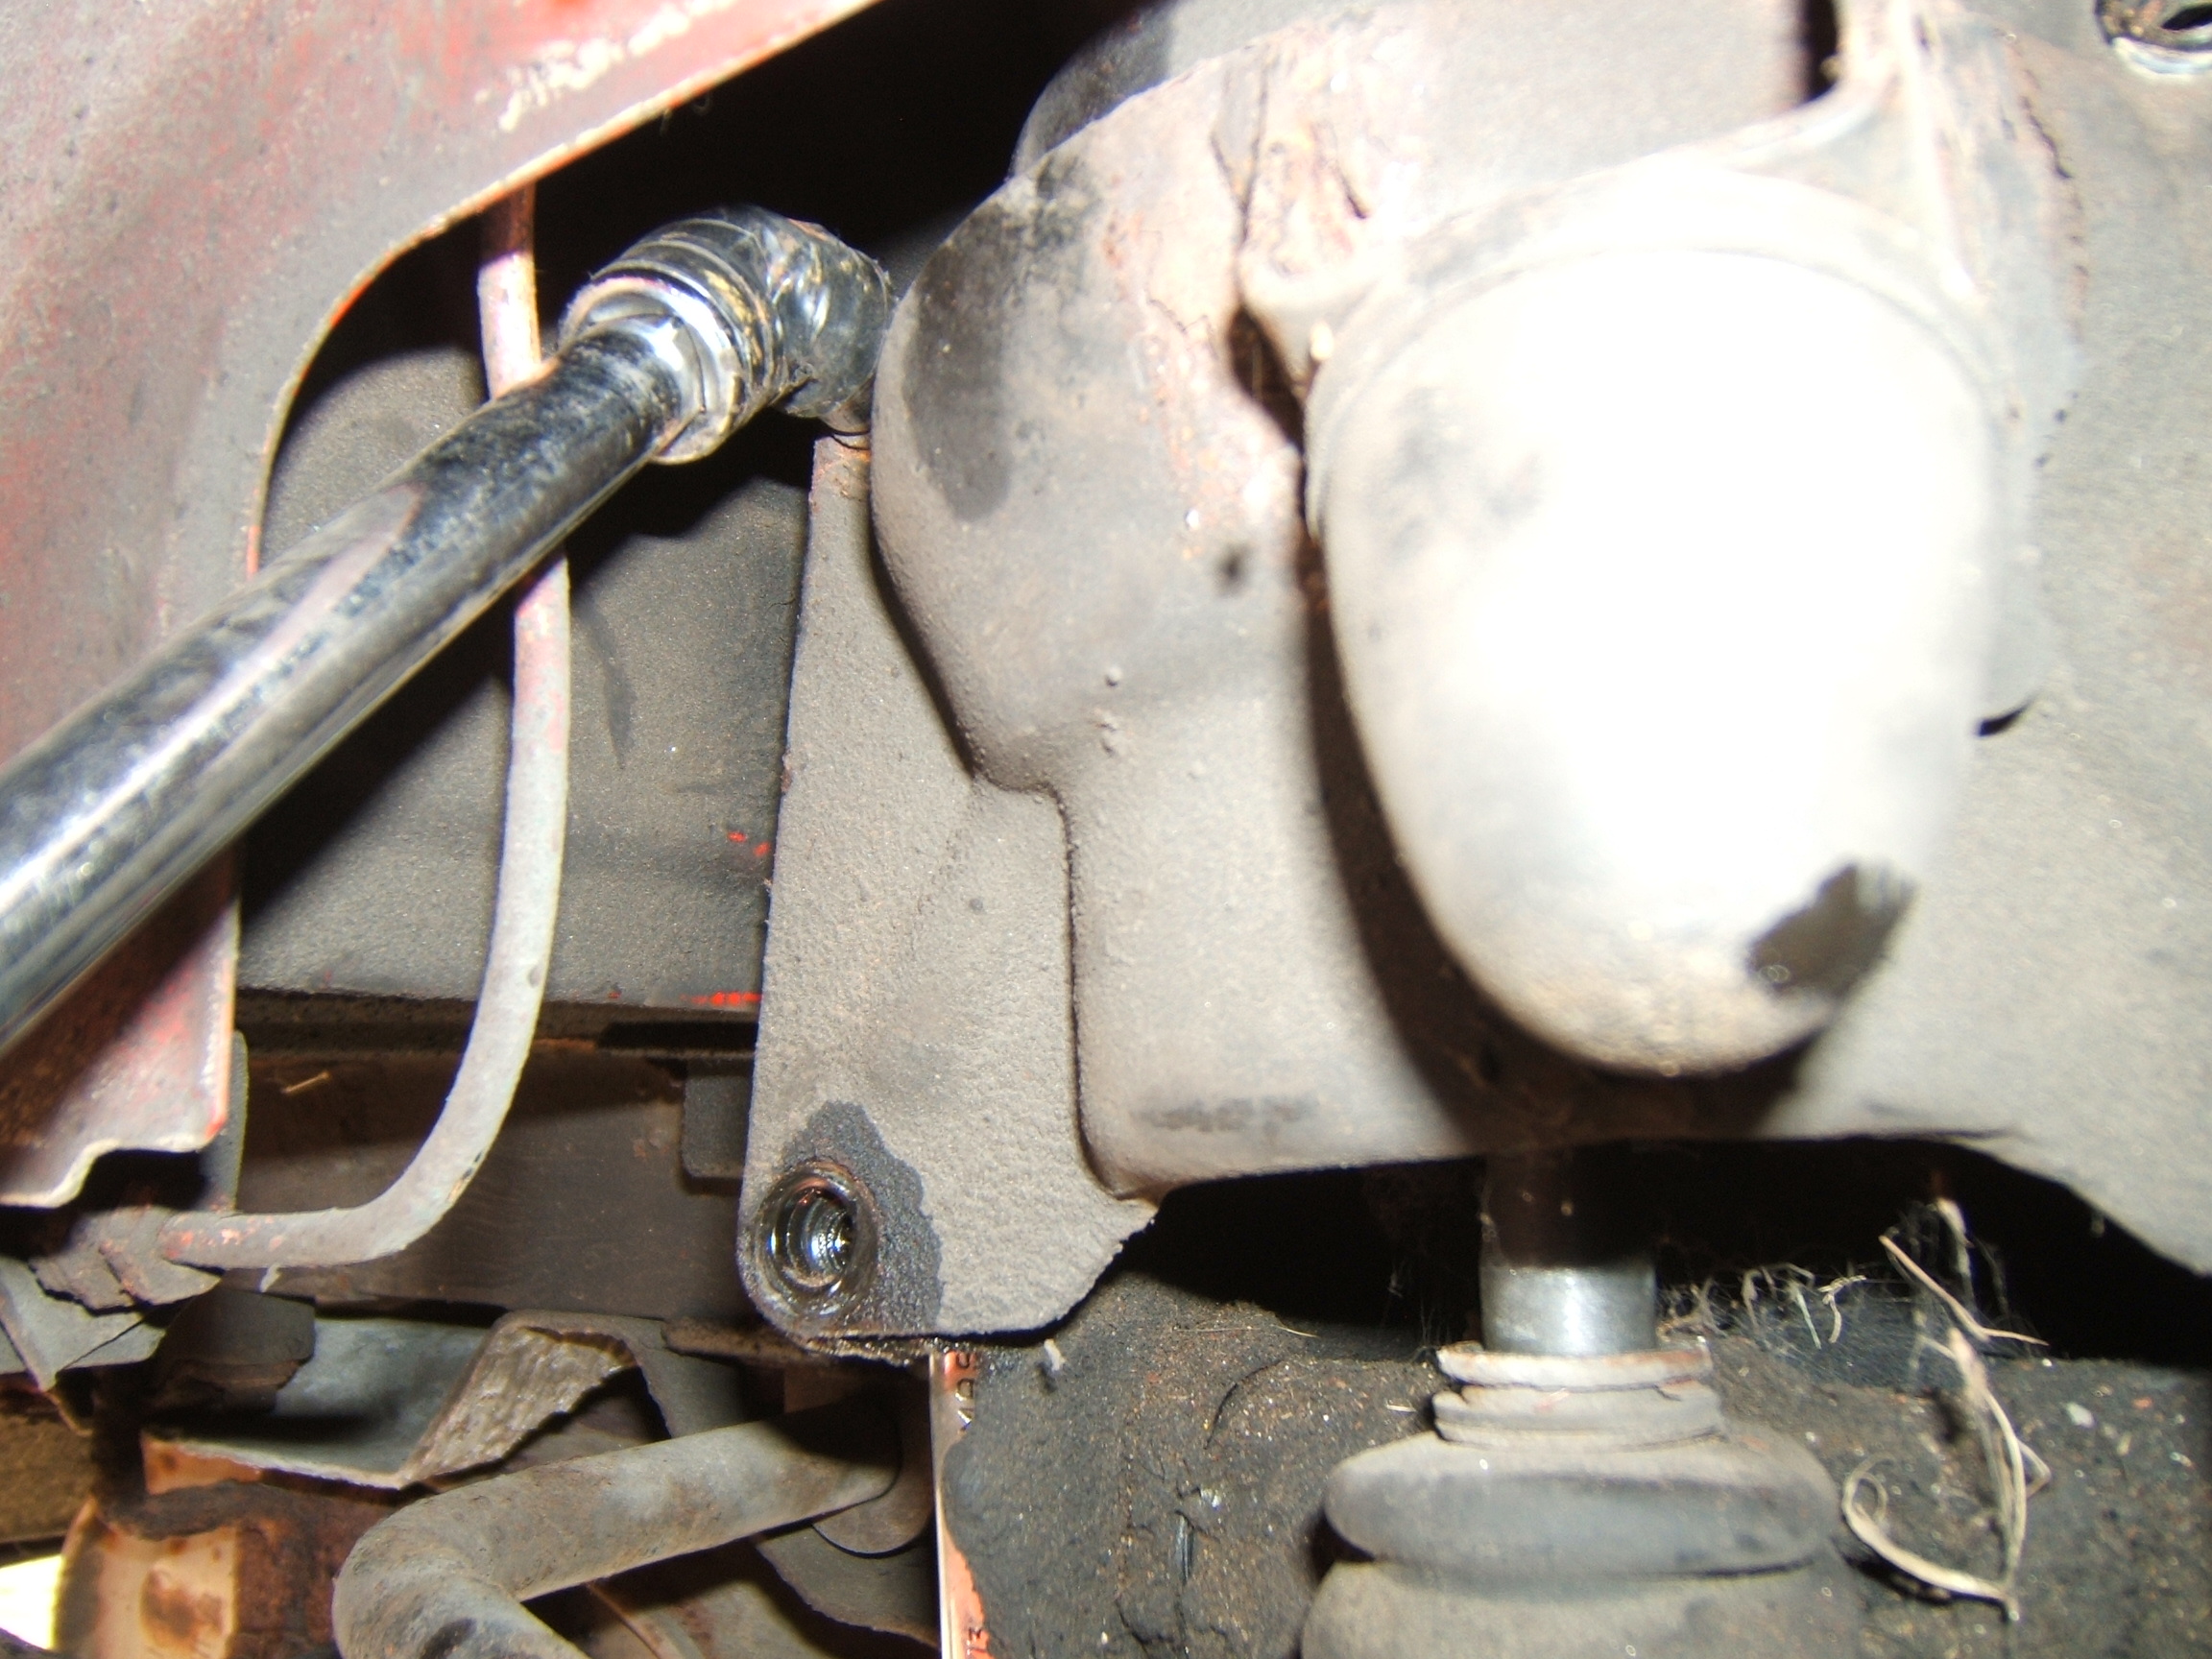
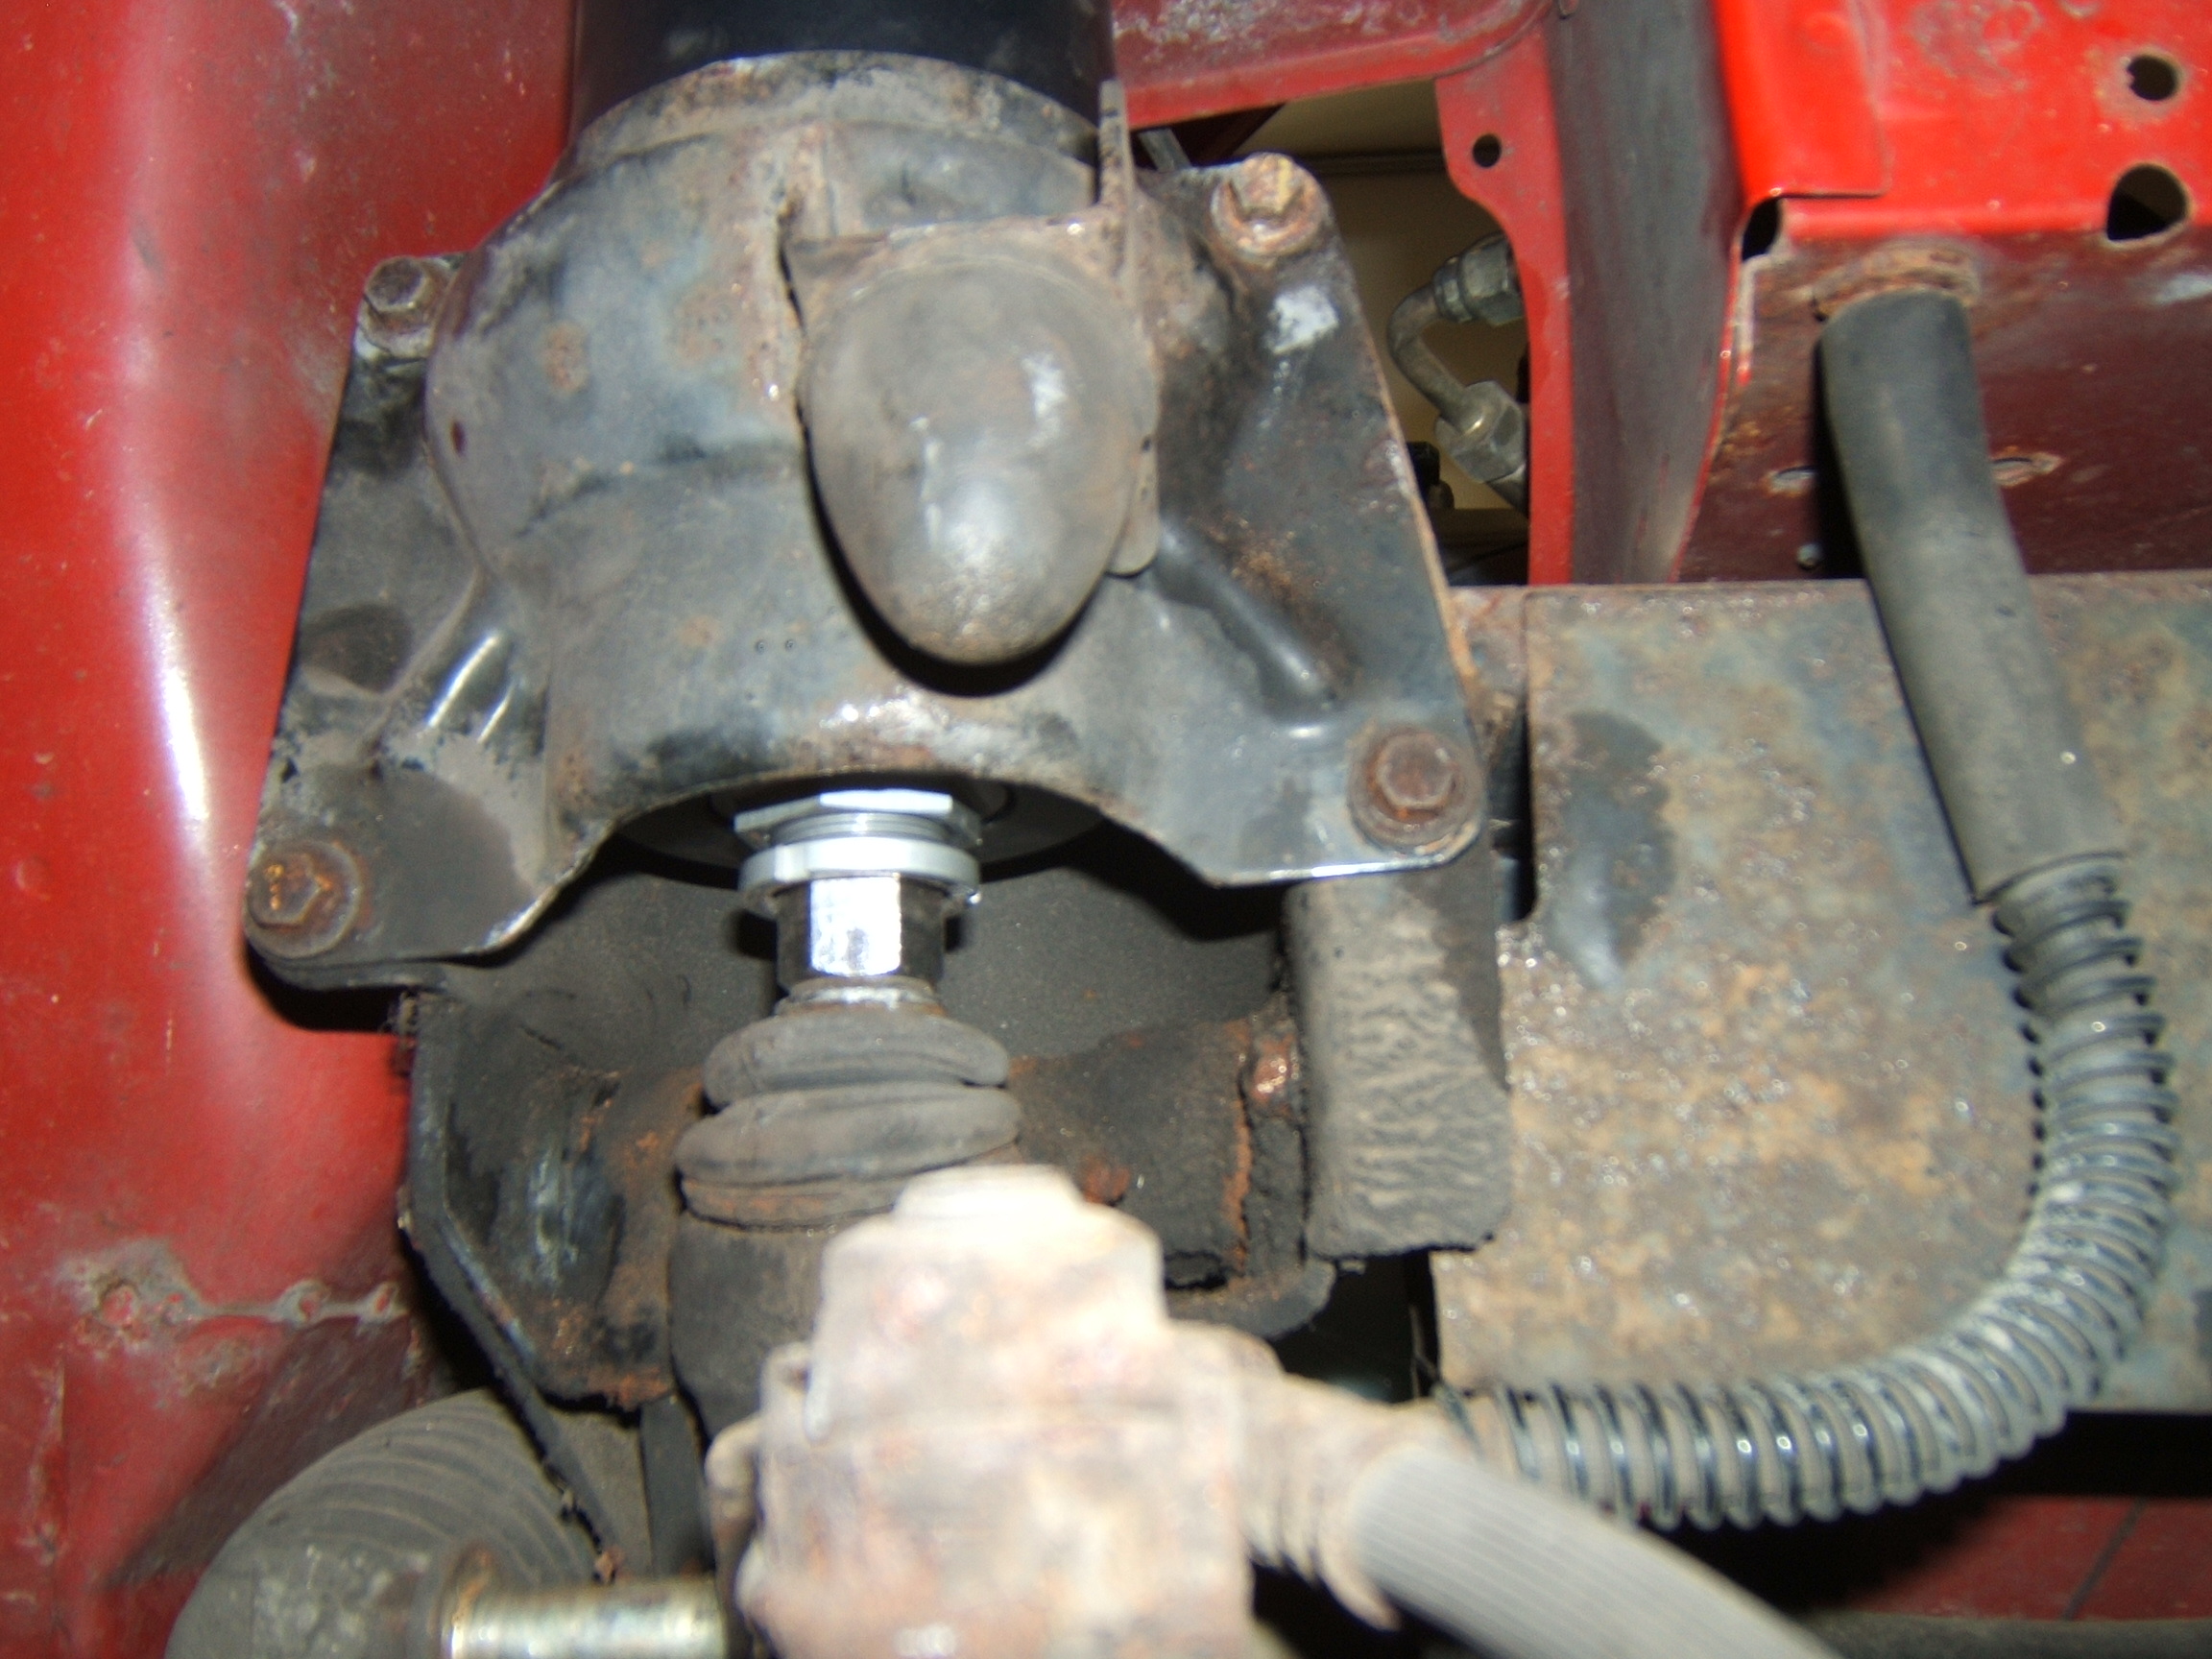
This shows the right rear. The right upper bolt can be accessed quite easily with an extension, keeping in mind that the top bolts have a nut behind them, whereas the lower ones have a captive nut welded to the subframe. |
 |
The left upper needs a swivel socket. Keep in mind that these 8mm bolts have a 10mm A/F head, yet a 13mm A/F wrench is needed for the nut! This means it is quite easy to round off the bolt head if one is not careful. Fortunately, this only happened on one out of sixteen on this car and it was a front one. |
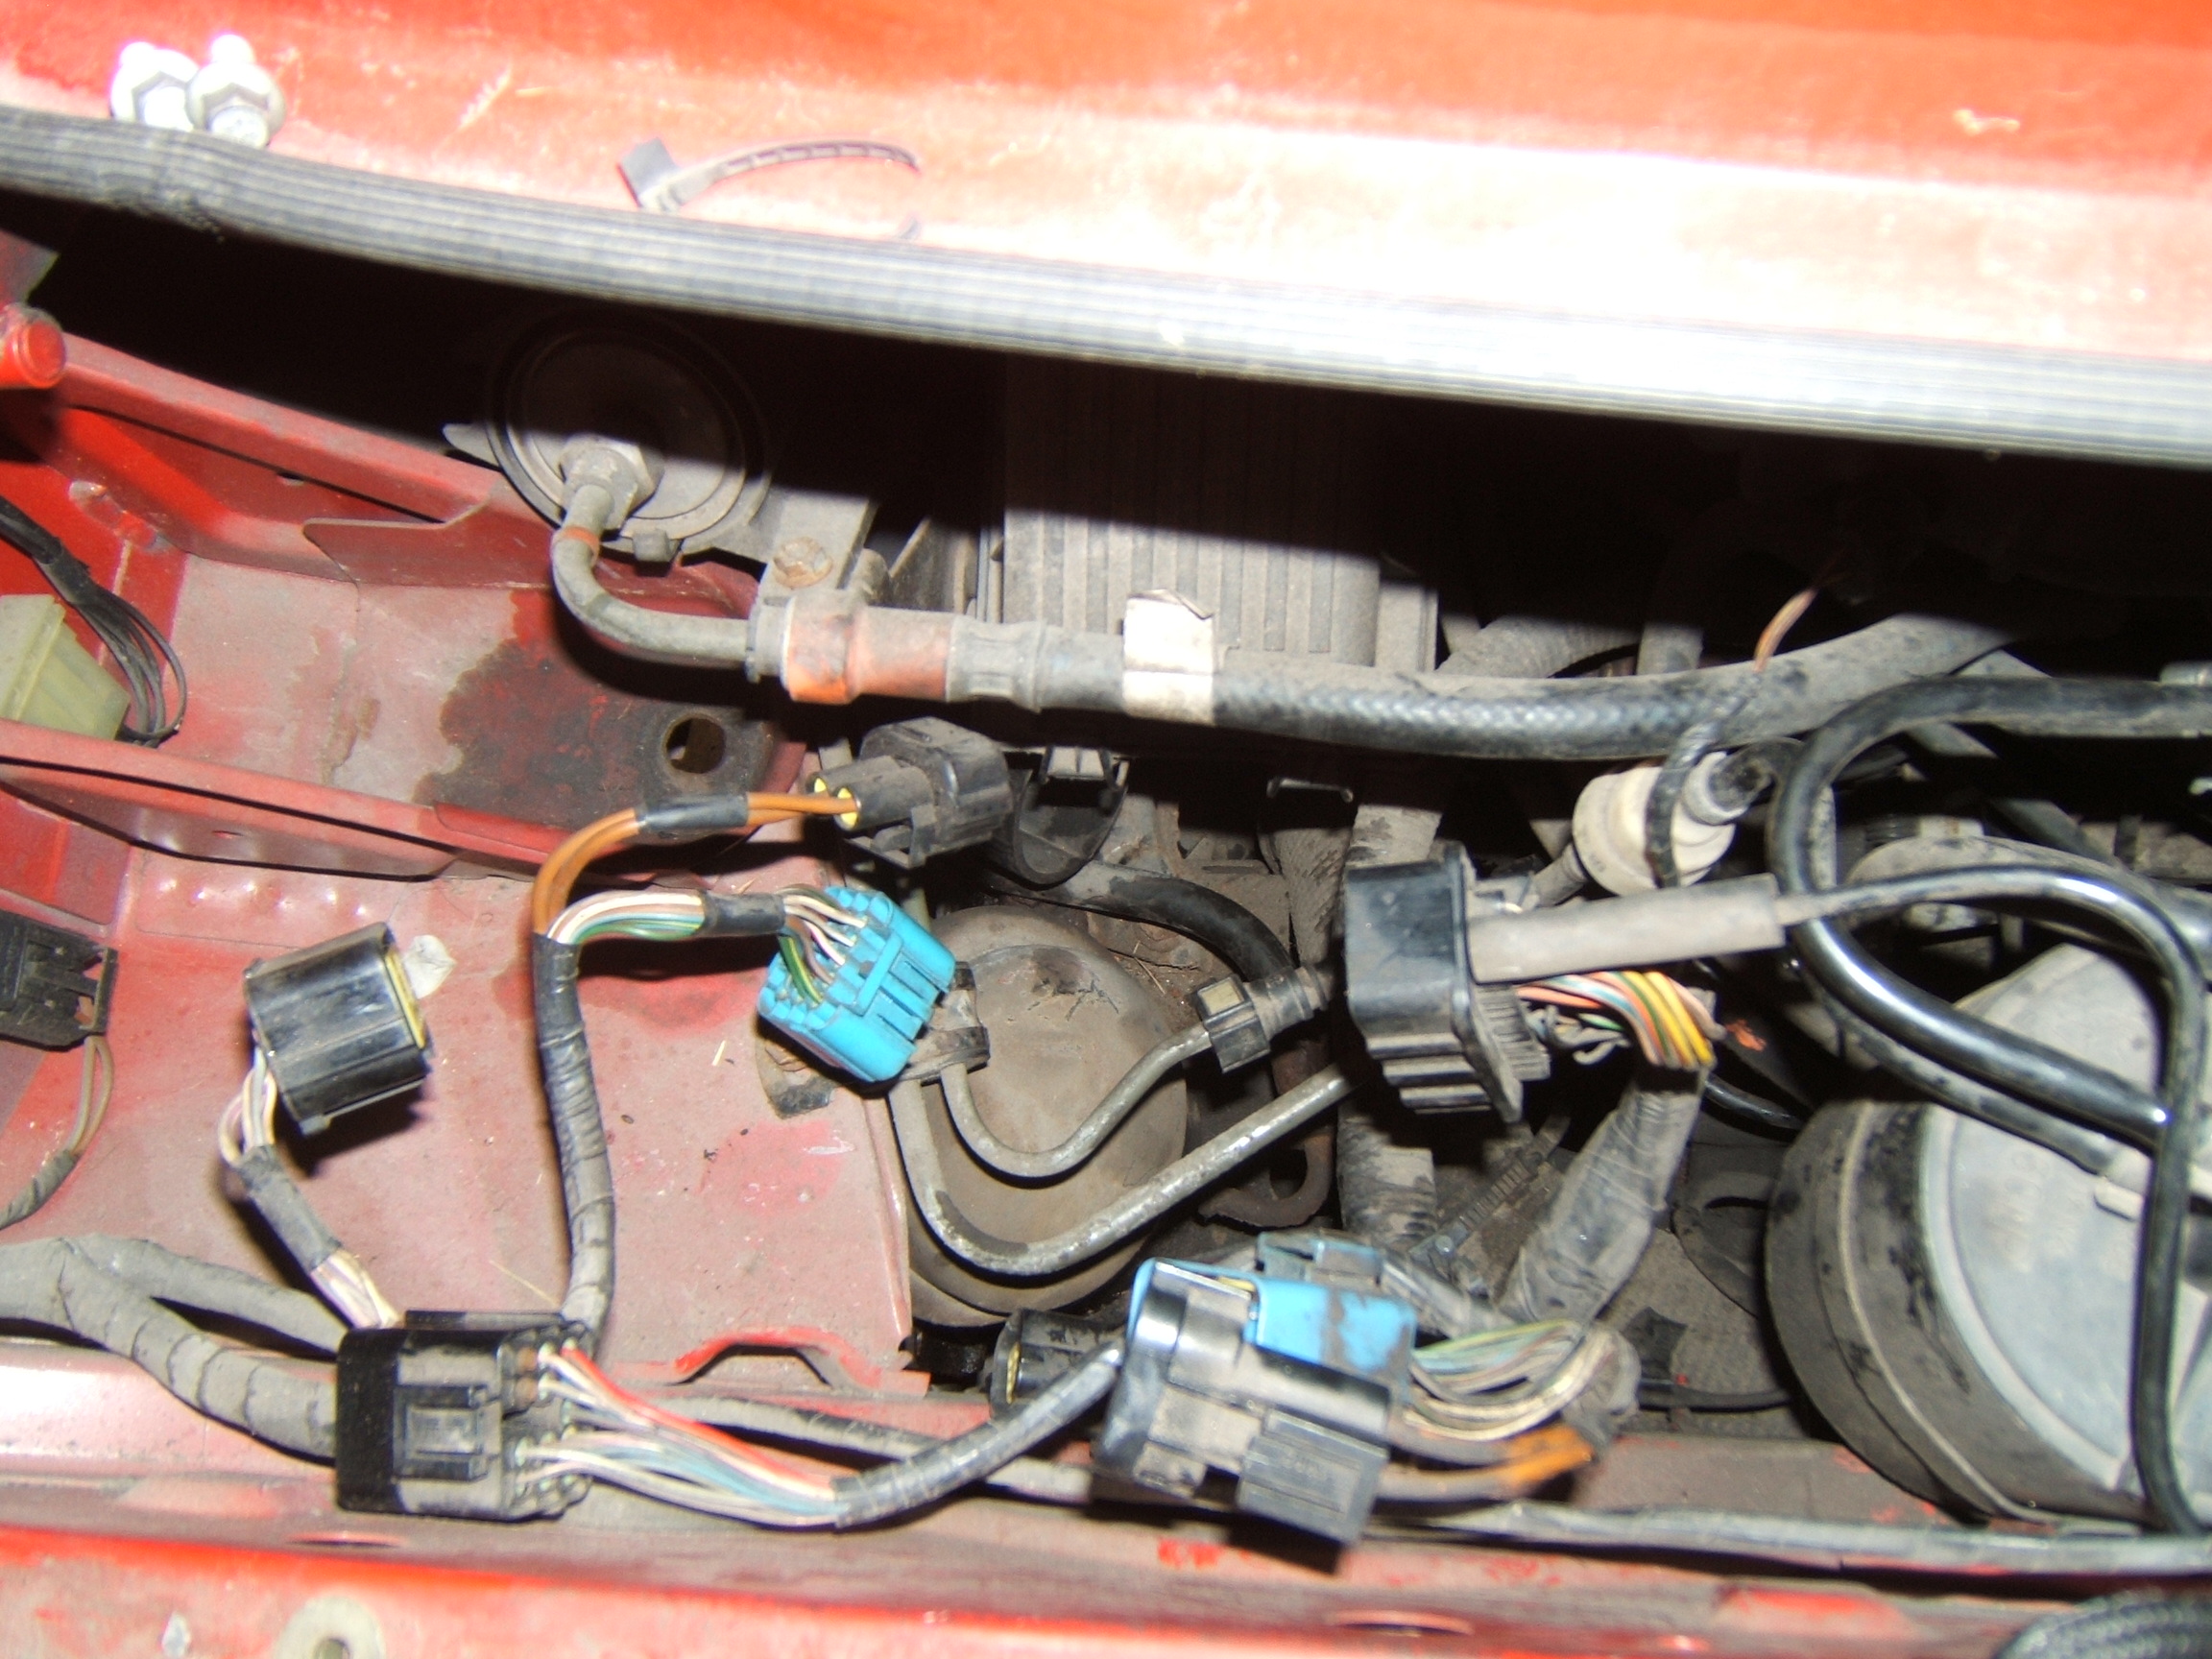 |
At the left rear it is necessary to remove the ECM and associated bracket. The sphere can then be snaked across almost the entire engine compartment before finally being withdrawn vertically next to the oil filler neck! At the right rear it is marginally easier once the coolant tank is loosened & set aside as far as the hoses will allow. |
So with all four hydragas spheres & dampers removed it is time to install the Suplex.
At this point it is worth noting that this kit contained version 7 of the instructions in a handy spiral bound booklet although the text & photos are rather small. |
 |
At the front, the Suplex cans can easily be installed at the datum setting of 10mm as per Version 3 instructions dated June 2011 and found online. |
 |
Version 7 instructions state a datum setting of 4mm which makes getting a wrench on to wind out the adjuster a bit tricky. A 21mm Craftsman open end wrench is about 9mm thick at the jaws. Regardless of which datum setting one chooses, there is no tension on the upper arm and in fact the adjuster is not even fully seated on the knuckle. |
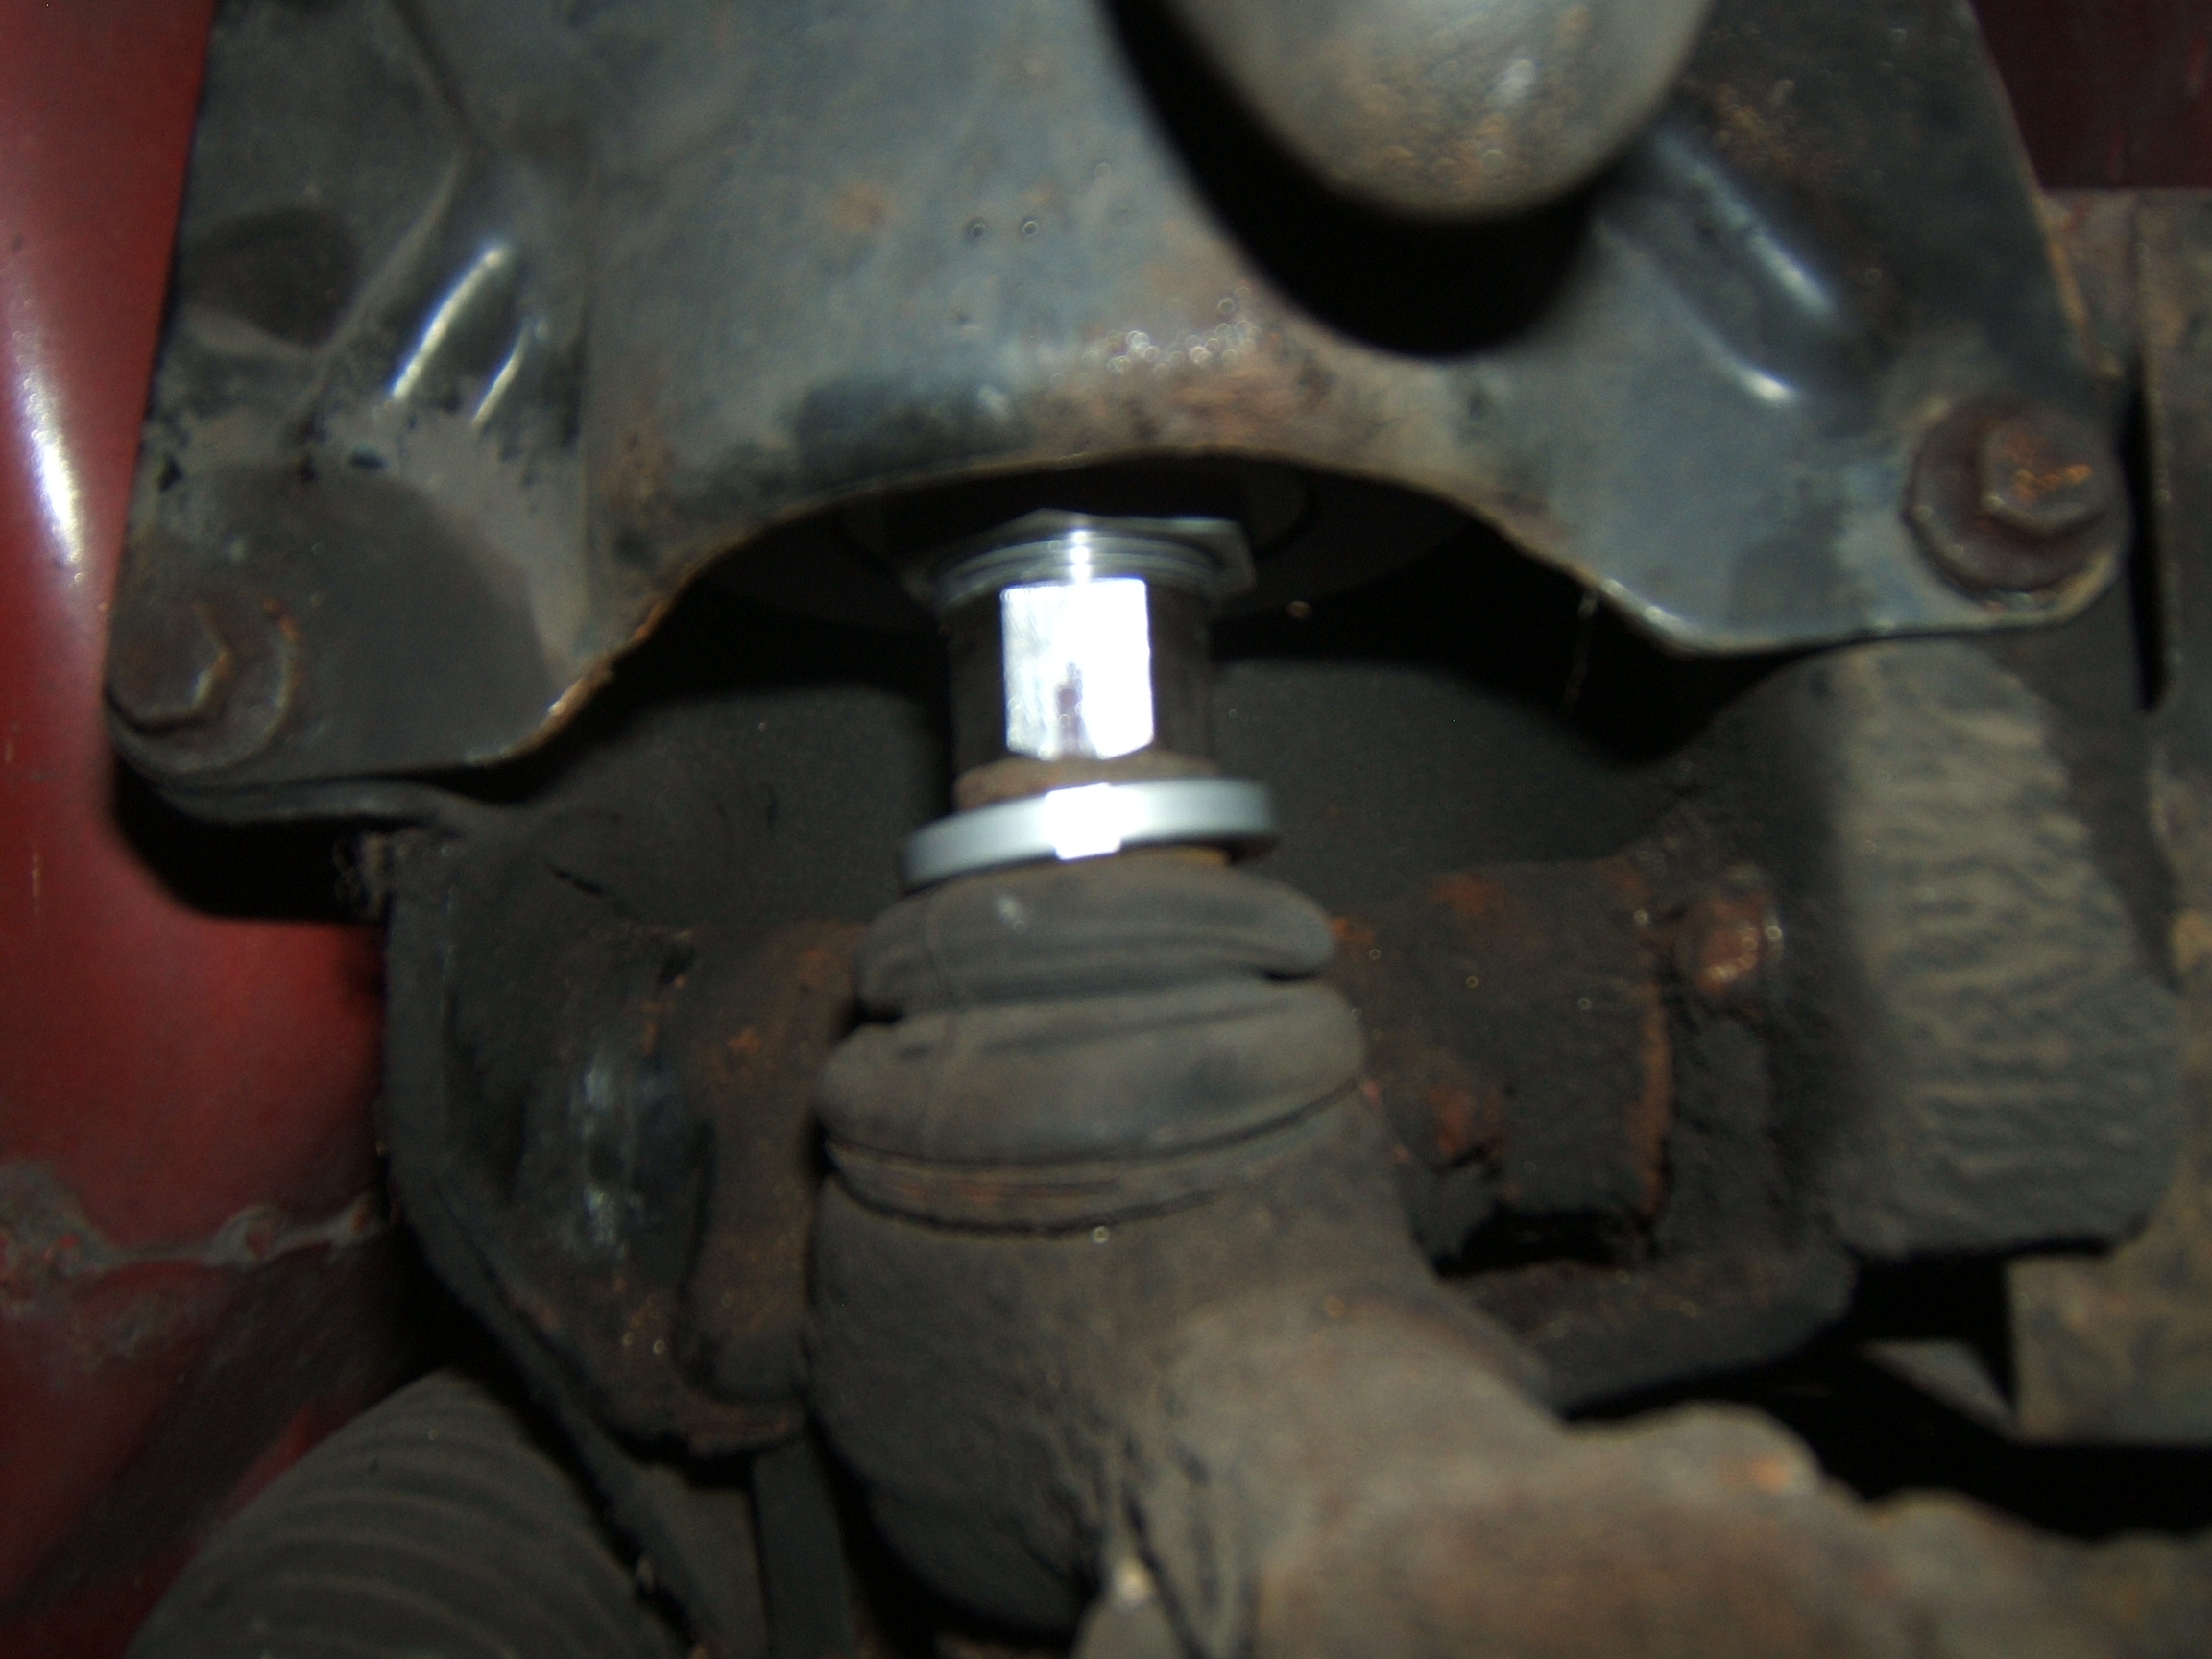 |
Winding out the adjuster six turns looks like this. |
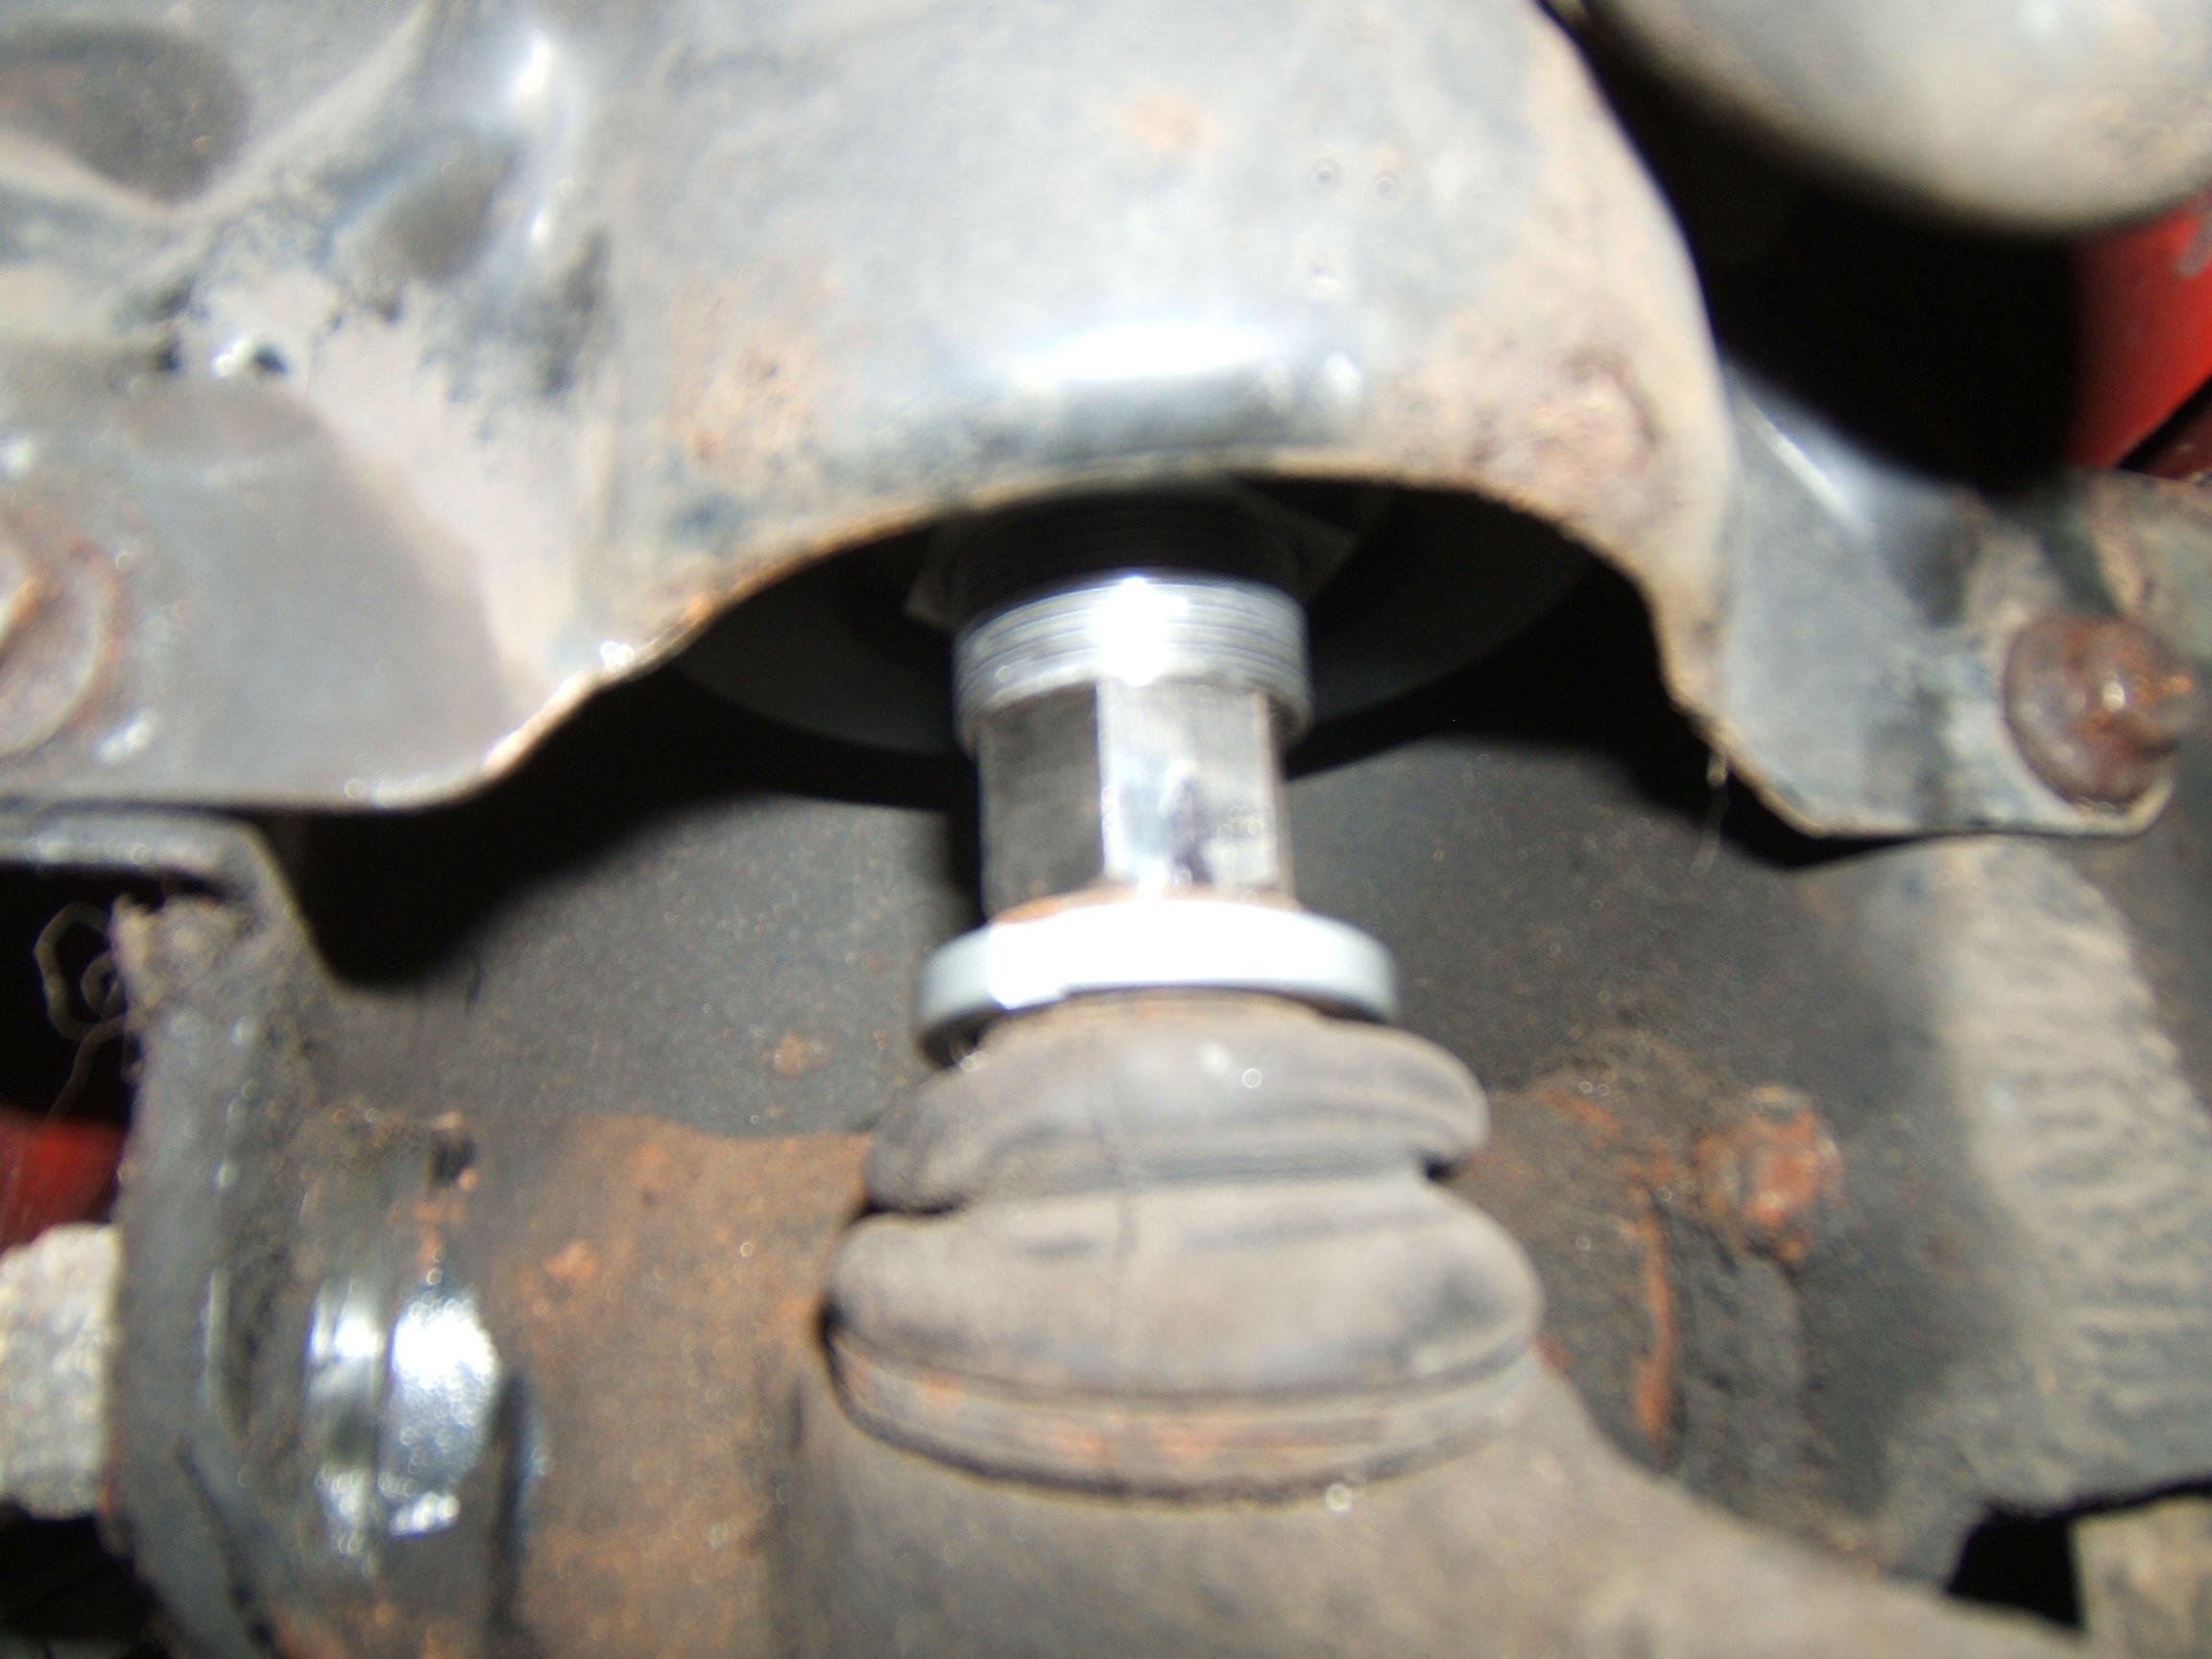 |
At twelve turns.
As for keeping the original spacer, the instructions are contradictory. Step 42 claims it can be retained in both versions, whilst step 11 in later instructions calls for its removal? |
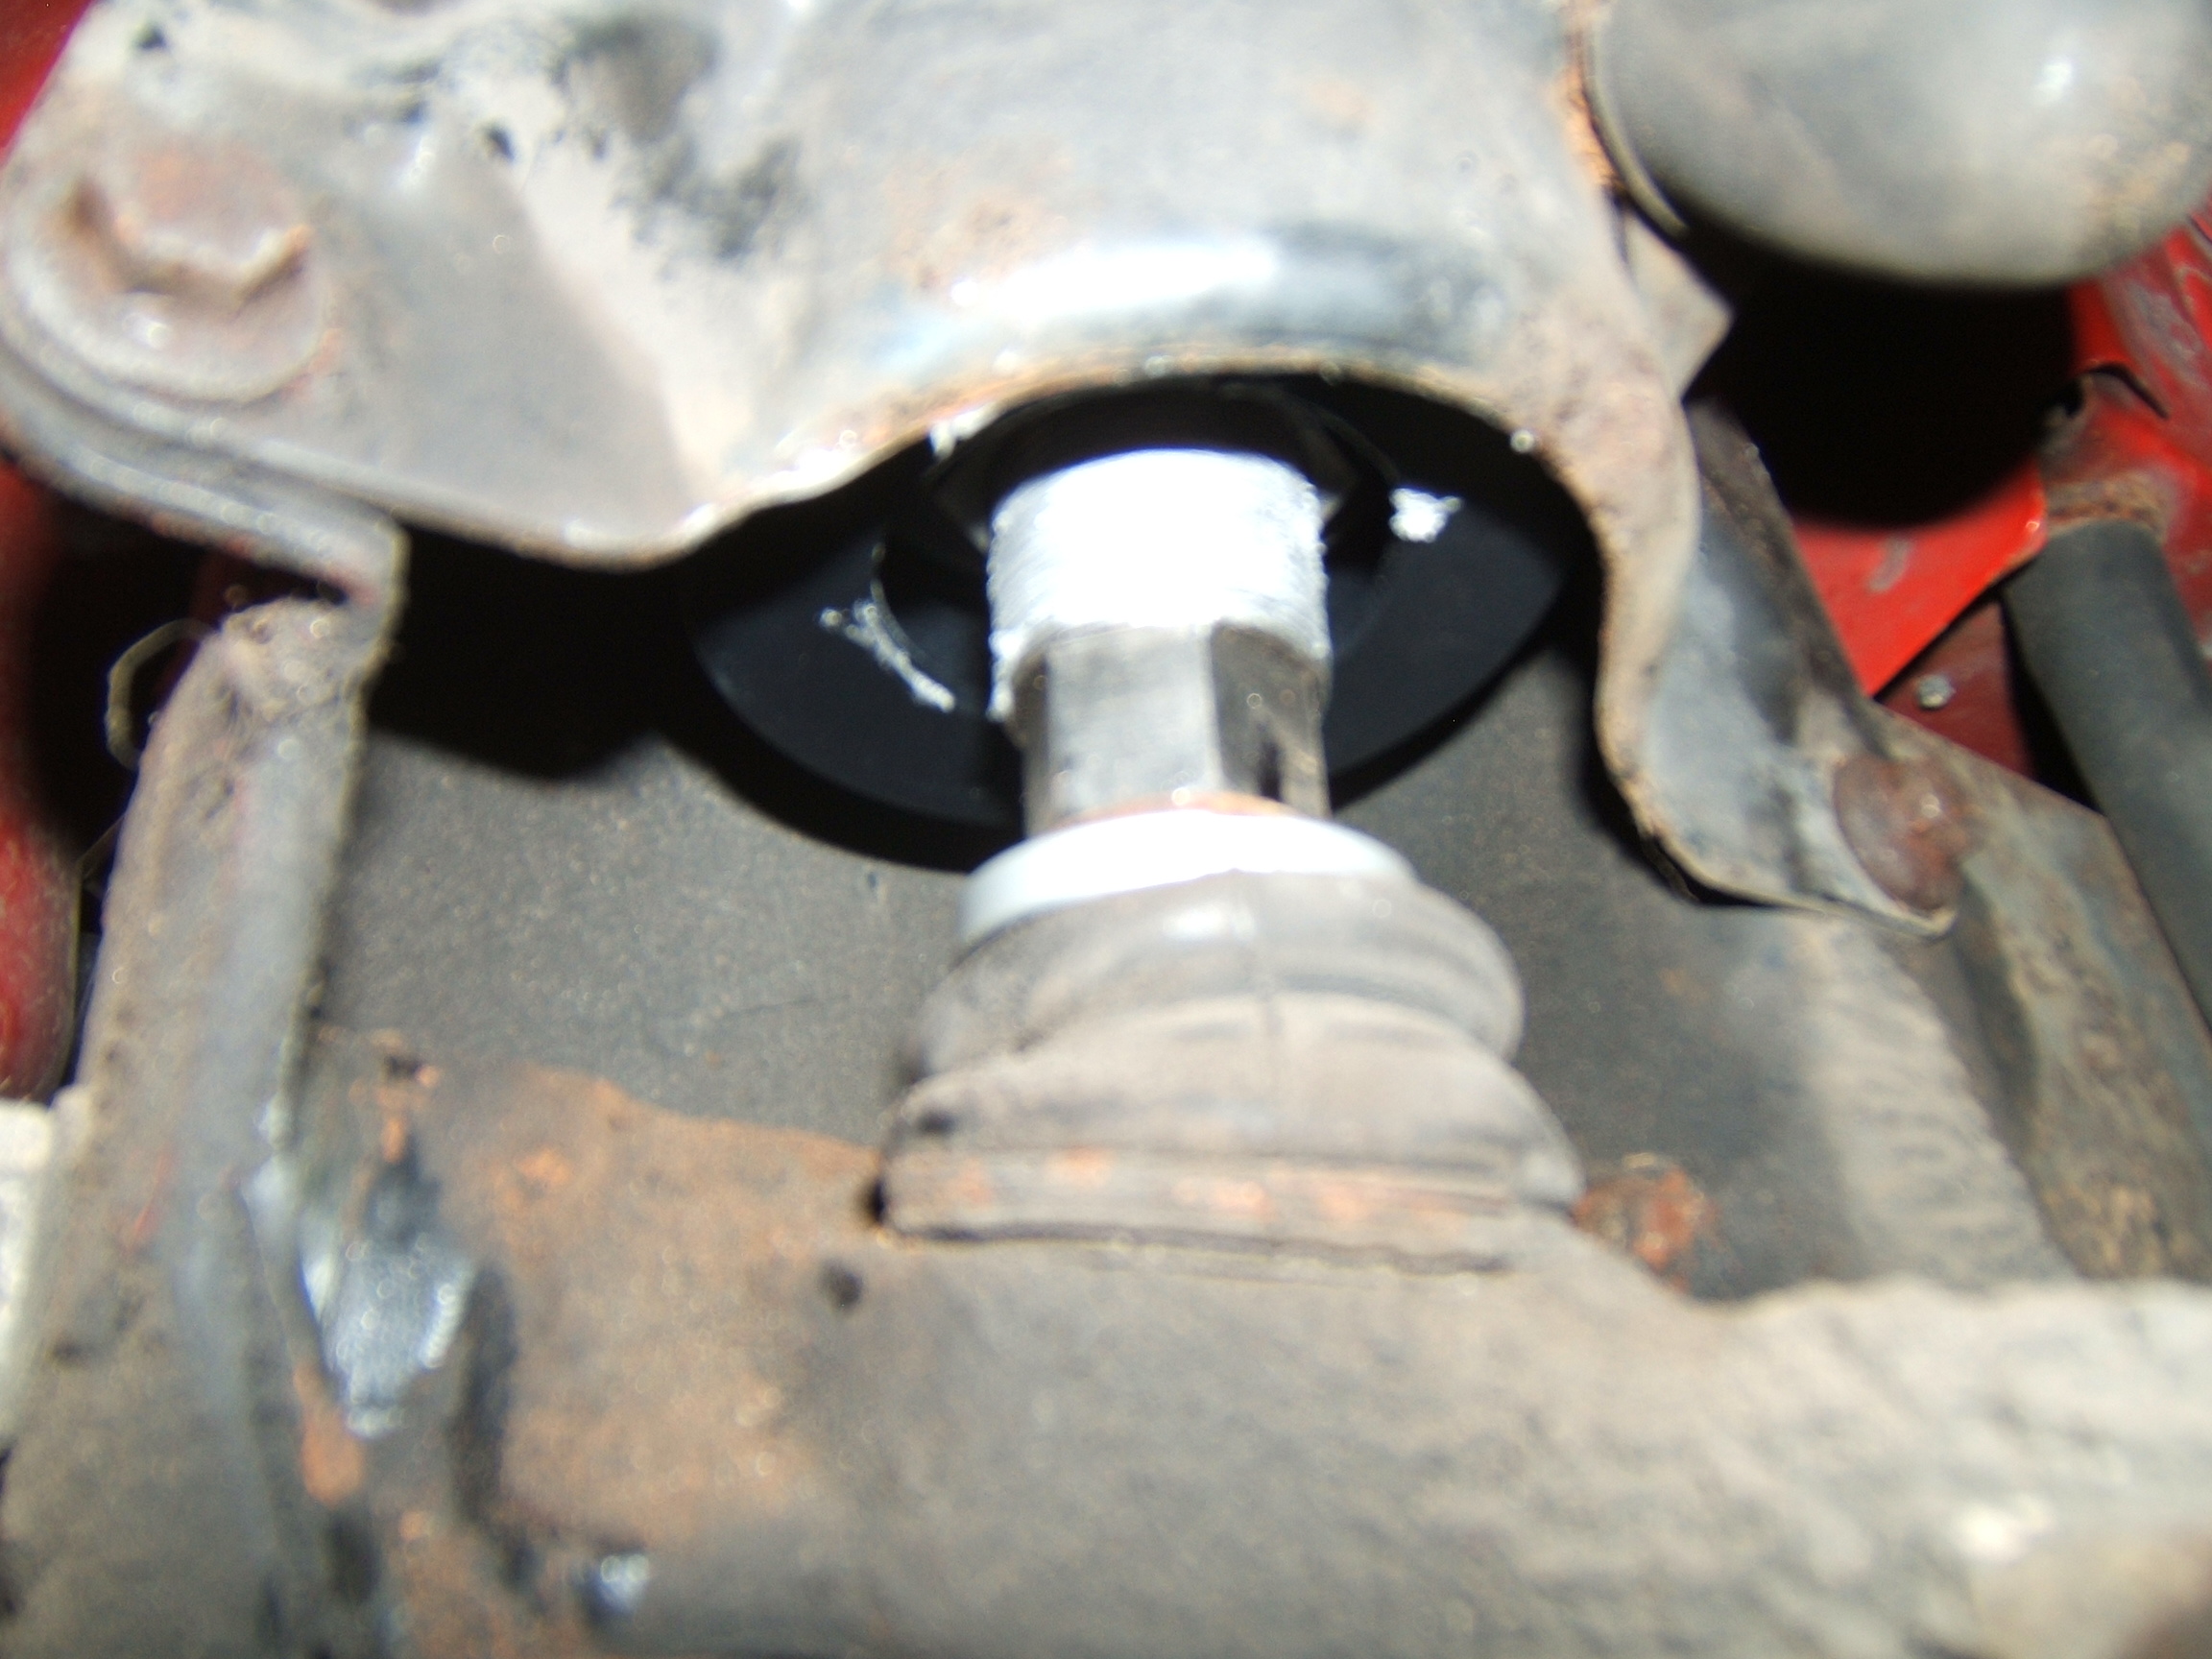 |
The full eighteen turns appears to have compressed the spring in the can. Both version 3 & 7 instructions call for eighteen turns past the datum points of 10mm & 4mm respectively. Eighteen from 10mm sounds like too much.... |
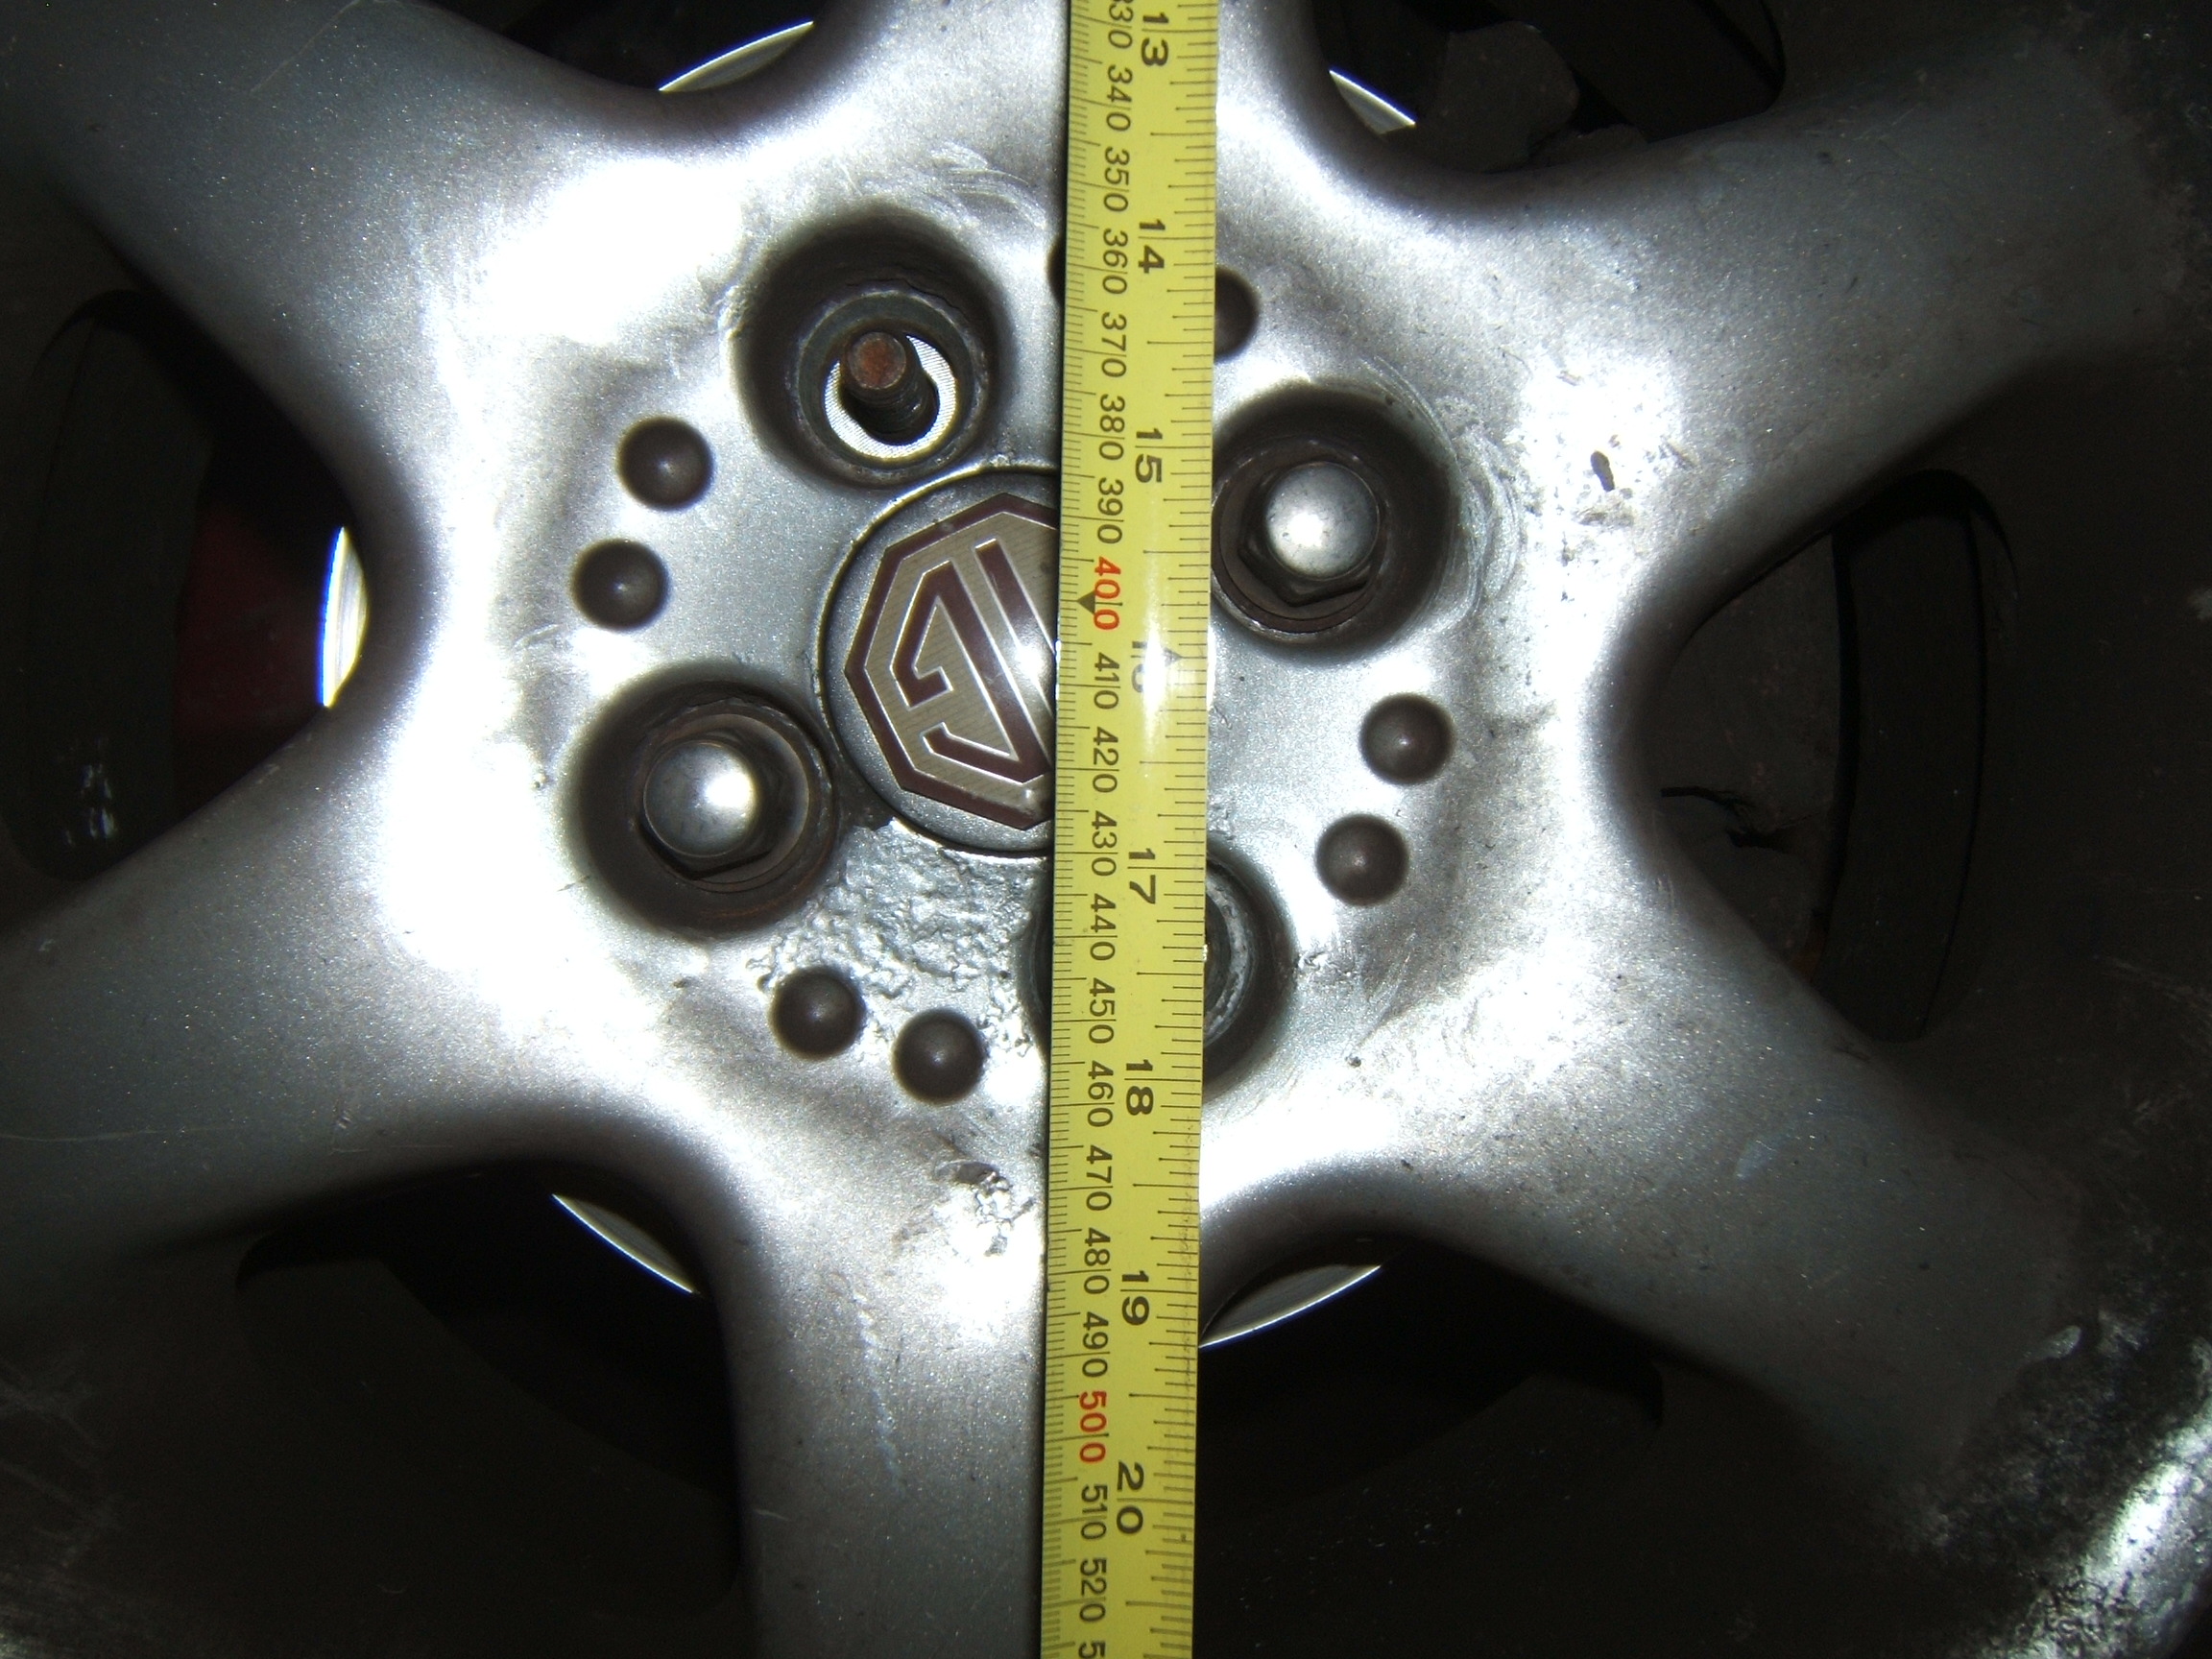 |
As that produced an apparent ride height of 410mm with the wheel installed and the lift lowered so that the right front arm was loose.
It seems like it would make more sense to state the number of turns from the point the adjuster is fully engaged on the knuckle? |
 |
This kit also came with eight flat washers which appear to be for the lower damper bolt. Evidently, they are an ehancement as the version 3 instructions make no reference to them. Version 7 instructions are not clear as to their placement. Is this correct? Also, being a very early car, it does not have the outer concave washer referred to in the version 3 instructions. |
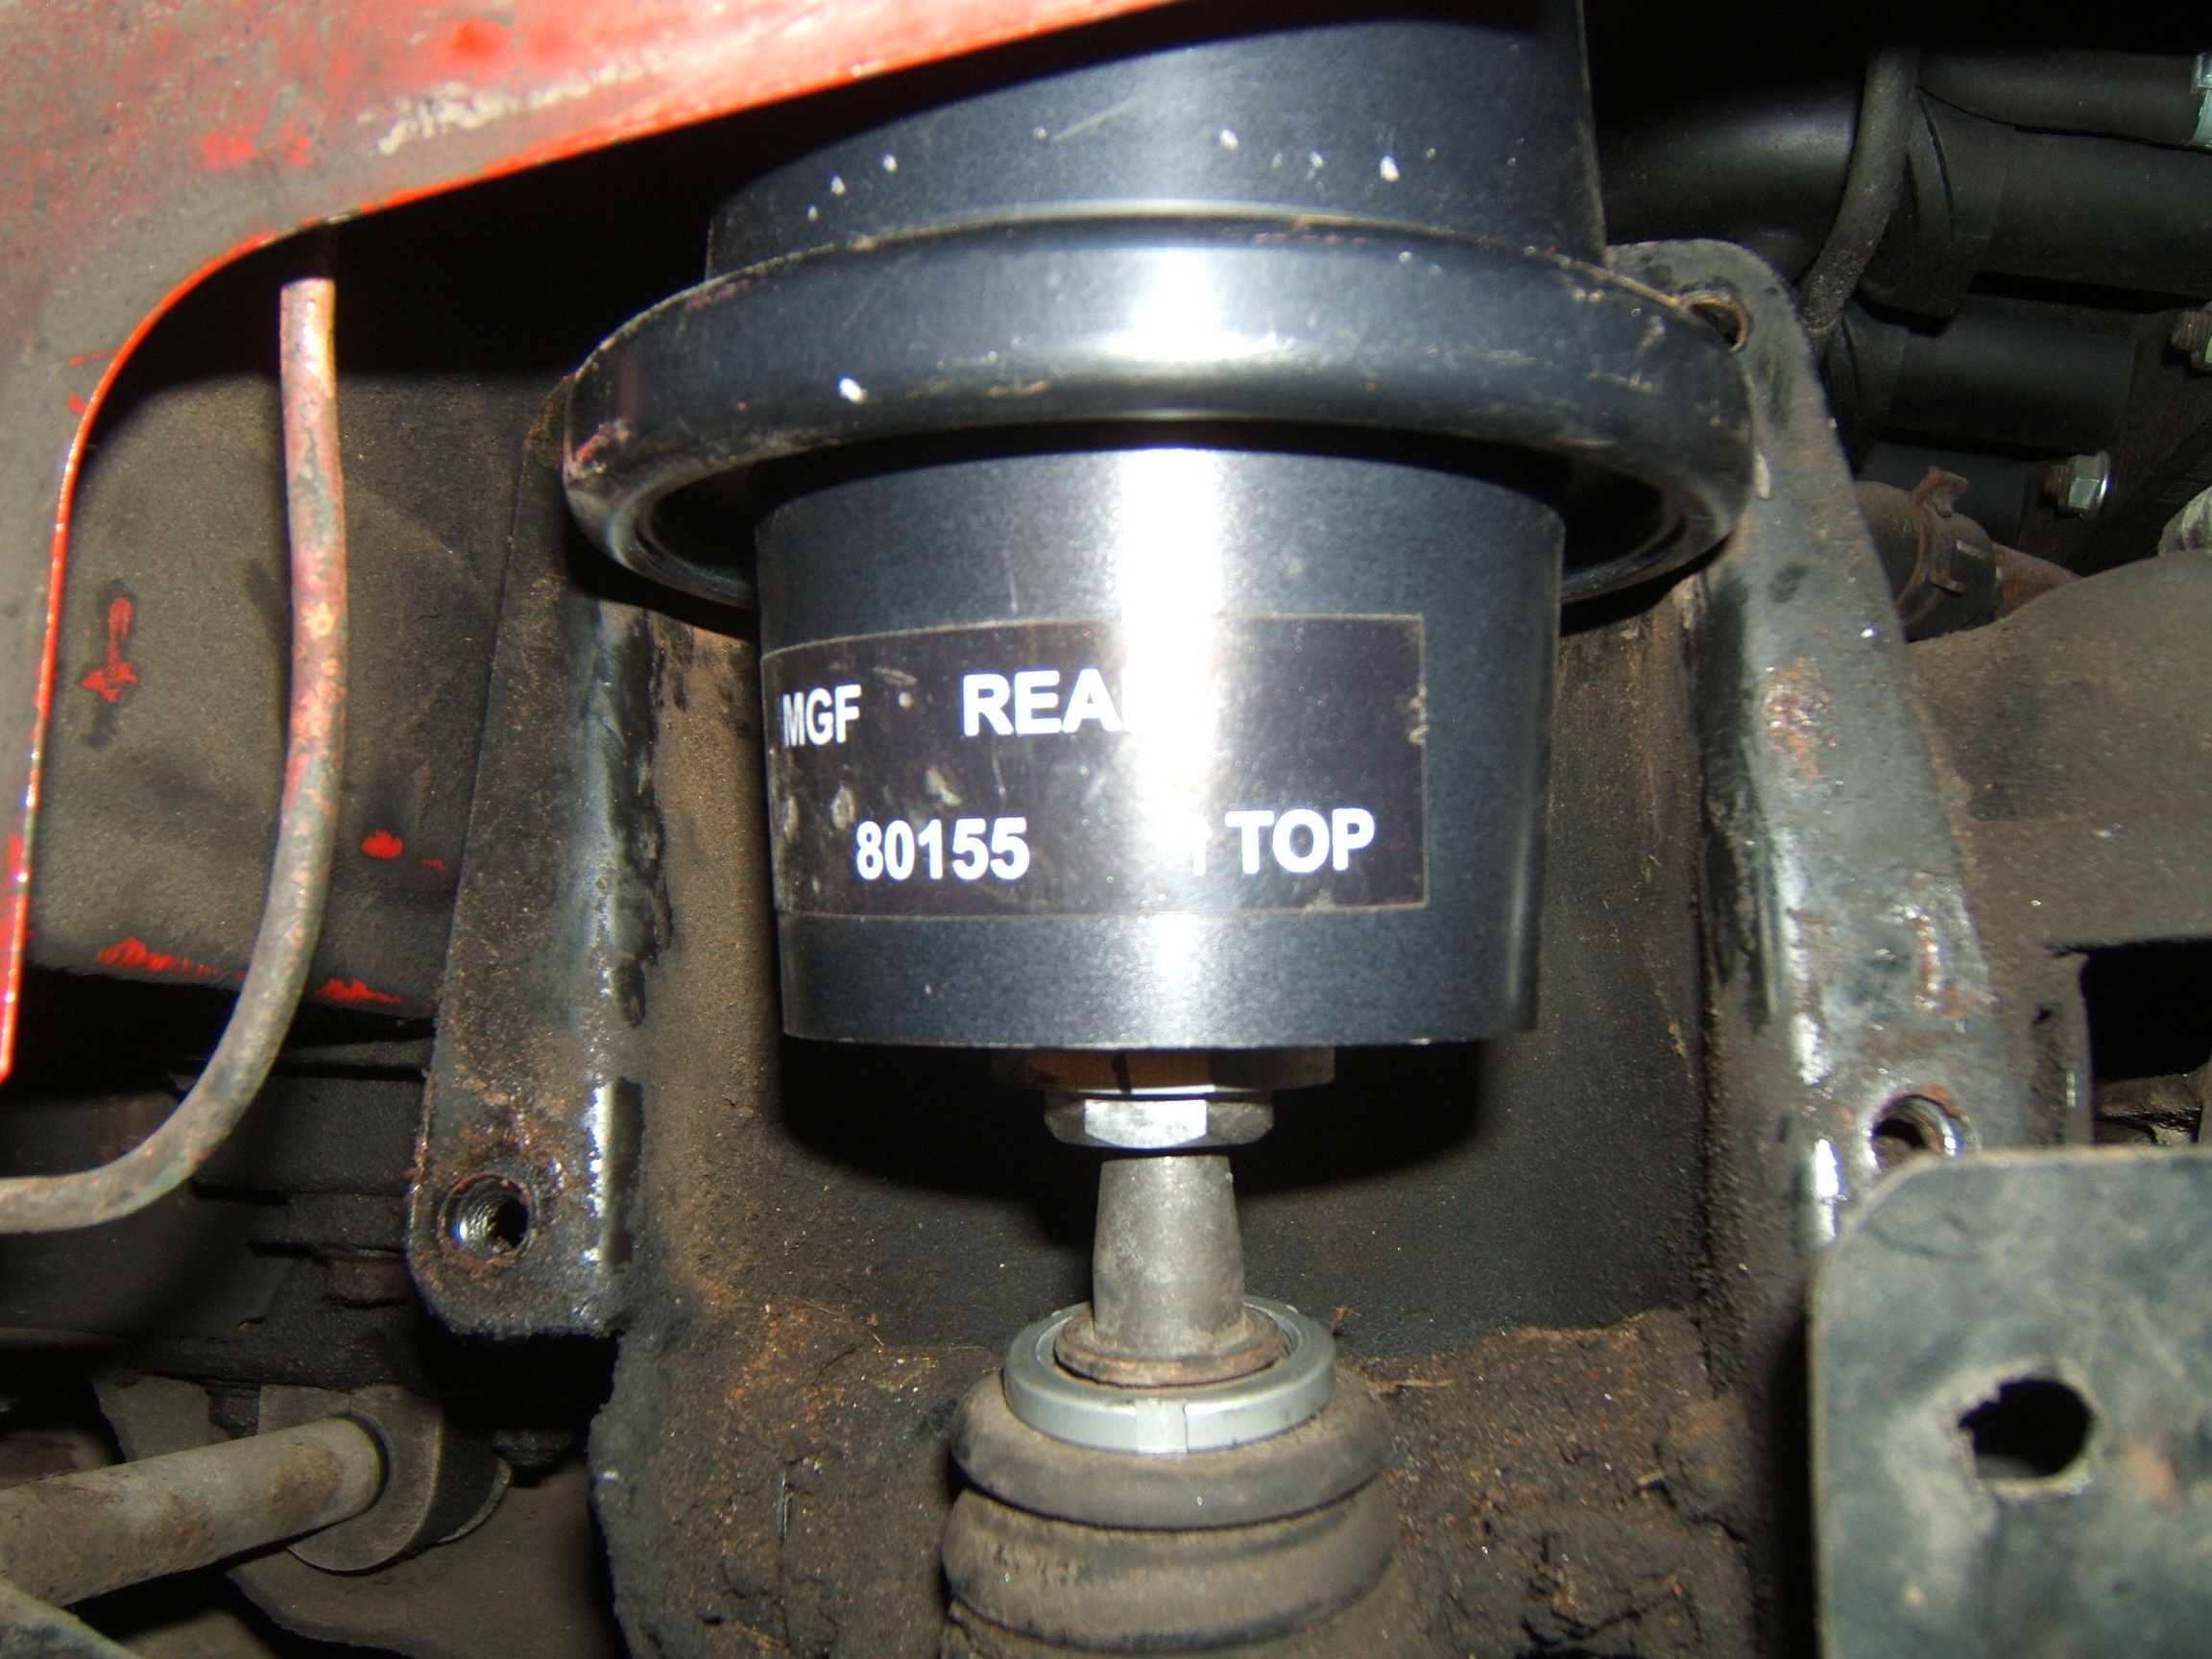 |
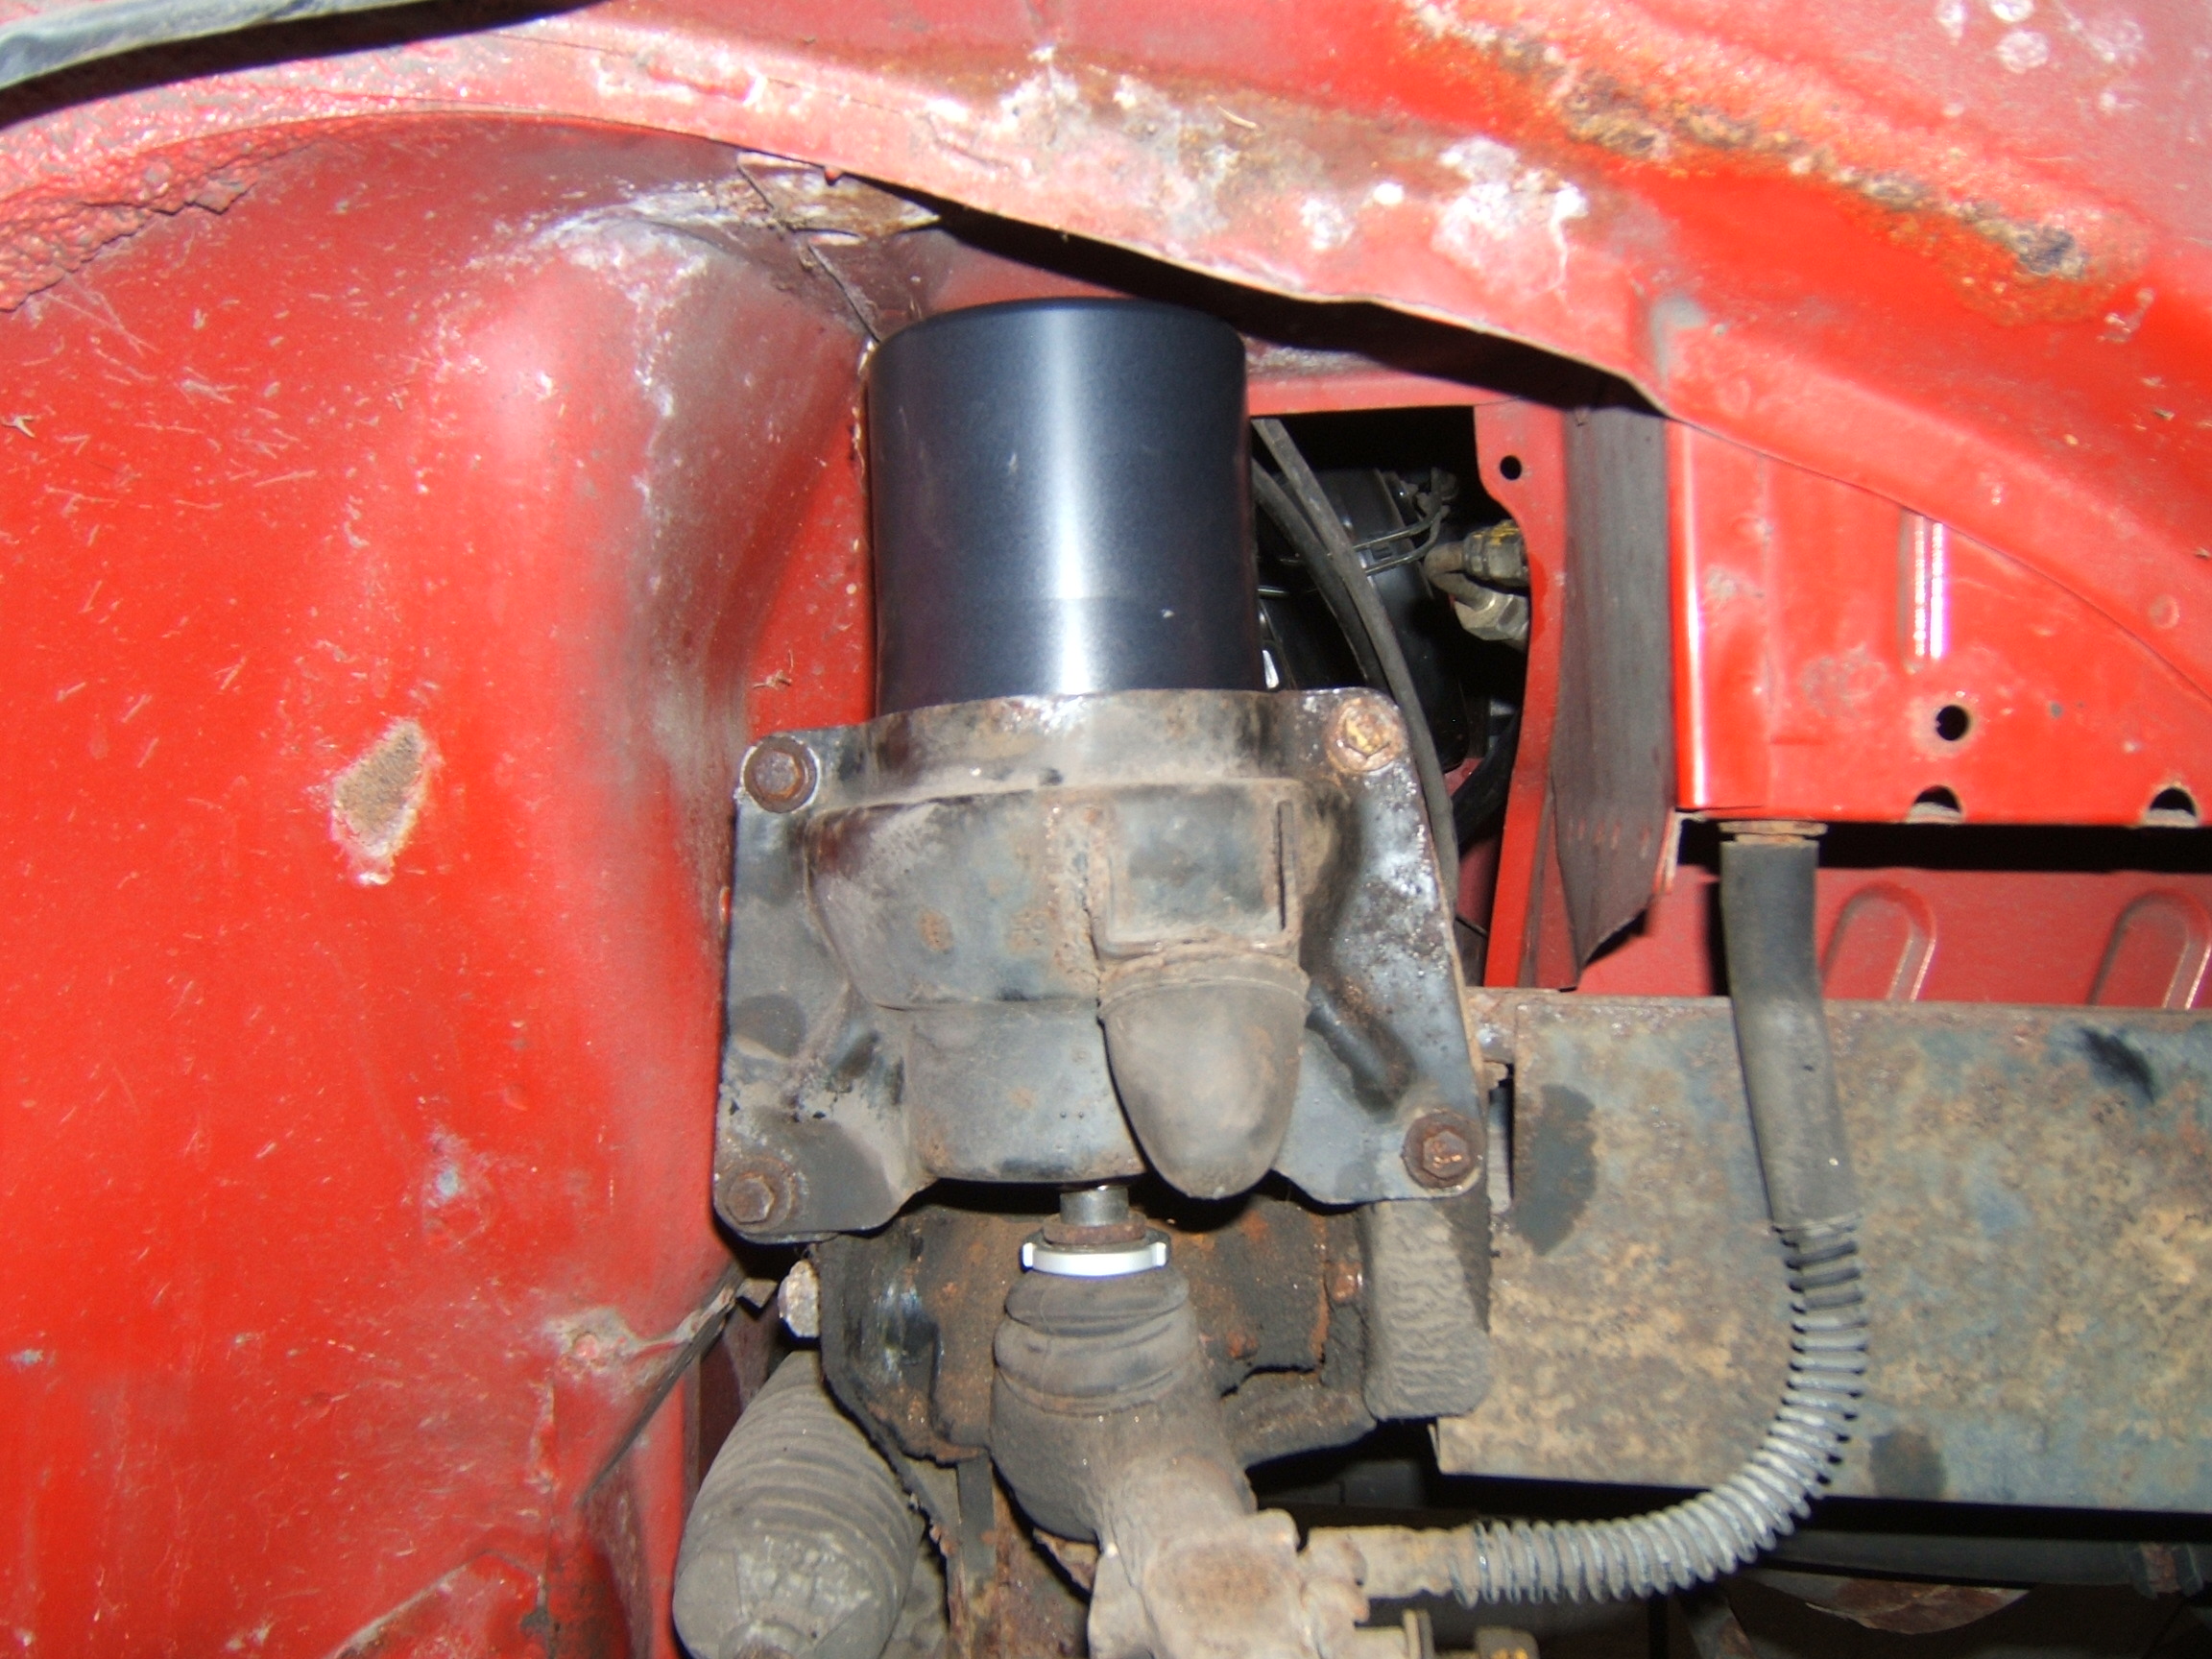
Unlike the rear hydragas spheres which fight all the way, the rear Suplex units slide in nicely from the wheelarch! This one would not fully seat with this much of the adjuster protruding but.... |
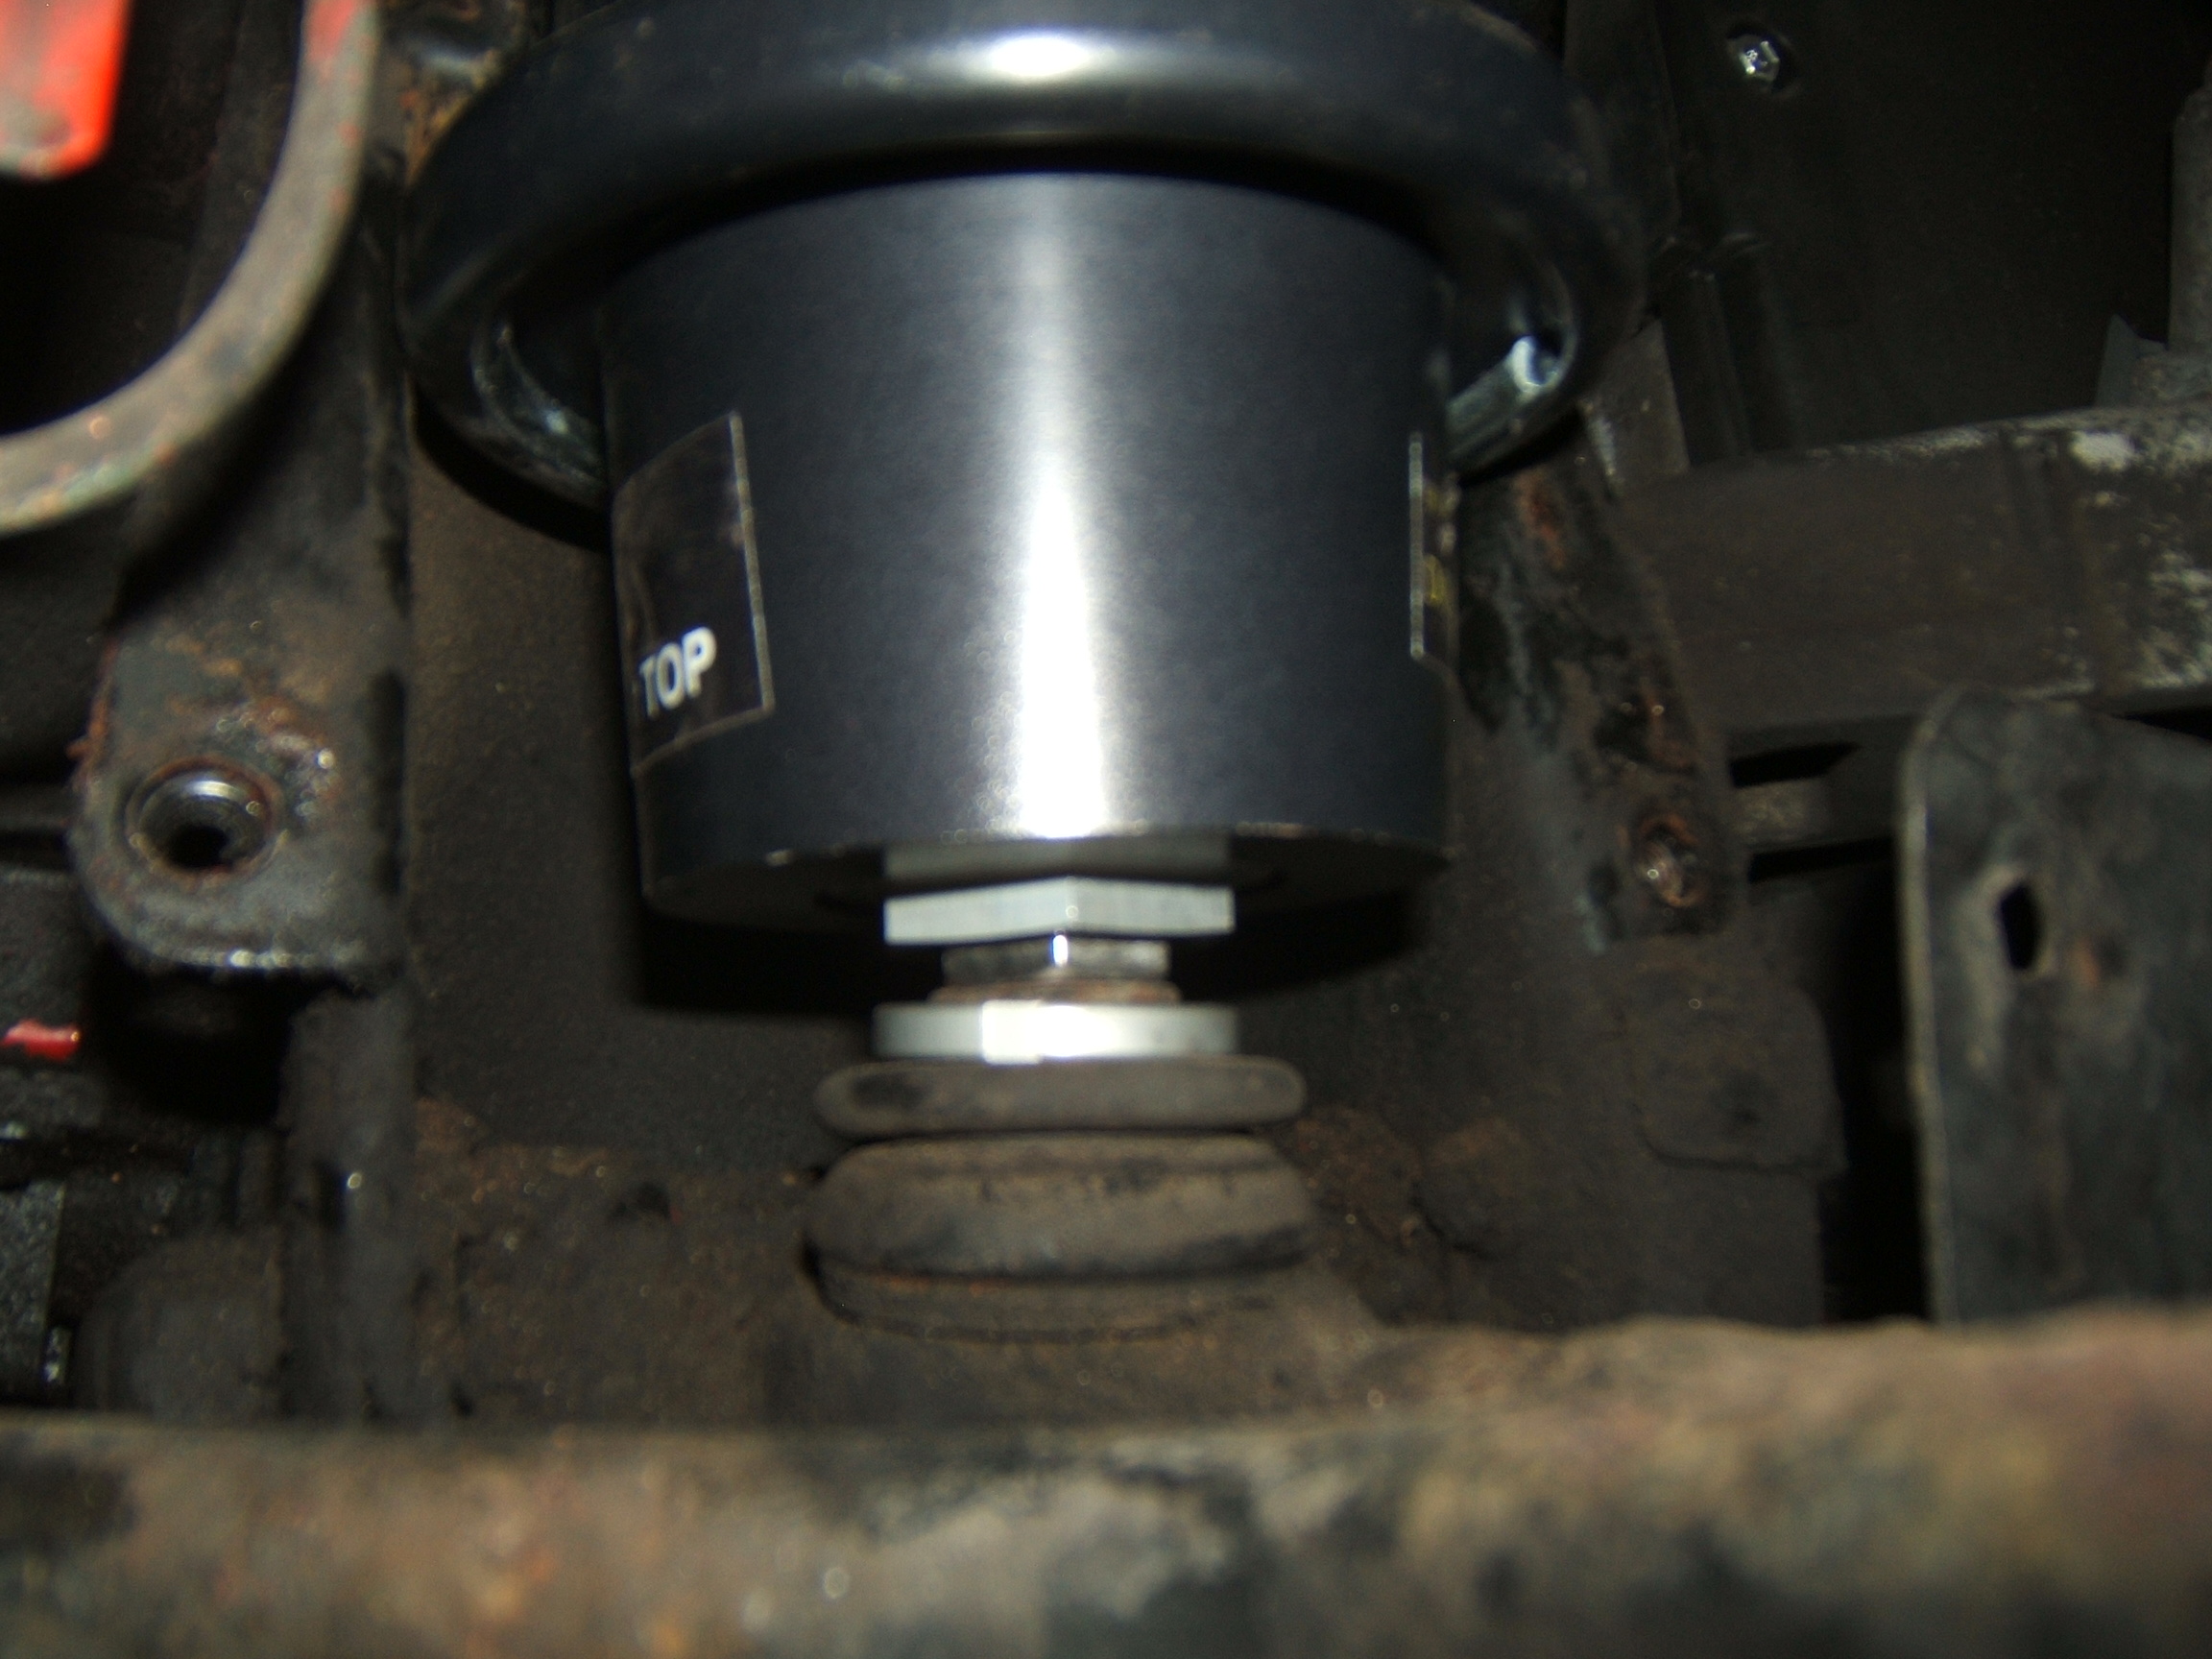 |
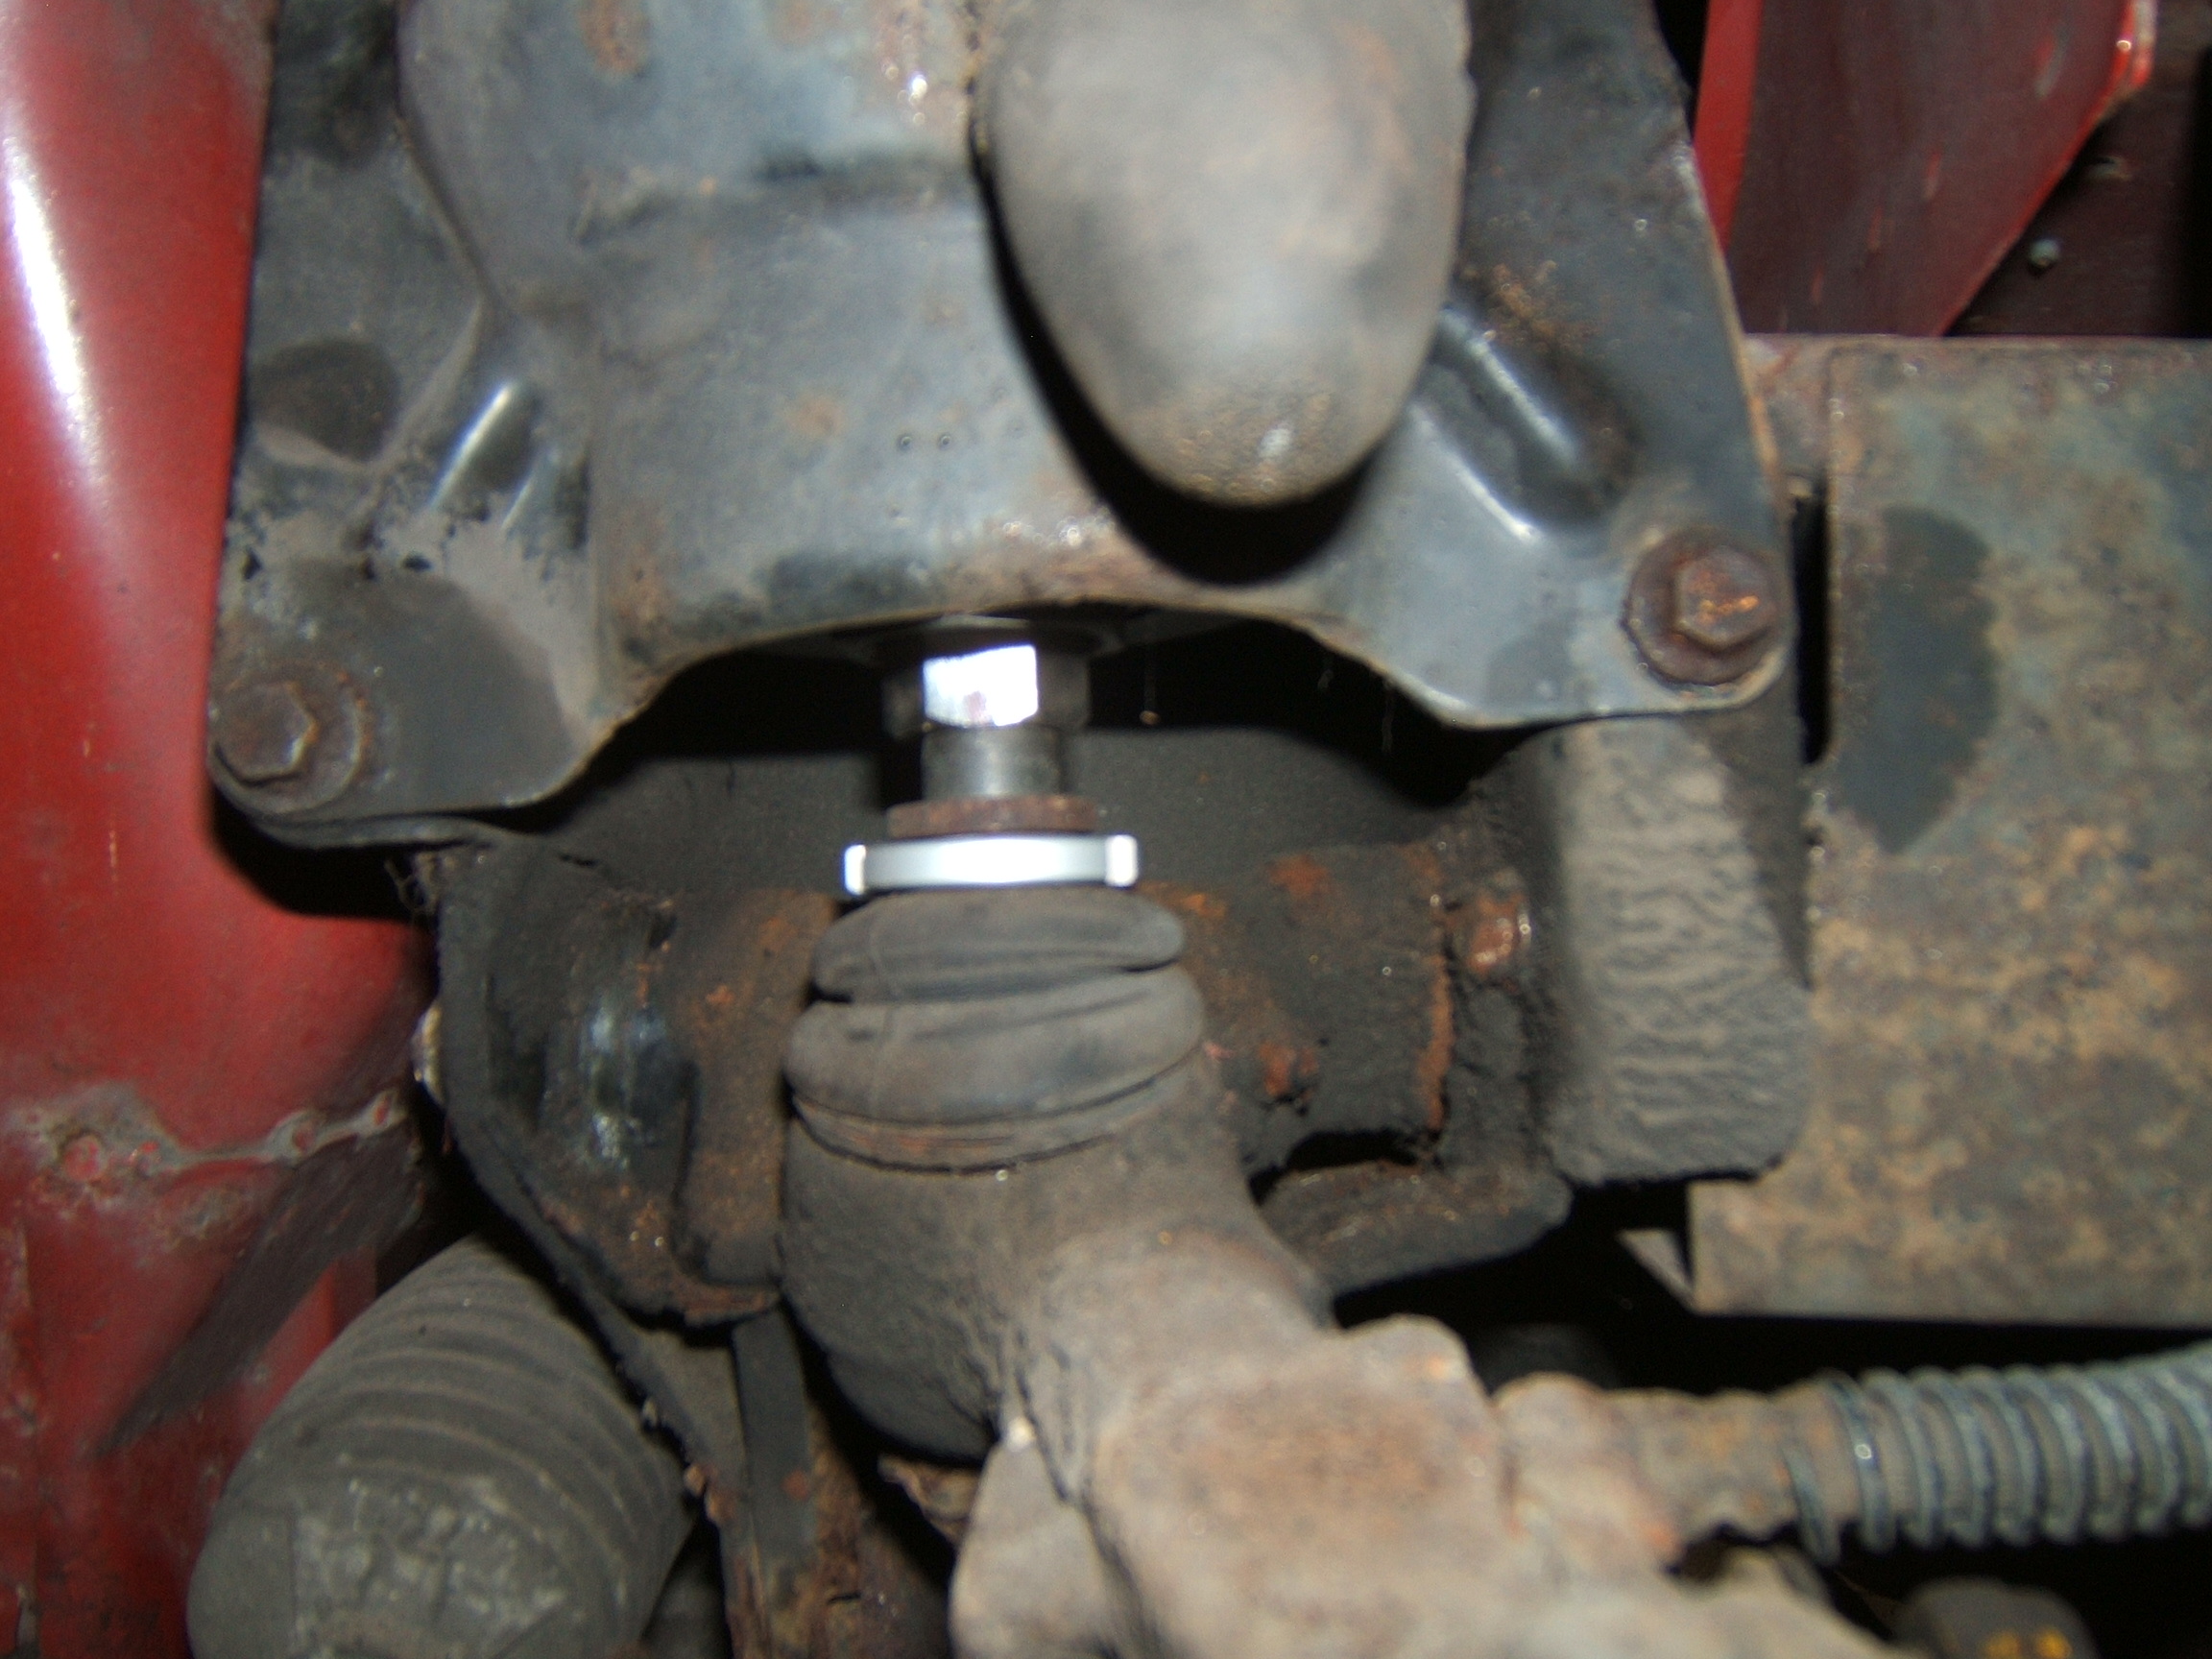
.... when wound in a little more dropped right into place. Of course once the retaining plate is installed that will raise the Suplex can so that the adjuster can be wound out. |
 |
Having slept on the problem, Sunday AM brought clarity. We decided to eliminate the spacers and determined that for reference it is about three turns from 4mm to 10mm of initial adjuster setting. It was also apparent that to get any kind of accurate reading it would be necessary to install both front & rear cans. |
 |
So with the right rear Suplex can installed, we wound both front and rear adjusters out to a datum setting of 9mm (the thickness of the jaws on an open end 21mm Craftsman wrench). Recall, that per version 7 instructions calling for a 4mm datum we have clocked up about three turns so far. |
 |
We then wound the adjusters out to the point of being fully seated on the knuckle. That was about 11 turns at the front, but only 8-9 at the rear. Here is a rear measurement, car lowered. 335mm is of course too low. |
 |
We then added three more turns at the rear and achieved a respectable 340mm, for a total of 15 turns. |
 |
A further two turns at the rear for a total of 17, produces 355mm. |
 |
Our total at the front thus far was 14 turns. Adding three more for a total of 17, gave us 350mm at the right front. |
 |
With the car unsupported by the lift it looks like this - not bad. The dampers are not yet installed so it is quite bouncy but no sign of any noises. At this stage, we are pleased the with the results the kit has provided. Definitely a major improvement over what we had. |
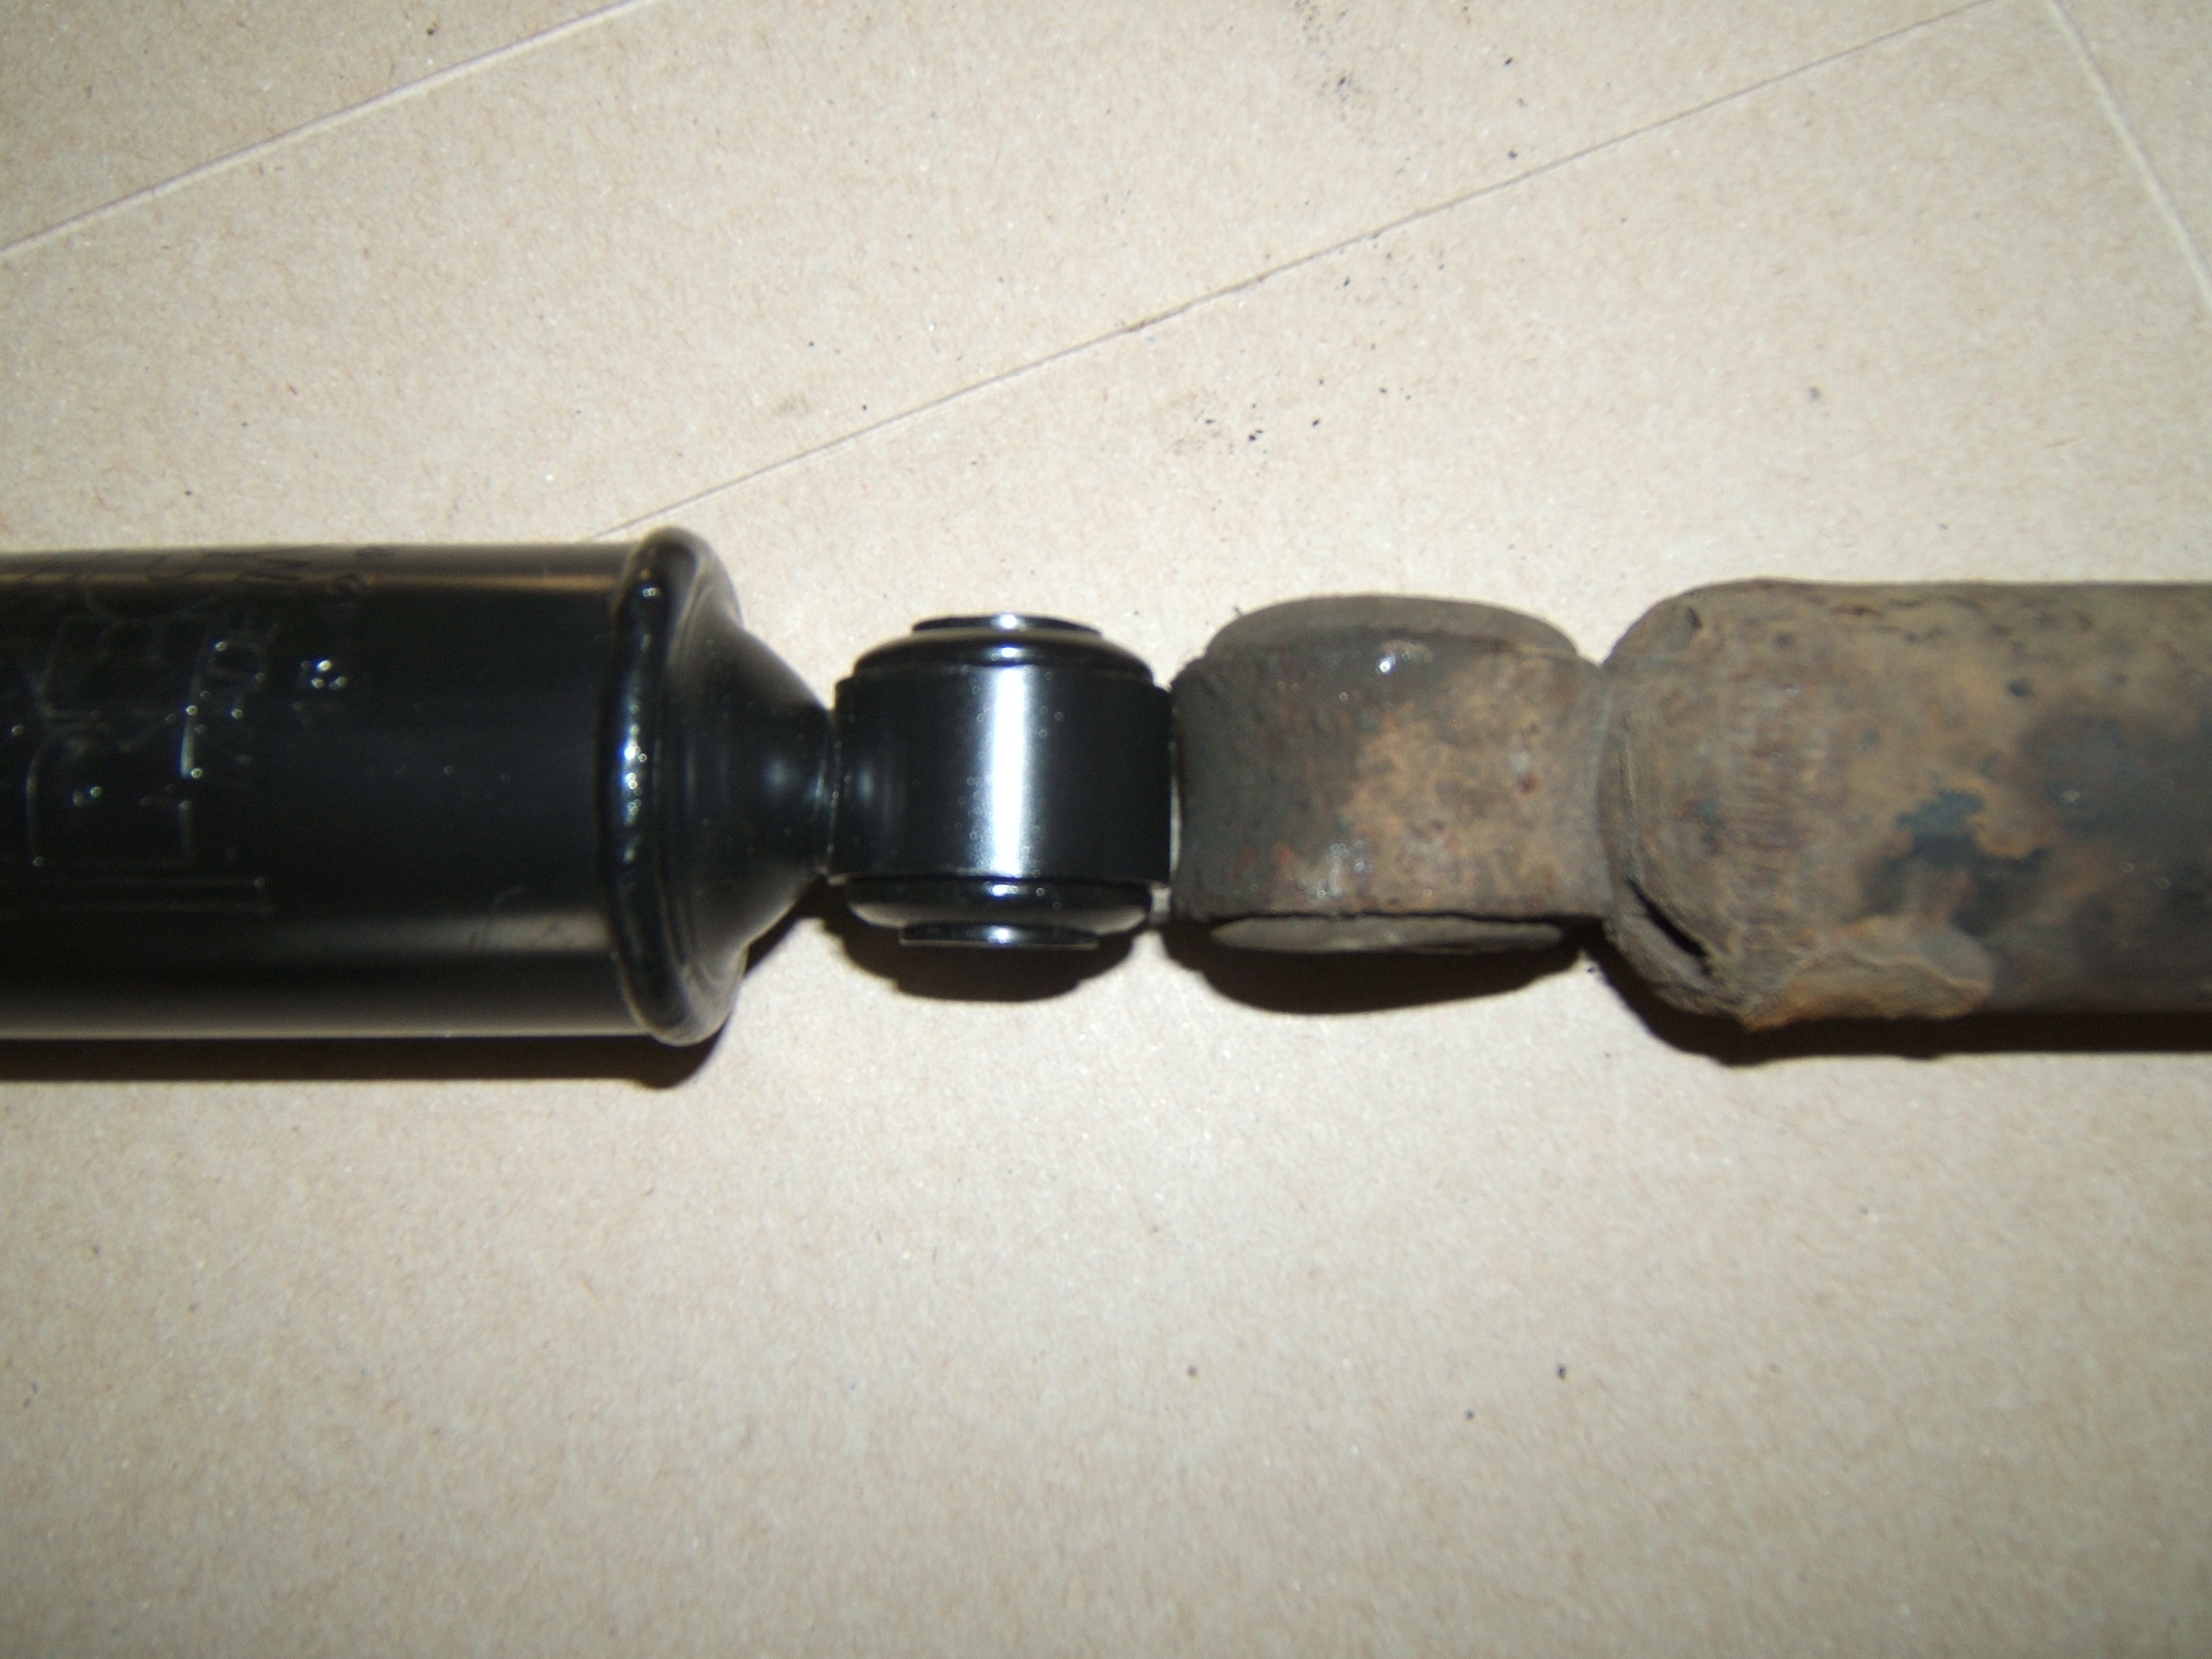 |
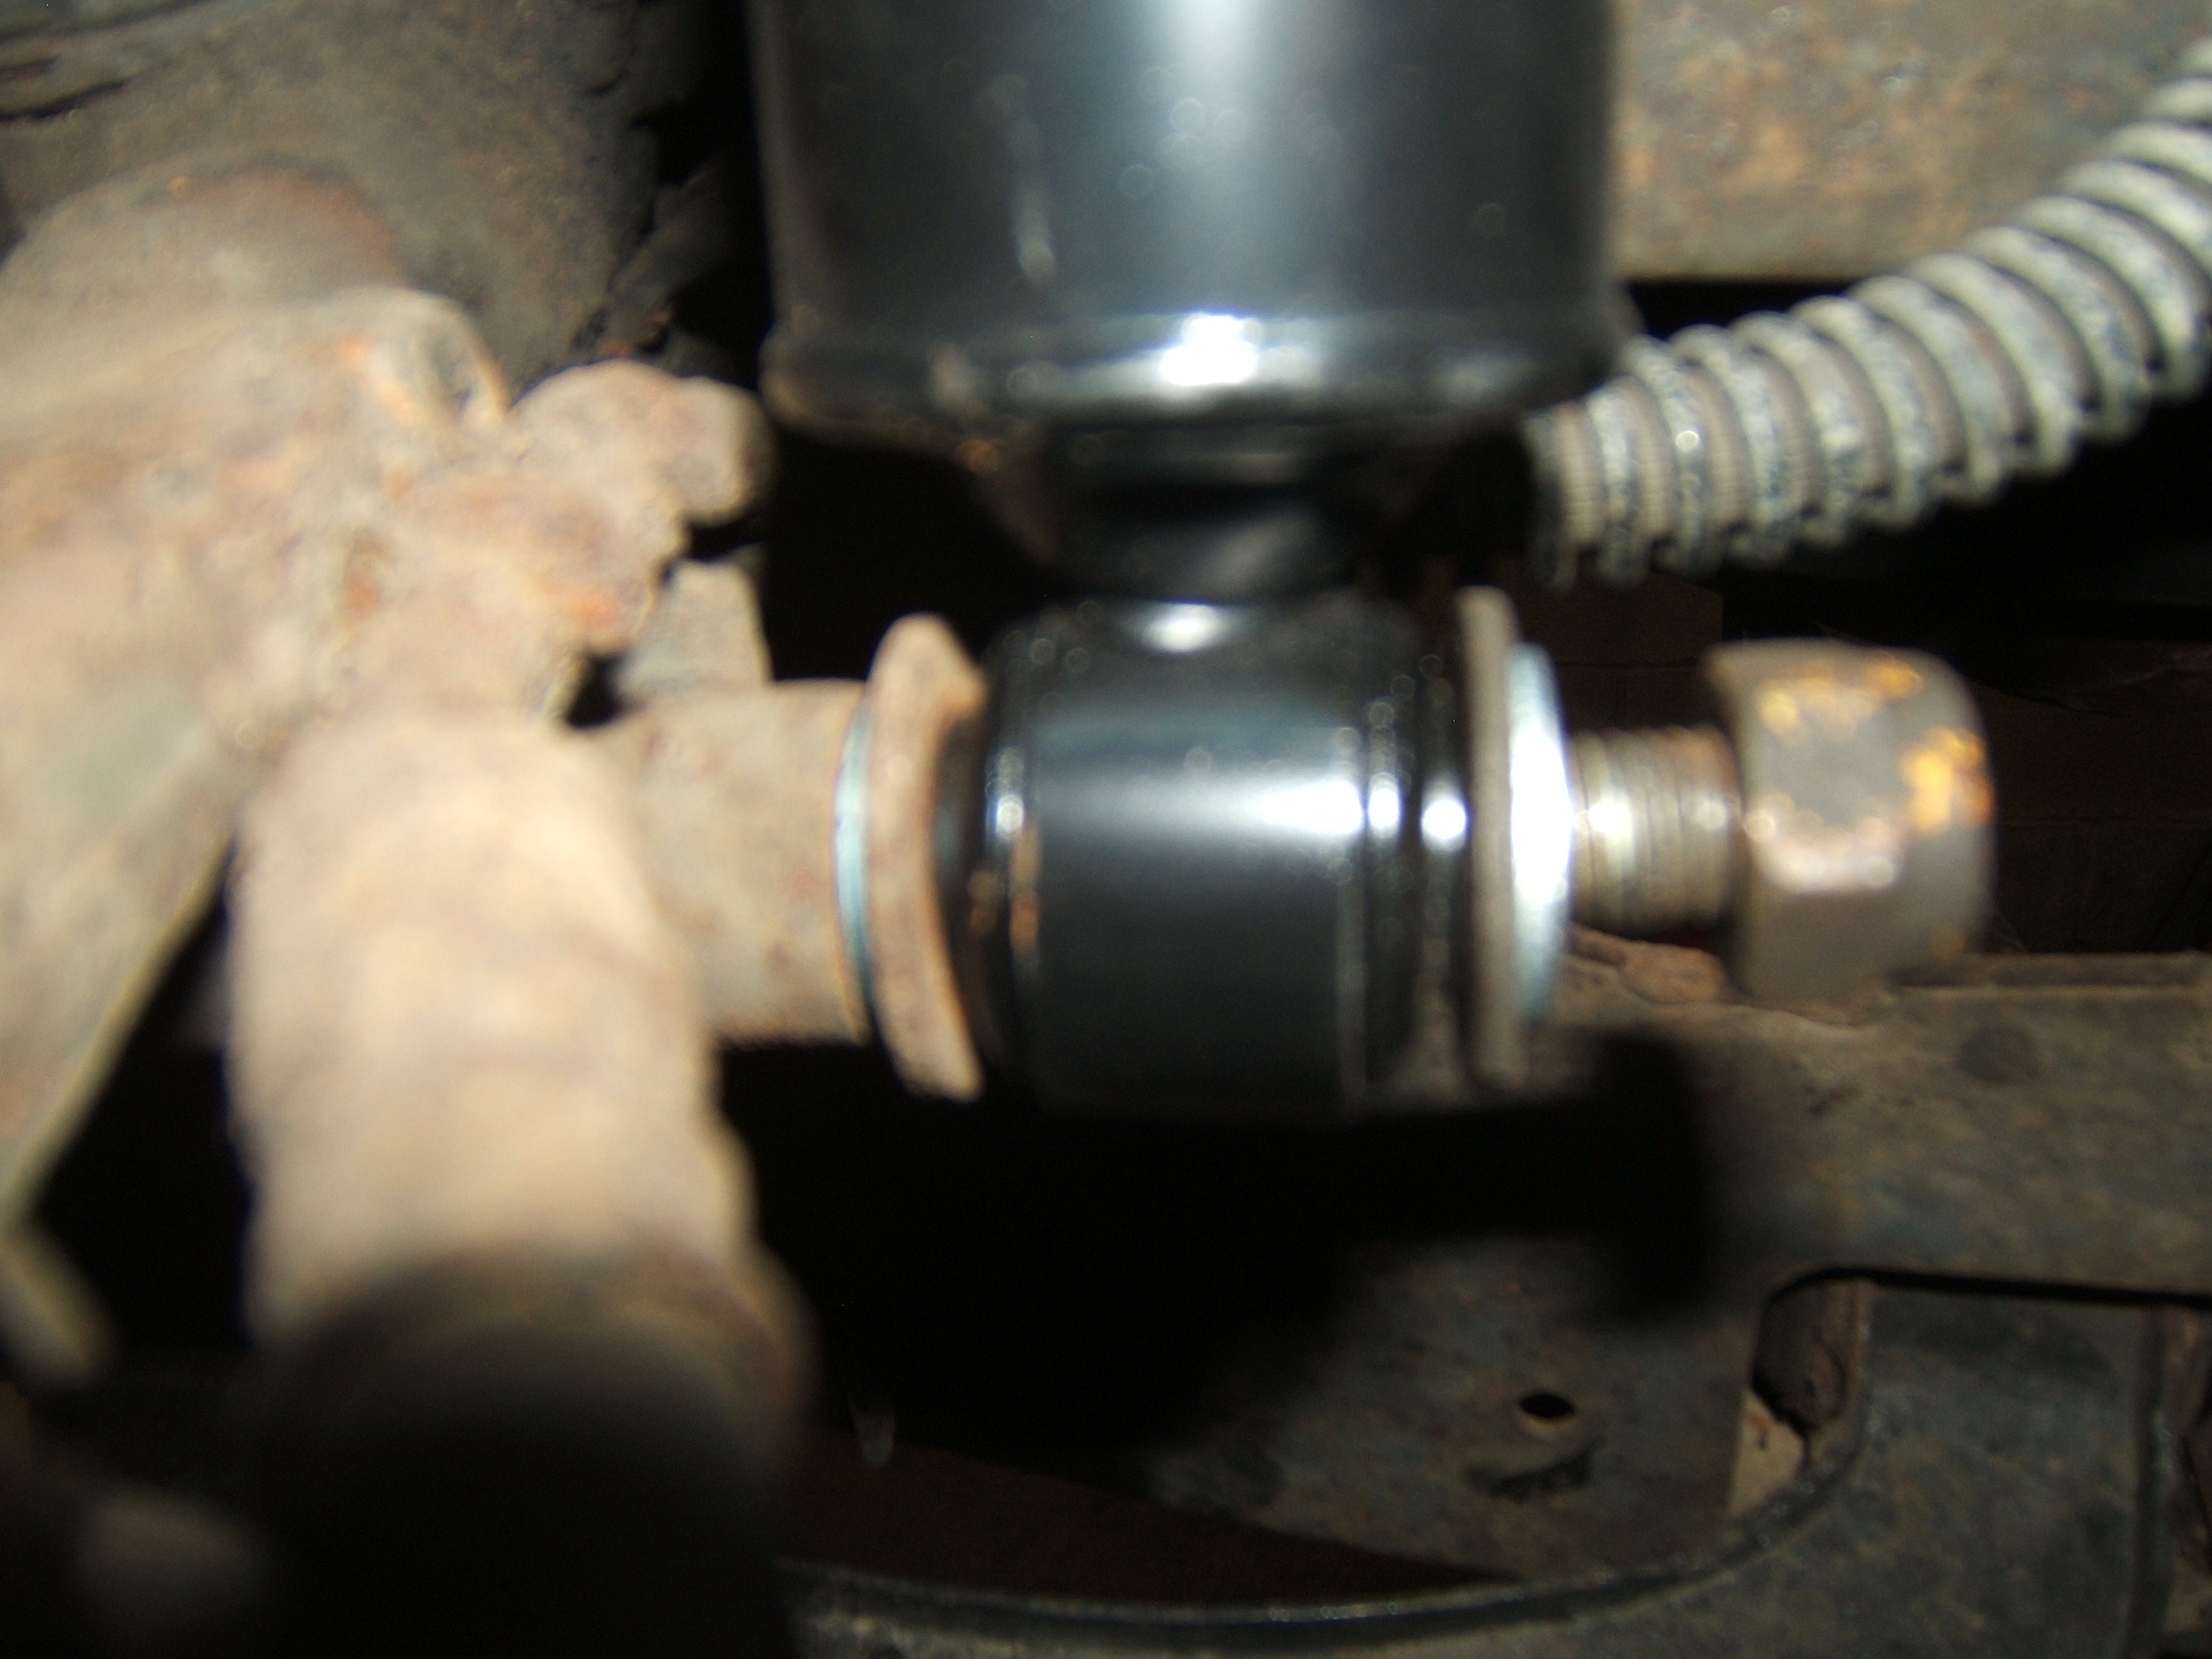
A comparison of the new and old dampers. Note, the protrusion of the sleeve beyond the bushing material. The parts book makes reference to a "cupped" washer either side of this bushing, part# RYF100430, however being an early car..... |
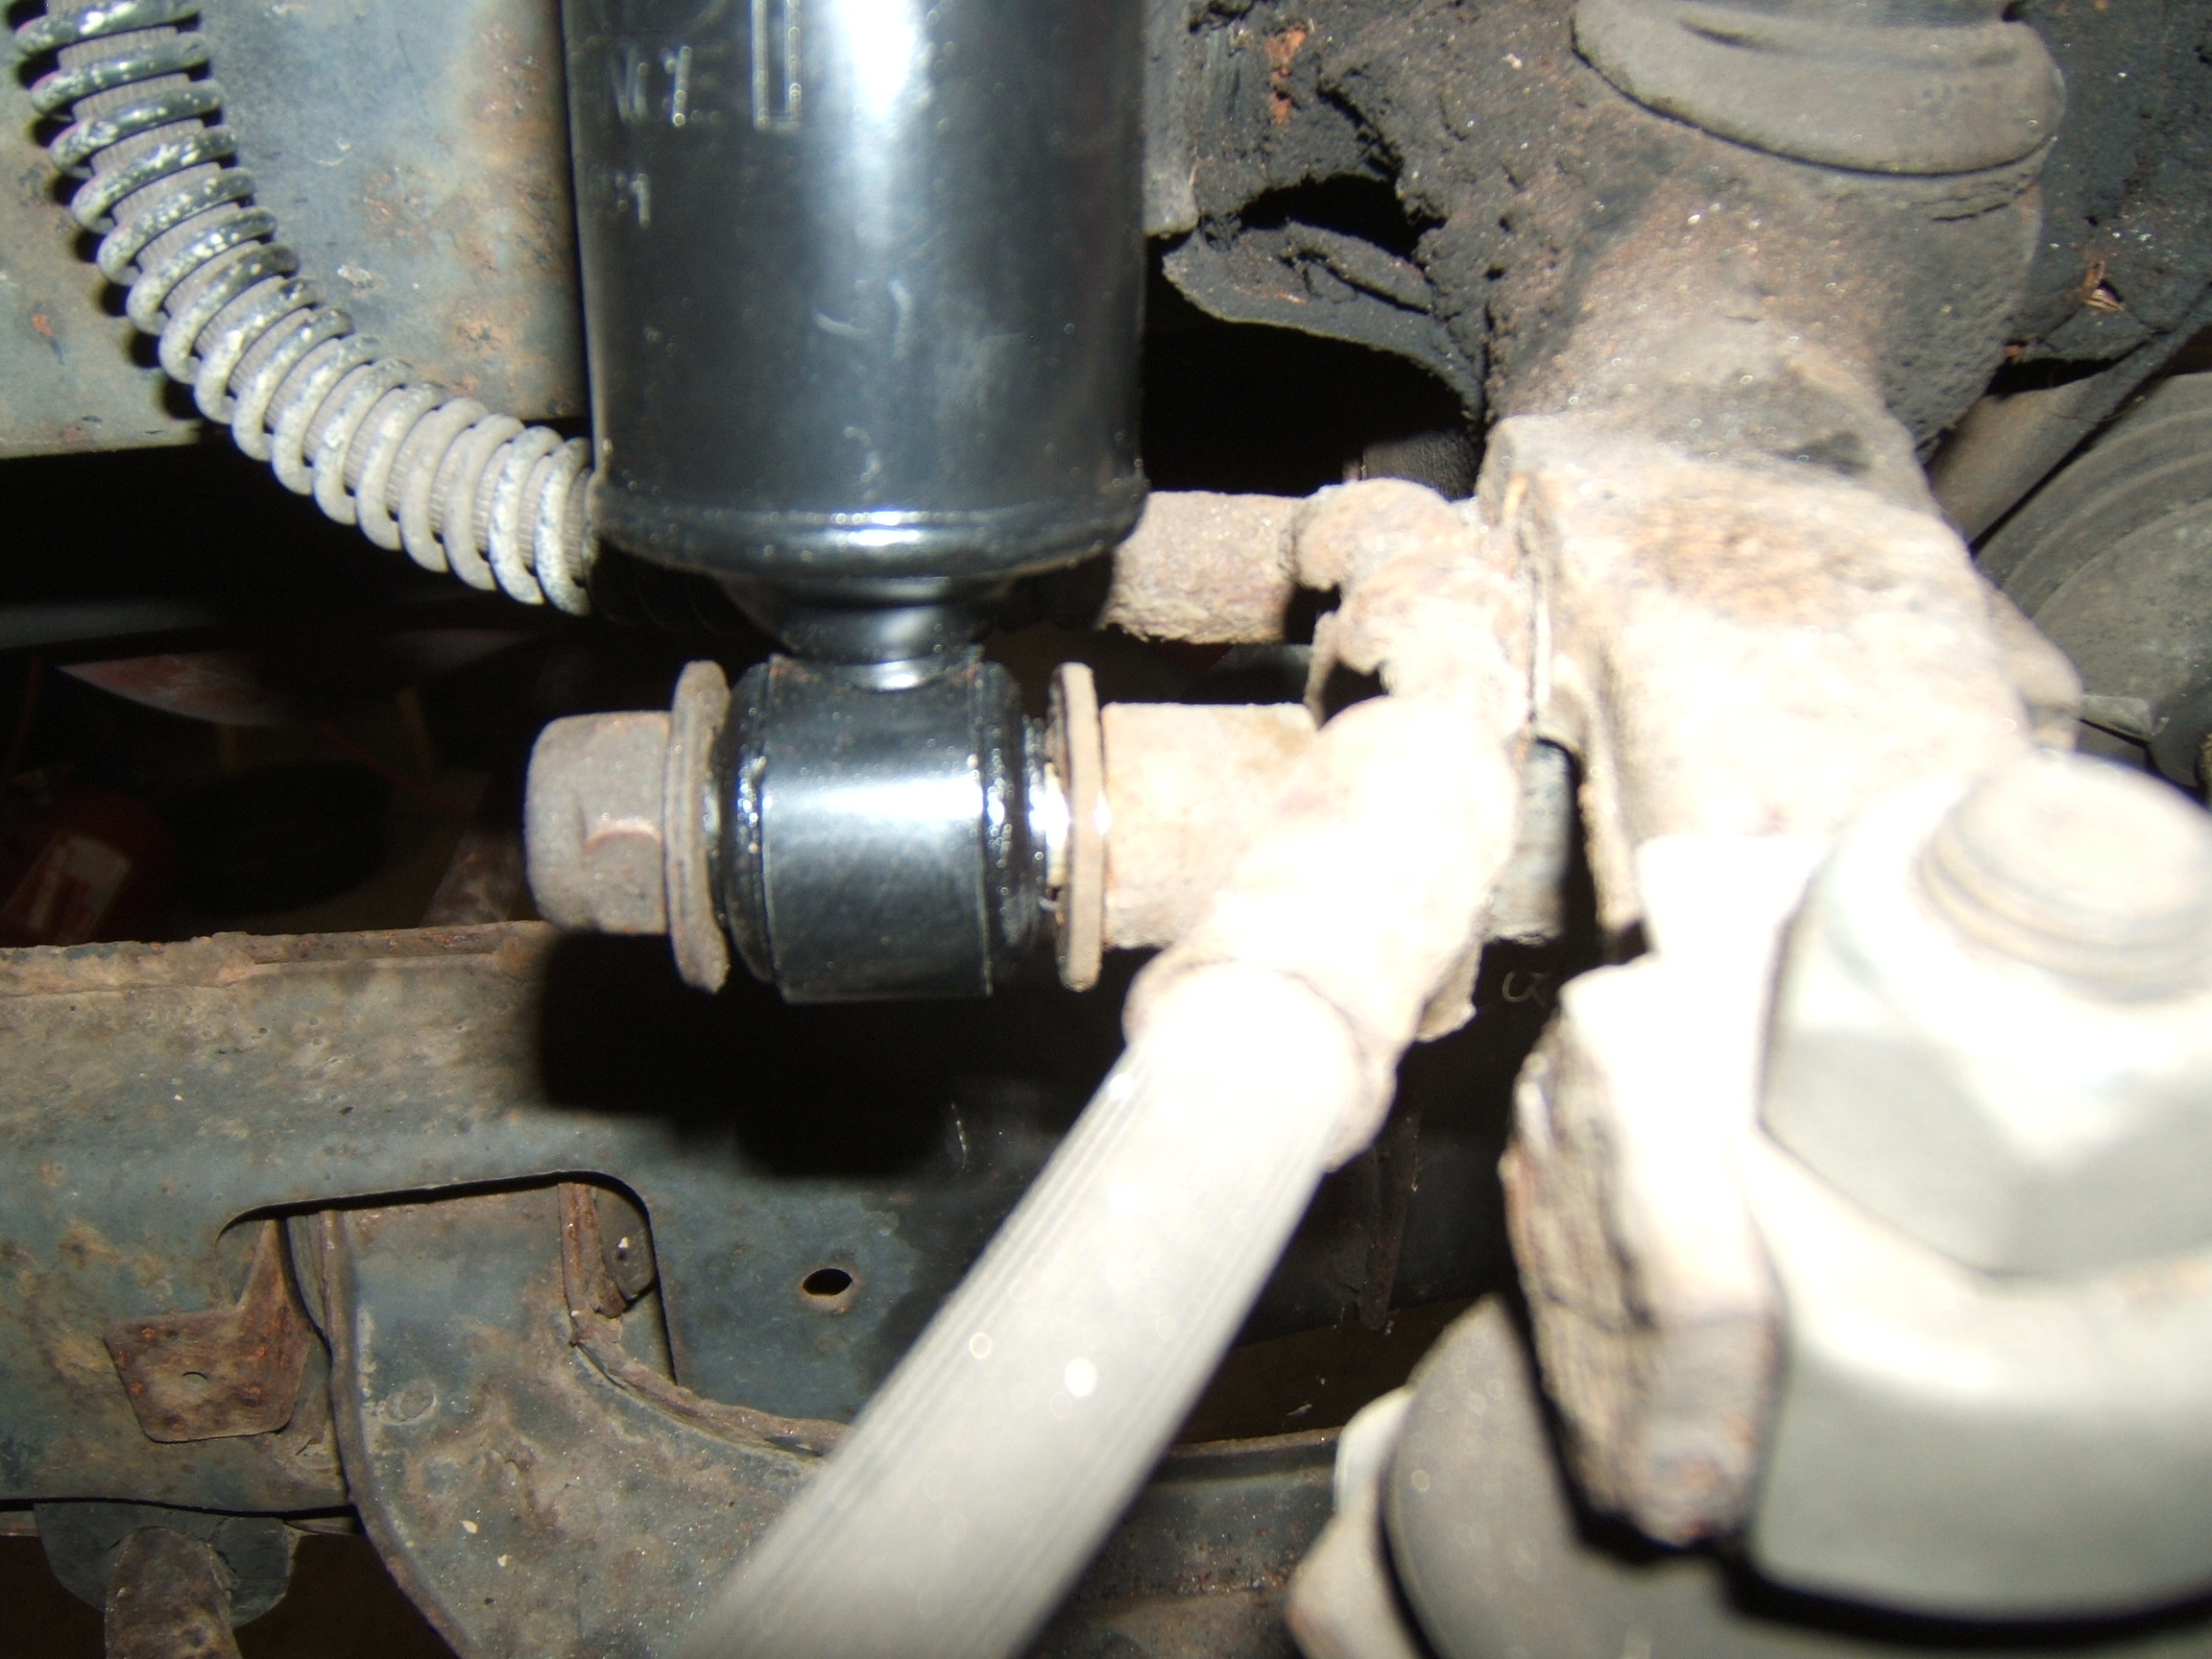 |
... it is fitted with flat washers. To avoid concerns of bushing "walk" that others have cited we probably need to order eight cupped washers but they are about ten quid each! We fitted the old washers as shown to be able to test drive the car. |
We drove the car about fifteen miles and overall the result was good. Some clanking noises were noticed over quite harsh pavement and when pushing the car quite hard around corners, but for the most part the ride was rather nice. Upon return,
some settlement was also detected at the right rear so about 7 flats were added and 3 at the left front. We also plan to add EPAS to this car as the steering is very heavy.
more to follow.......... |
|
|